EPON/10G-EPON Testing
EPON testing uses Ethernet packets instead of the ATM cells that GPON uses. Additionally, EPON testing follows IEEE standards.
Testing EPON networks is similar to testing GPON/XG(S)-PON networks. The FX120/FX120 Lite should be inserted at the customer premises between between the ONU/ONT and the last splitter in the ODN.
![]() Do NOT connect the FX120/FX120 Lite between the OLT and splitter.
Do NOT connect the FX120/FX120 Lite between the OLT and splitter.
EPON/10G-EPON Key Features
-
Low loss, pass-through mode for ONT/ONU verification
-
Measures 1490/1577 downstream & 1310/1270 upstream
-
Displays MAC address from OLT
-
Displays ONU LLID, ONU MAC, and ONU Status
-
Time stamped histogram function for level monitoring
-
Low reflectance, SC/APC Interfaces for ONU/OLT test ports
-
TC-Sync per IEEE
-
Pre-defined Thresholds or User defined
EPON/10G-EPON Test Procedure
-
Power on the FX120/FX120 Lite test set. The unit connects to any network it finds, recognizes the type of network and performs tests using built-in thresholds that follow IEEE protocols and standards. Starting/stopping/restarting measurements from the OPM menu (see OLT Information Table) starts/stops/resets items in the OPM Summary screen - the power level graphs and the Active ONU list in Advanced Mode. To clear the PLOAM list, go to the respective PLOAM menu and press the clear button.
-
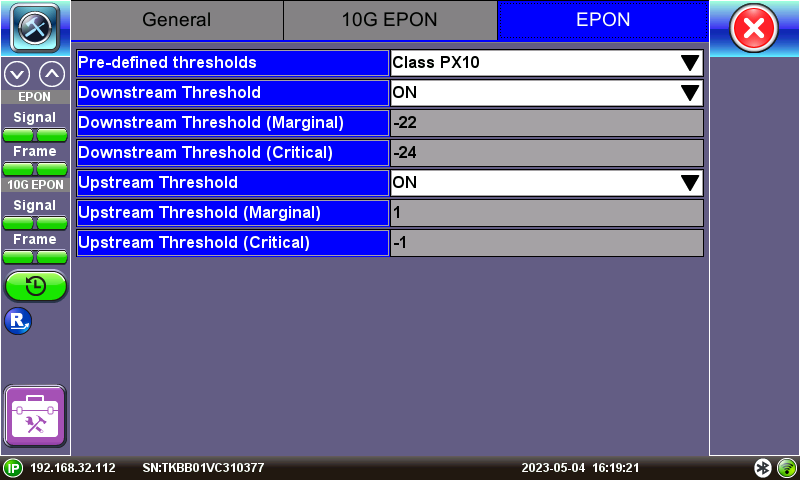
Tap on Setup and configure the test profile settings according to EPON IEEE Test standards.

EPON Setup menu
-
Inspect and clean the FX120/FX120 Lite test ports. Inspect and clean the fiber patch cord from the OLT and insert it into the FX120/FX120 Lite OLT test port.
|
|
-
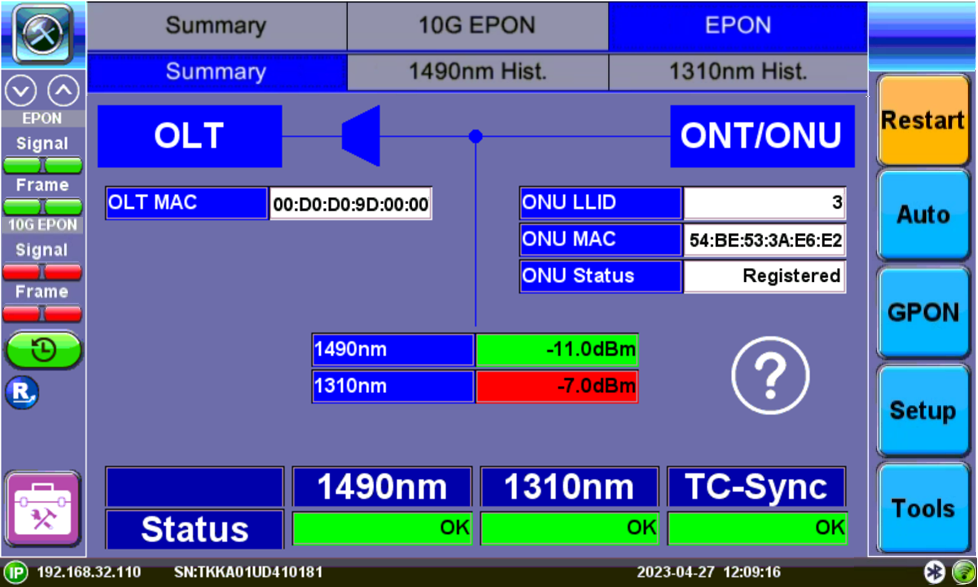
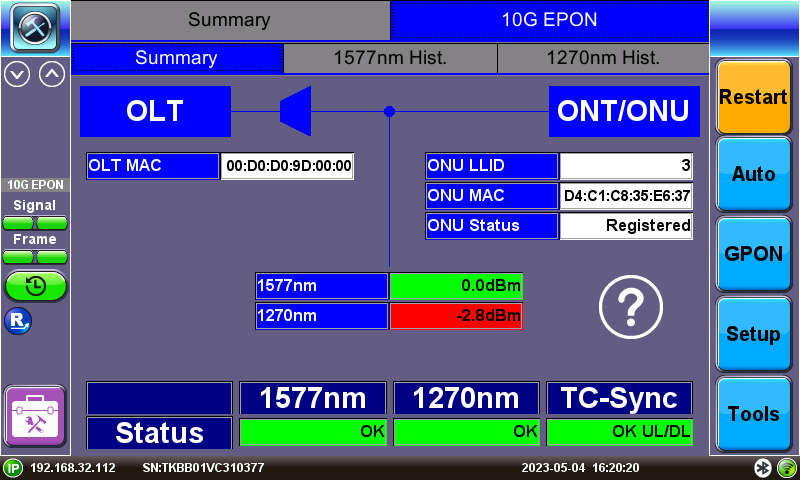
If 1490/1577nm light is detected, the 1490/1577nm Status will display OK. Verify that the measured 1490/1577nm signal level is green (see OPM Test Mode).

EPON Summary Screen

10G EPON Symmetric Summary Screen
-
All DS LEDs should turn from red to Green. If any LED remains red, clean and inspect the connectors again as specified in Step 4 (see GPON/EPON LED Status Indicators).

EPON/10G EPON Upstream/Downstream LED Status
-
Inspect and clean the patch cord connectors that will connect FX120/FX120 Lite to ONU/ONT and the ONU/ONT test port.
-
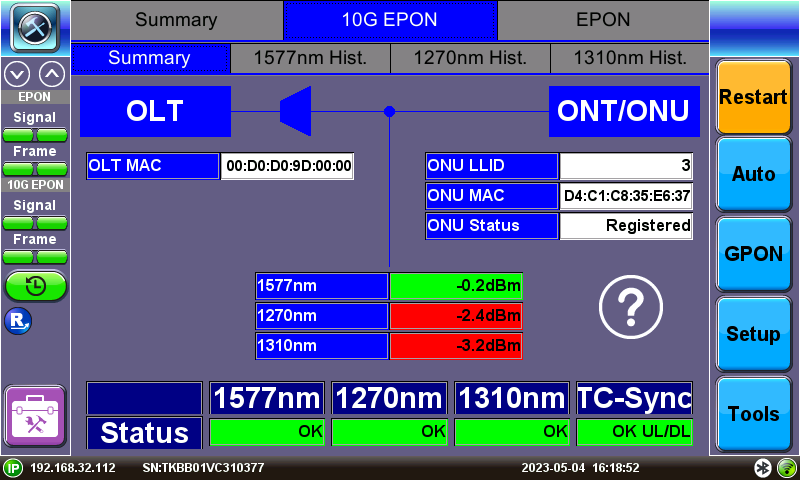
Connect the FX120/FX120 Lite to the ONU/ONT test port. If 1310/1270nm light is detected, the Status will display OK. Verify that the measured 1310/1270nm signal level is green (see OPM Test Mode).

10G EPON Asymmetric Summary Screen
-
All US LEDs should turn from red to green. If any LED remains red, clean the ONU connections again as outlined in Step 6.
-
Confirm TC-Sync status displays DL. If you are not able to achieve TC-Sync, contact VeEX Inc. Support.
Synchronizing the FX120/FX120 Lite with the ONU Activation Process
The FX120/FX120 Lite will synchronize to the downstream frame (from the OLT) provided the OLT is operational and 1490/1577nm signal level is good. The downstream frame synchronization indicator should occur almost immediately.
In order to synchronize with the ONU, the FX120/FX120 Lite needs to see the ONU registration process. Therefore, only connect the ONU AFTER the FX120/FX120 Lite application is already running. Otherwise, unplug and replug the ONU the ONU after the FX120/FX120 Lite application is running if the ONU is already connected to the FX120/FX120 Lite.
![]() If the OLT and an active ONU are connected to the FX120/FX120 Lite before starting the test application, the FX120/FX120 Lite will not see the ONU activation and the above process will not be completed. In this instance, LOF will be reported for the upstream side; no ONU ID or ONU S/N information on the OPM results page will be displayed.
If the OLT and an active ONU are connected to the FX120/FX120 Lite before starting the test application, the FX120/FX120 Lite will not see the ONU activation and the above process will not be completed. In this instance, LOF will be reported for the upstream side; no ONU ID or ONU S/N information on the OPM results page will be displayed.
EPON Thresholds
| PX10 | PX20 | PR10 | PR20 | PR30 | ||
| ONU Site | Upstream ONT TX | -1 to | -1 to | +3 to +8 | +3 to +8 | +4 to +9 |
| ONT Site | Downstream ONT RX | -24 to | -27 to | -27 to -8 | -27 to -8 | -28 to -9 |