Bidirectional OTDR Testing (X-view)
When Bidirectional fiber testing results are available, the OTDR can be used to view the results using the X-format. The OTDR results table will be unidirectional, meaning results can be viewed from one trace at a time. Use the green arrow in thumbnail view to switch active trace/even table results.
![]() In some cases, a more detailed analysis may be needed. This can be accomplished by averaging the test results of both traces. Results are averaged to counteract variation in attenuation at connector junctions between fiber sections.
In some cases, a more detailed analysis may be needed. This can be accomplished by averaging the test results of both traces. Results are averaged to counteract variation in attenuation at connector junctions between fiber sections.
Fiberizer Cloud or Fiberizer Desktop Plus software is recommended to:
- Generate test reports that will include the results table that shows both individual results and averaged bidirectional results, along with traces in an X-view format.
- Automate bidirectional test reports for a batch of fiber strands, instead of individual strands at a time.
Refer to Fiberizer Cloud for information on using Fiberizer Cloud. For more information on Fiberizer Desktop Plus, go to https://veexinc.com/products/fiberizer or contact Customer Care.
To create a bidirectional X-view screen:
-
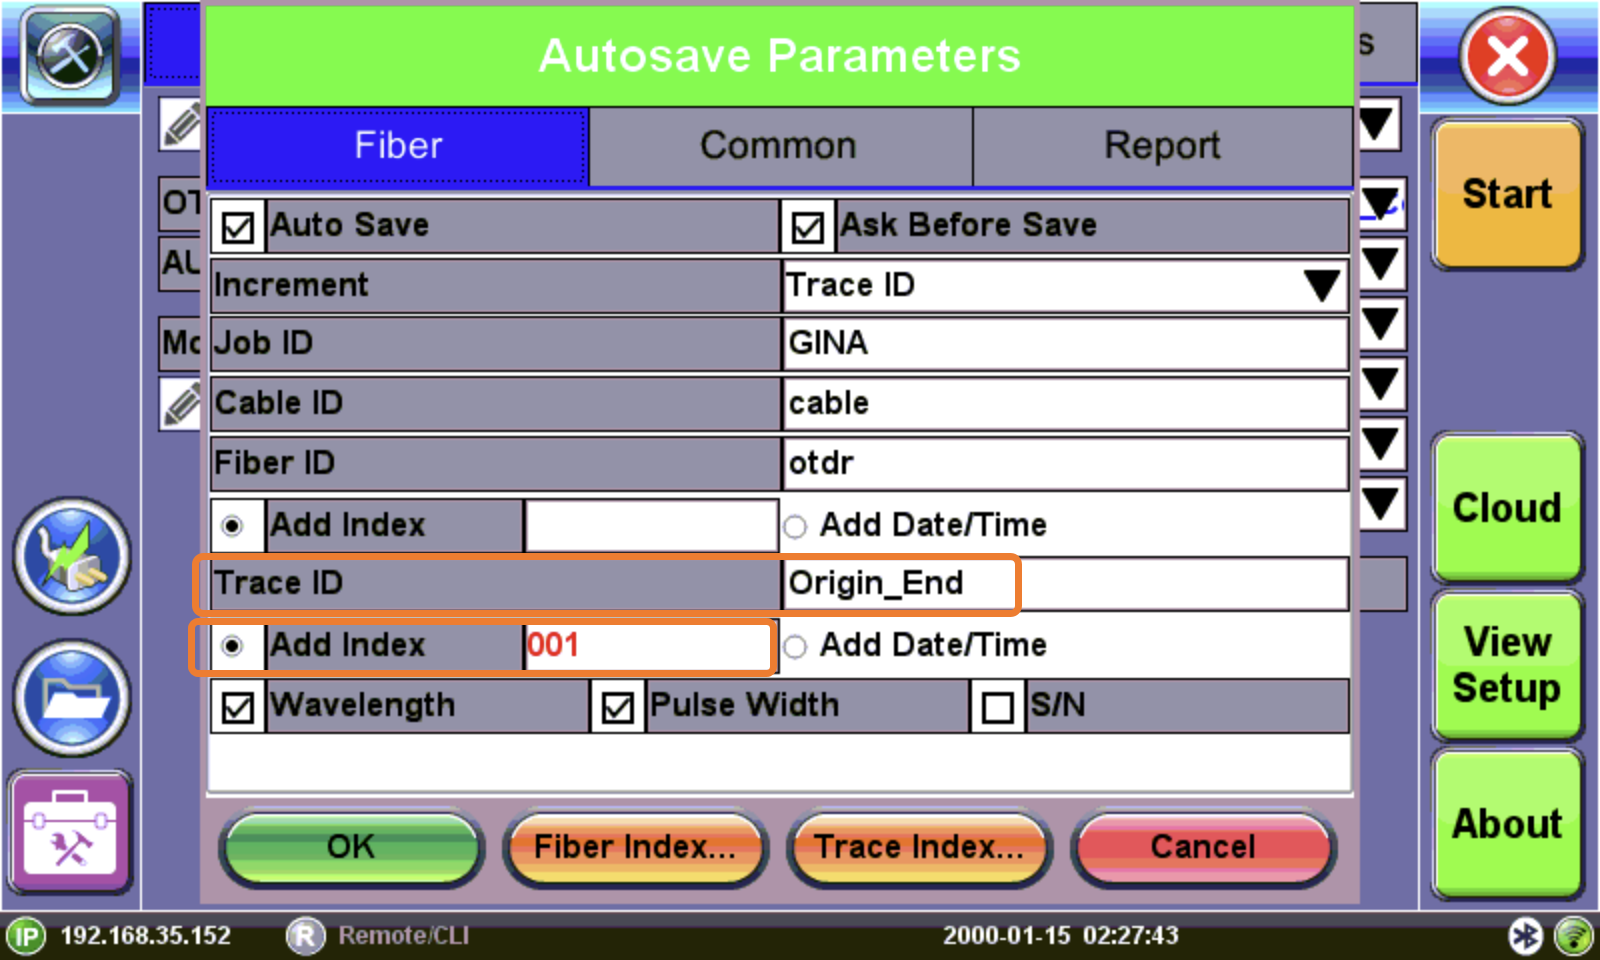
Before saving bidirectional test results, configure Autosave settings so that it is easy to track bidirectional results. In the Setup tab, tap Autosave. The Autosave Parameters window appears.
-
Set Increment to Trace ID and Common tab to enter Origin and Termination sites. The Trace ID label should reflect the physical location for each direction (e.g. first trace labelled "origin_end" and the second opposite end labeled "end_origin").
 Do not use "-" in the Trace ID field.
-
Reset or Force the Trace Index counter number to the fiber port you are testing at; otherwise, it will continue incrementing from the previous test. To change the number, tap Trace Index.
-
Bidirectional Trace - First Fiber to Test
-
Before testing from the opposite direction, re-configure the Autosave Trace ID settings to reflect the new test direction so the filename will be correct with the first trace.
-
The Trace ID label should reflect the physical location for the opposite direction (e.g. first trace labeled "origin_end" and the second opposite end labeled "end_origin").
-
Reset or Force the Trace Index counter number to the fiber port you began testing at; otherwise, it will continue incrementing from the previous test. To change the number, tap Trace Index.
-

Bidirectional Trace - Reverse Direction testing
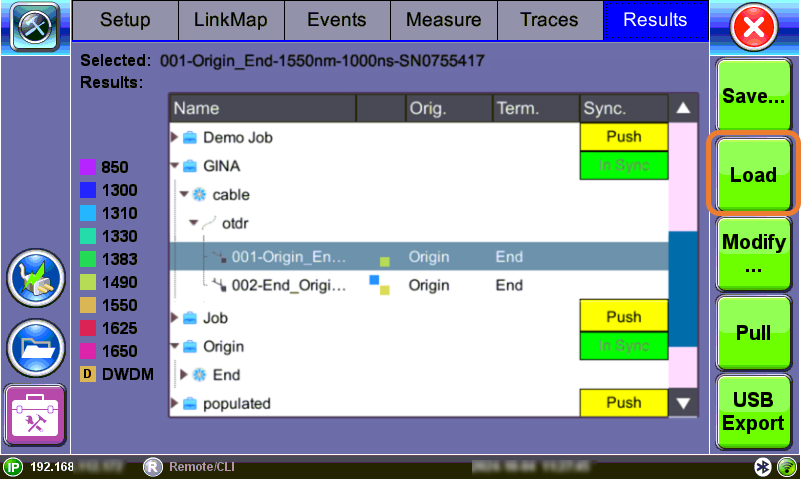
To view bidirectional test results, load the bidirectional traces previously saved from opposite direction testing (e.g. load "Origin_End" and "End_Origin"). See Step 3.
-
On the Results tab, select the required traces and tap Load.
Bidirectional testing: Results
Bidirectional View: First Trace loaded (before selecting reverse direction trace)
-
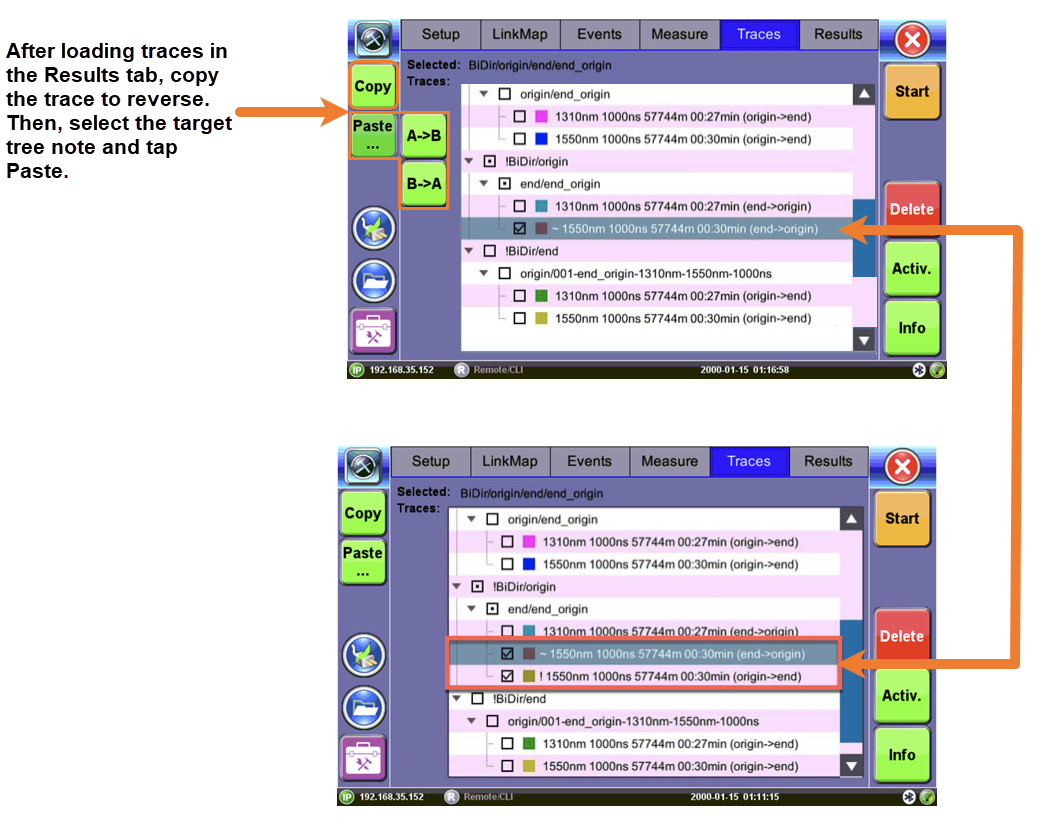
On the Traces tab, select one trace (End_Origin) and tap Copy. Then, select the target tree node and tap Paste>B->A. The reverse direction file copies into the same folder. Select two files (Origin_End) and (End_Origin) to view results. Bidirectional testing: Traces tab
-
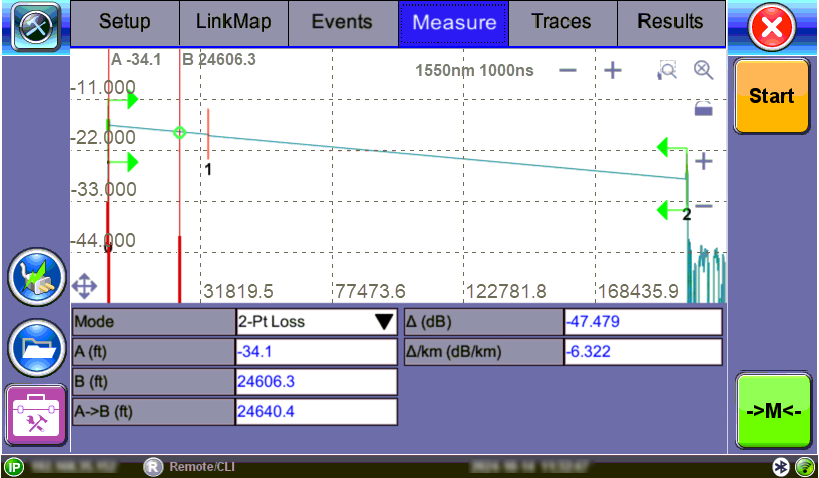
View the bidirectional trace in X-format on the Measure tab and Events tab.
Both traces must be checked (selected) in the Traces tab to view the bidirectional trace.
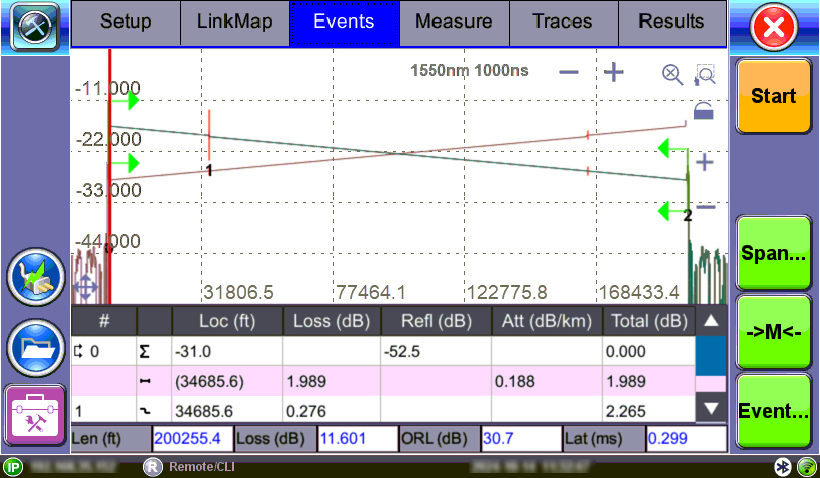
Bidirectional test: Events view