Understanding Fiber Menu GUI
The default Fiber Menu is loaded by default when the test set is powered on. See Customize Tester.
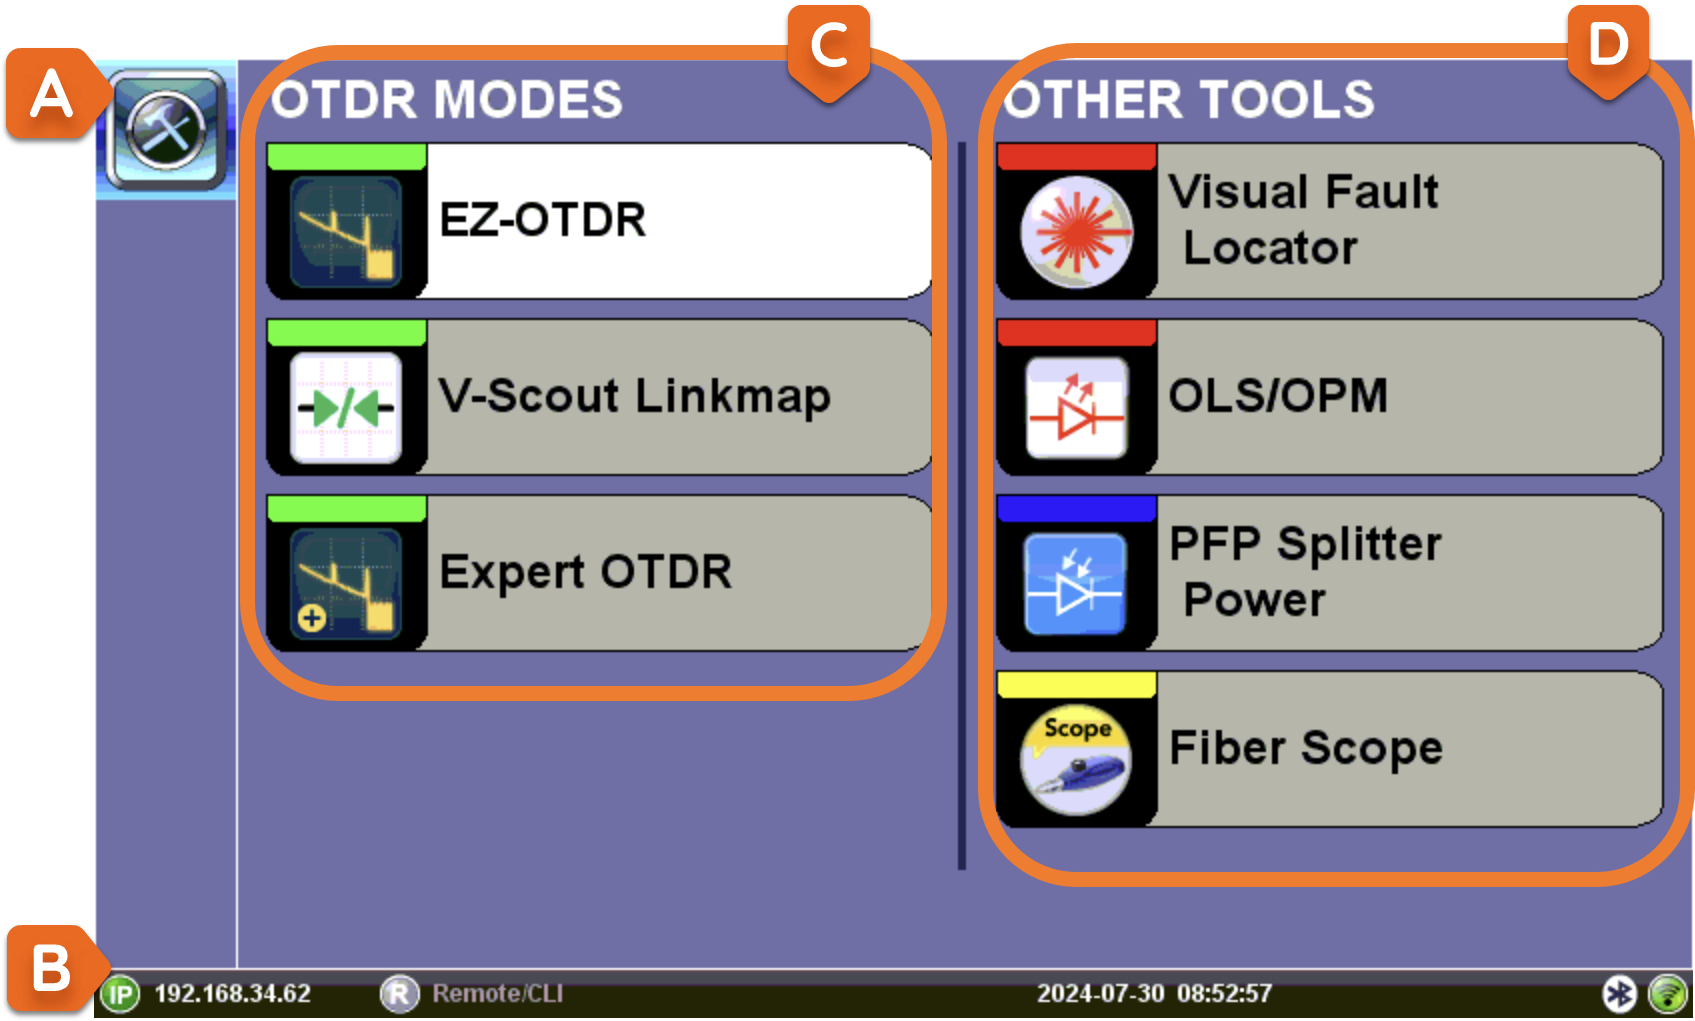
A. Platform Menus: Each platform menu (Tools, Utilities, and Files) displays submenu options.
B. System Information: Test set IP address, system date and time, and GPS status (optional).
C. OTDR Modes
- EZ-OTDR: Select this option for Automatic setups only.
- V-Scout Linkmap(optional): Default Auto profile. Select this option to use factory or user defined multi-pulse test profiles with summary results displayed on a LinkMap.
- Expert OTDR: Select this option to customize setups and/or manually override the default options. Realtime, Manual, Auto, and V-Scout are all available from this option.
D. Other Tools
-
Visual Fault Locator (VFL): If optional Visual Fault Locator (VFL) built into unit, select to trace and visually identify breaks in ODFs, bare fibers (900μm), and patch cords that are typically hidden in the OTDR dead zone.
-
OLS/OPM (Optical Light Source/Optical Power Meter): Select to use Optical Light Source in conjunction with the OPM (built-in or external OPM connected via Micro-USB port) Tests average output power from a light source and can be used to measure the span loss in dB of an optical fiber system. On the test set display, view measurement loss in real-time.
-
PFP Splitter Power : Select to access the Splitter Power Analysis application.
-
Fiber Scope: Select after connecting Fiber Scope to test set to capture the image and qualify the connector endface for cleanliness and damage per IEC 61300-3-35.
See OTDR Screen Navigation for information OTDR test screen navigation.