Working with Saved Results, Profiles, Images
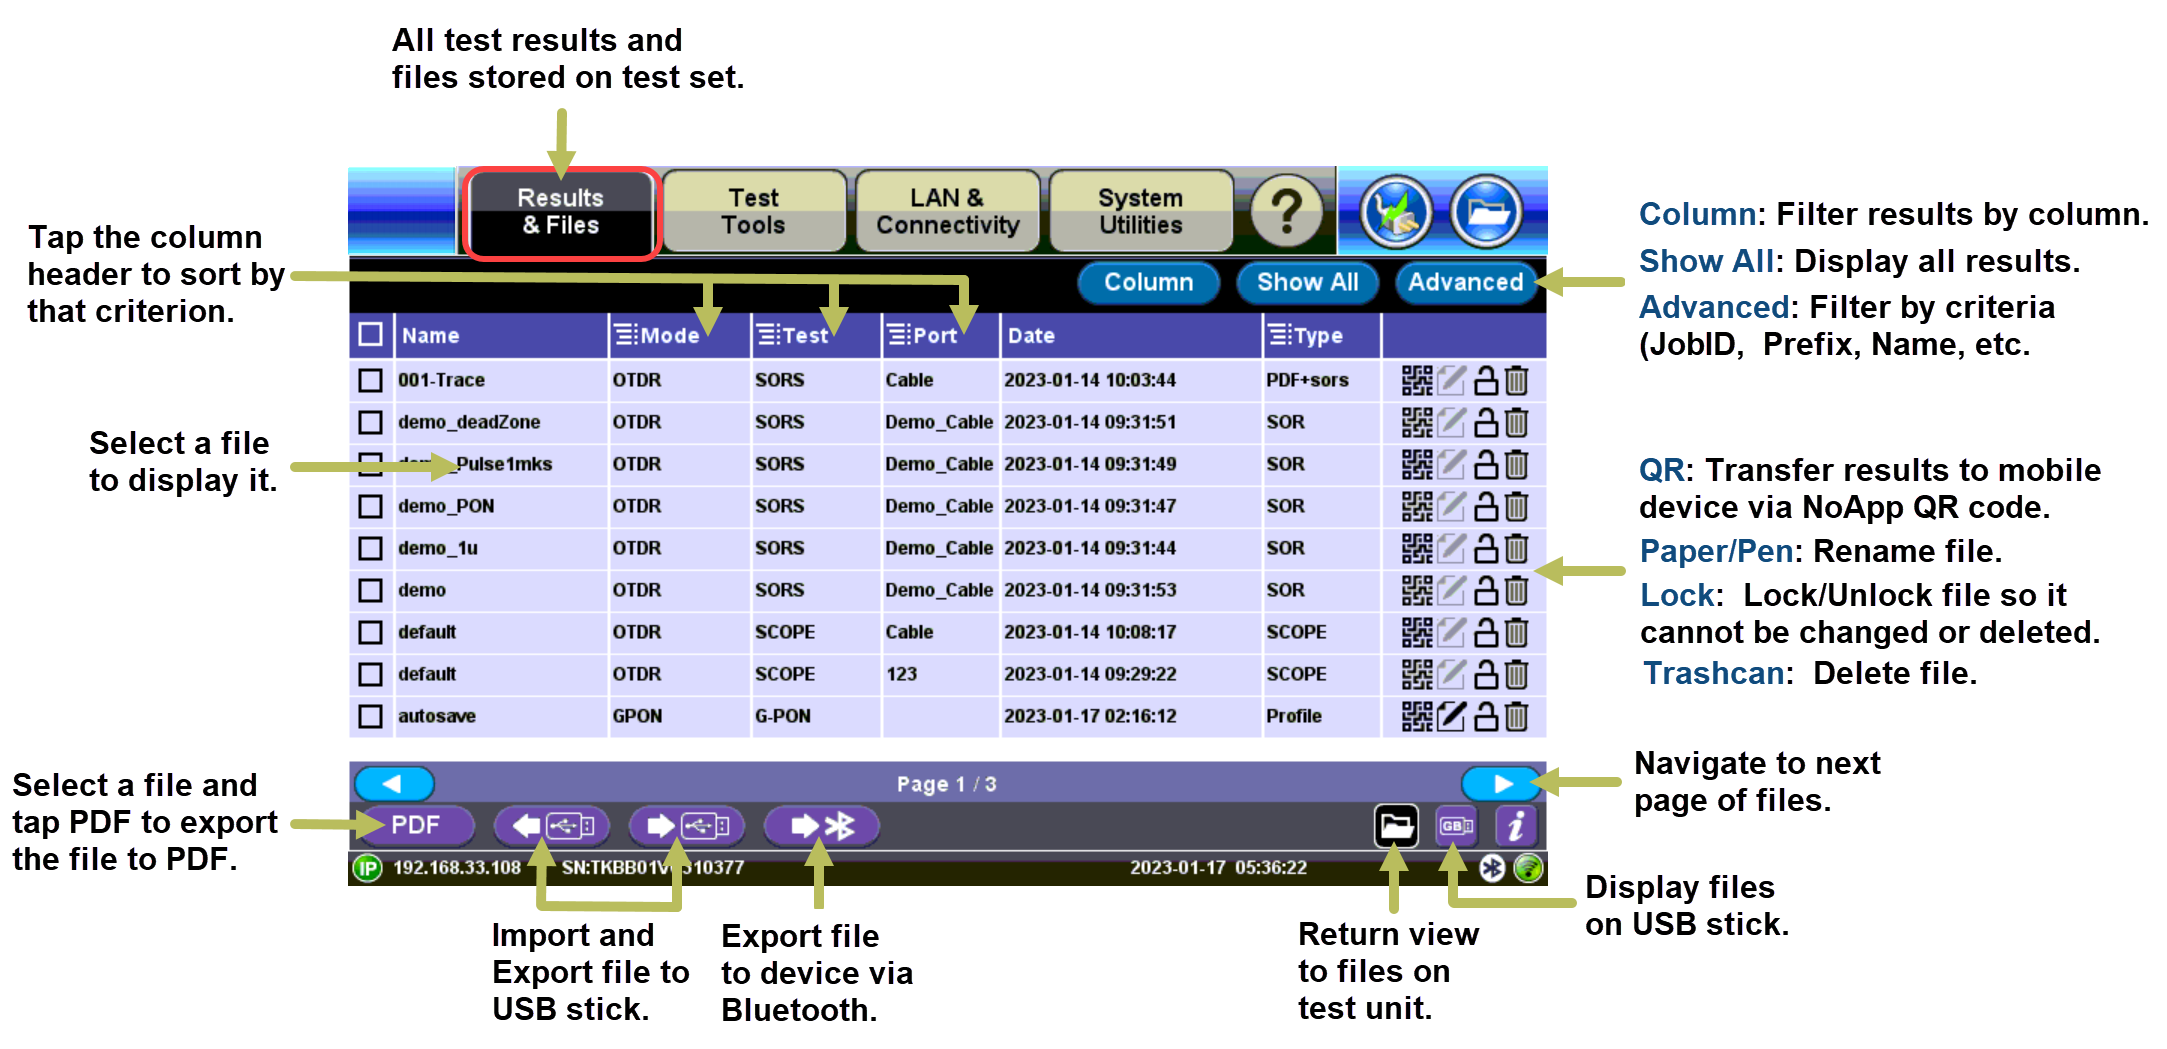
File types include:
-
OTDR traces saved as SOR files.
-
Fiberscope images saved as PNG files.
-
OPM results saved as text/xml files.
Access the File Manager by selecting  to select the desired file(s) or choose all files by selecting the check box in the top header row.
Table Sorting
Tap a column header to sort the table in ascending or descending order by the column selected.
Tap the 
At the top of the screen, tap the
|
|
Select columns to make visible. |
|
|
Displays all records. |
|
|
Search for specific file(s) using advanced search terms. |



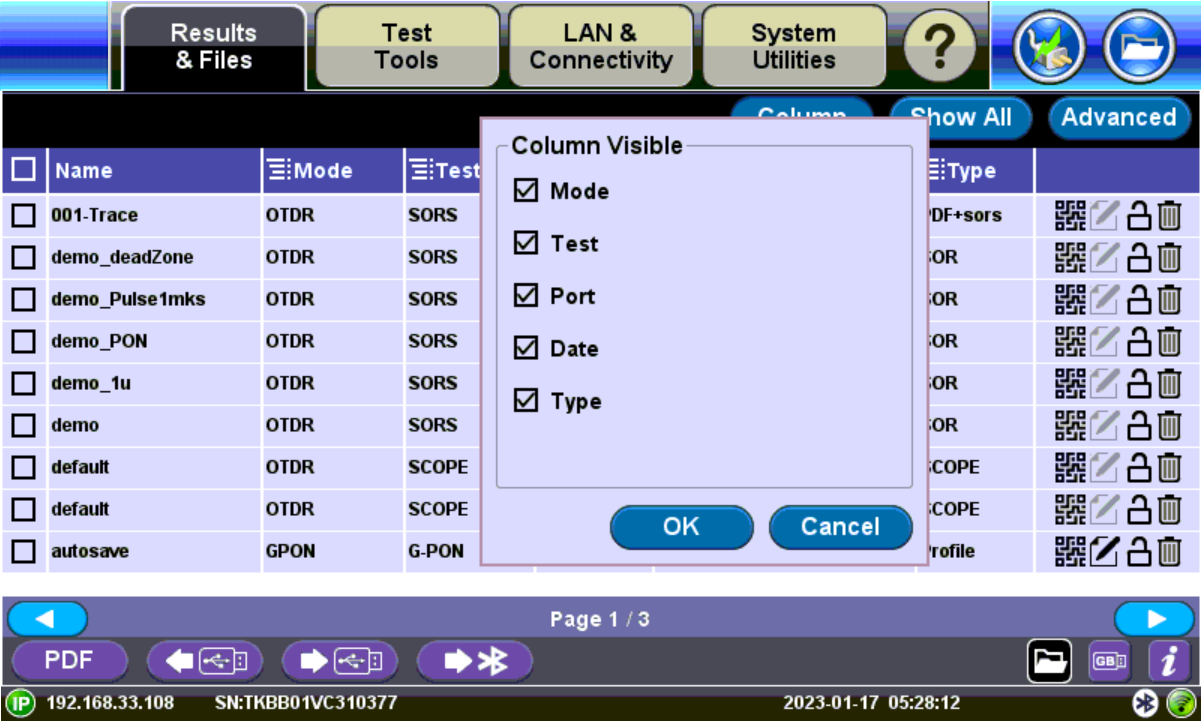
Selecting columns to make visible
Viewing and Managing Files
Use the options at the bottom of the screen to manage selected file(s).
Tap the file to open and display it.
 |
Navigates right and left to view all files. |
|
|
Closes the current test report and goes back to the File Manager. |
 |
Exports the selected test report to mobile device via QR Code. Results that do not support QR codes will display a "Result not supported." message. |
|
|
Deletes all unlocked test reports that are selected with checkmarks. |
|
|
Renames the selected test report (one). |
|
|
Unlocks or Locks test reports. Locked reports are identified by a red padlock icon. Locked test reports cannot be deleted or renamed. |
|
|
Generates a PDF copy of the test report and stores it in an attached USB memory stick (required) for distribution (e.g., via email). |
|
|
Imports (restores) all test results, test profiles and screenshots stored in an attached USB Memory Stick. The included On-The-Go (OTG) micro-B USB to USB-A adapter cable is required for the USB memory stick. |
|
|
Exports (backup) all selected test results, test profiles and screenshots stored to an attached USB Memory Stick. The included On-The-Go (OTG) micro-B USB to USB-A adapter cable is required for the USB memory stick. |
|
|
Transfers selected test results, test profiles and screenshot files to a paired Bluetooth® smartphone, tablet or PC. |


Enabling To USB and From USB Functions
- Insert a USB Memory stick (FAT32 file format) into a USB port on the side of the unit.
- Wait for the USB memory to be detected. After the unit detects the USB memory stick, files can be downloaded to or restored from USB. See USB Memory Browser for details about using a USB memory stick with the test set.
Downloading Files To USB
- Select the test results, test profiles, screen capture files to be saved. For a full backup, tap the check box in the top header row to select all files.
- At the bottom of the screen, tap the To USB button
 to initiate the file transfer procedure and wait for the progress bar to finish. Original files won’t be deleted from the test set. Each file is saved into it's own folder using the "MyVeEX" tree directory format.
 - When all files have been copied to the USB, tap the folder icon (top-right corner)


Exporting Files to Mobile Devices via Bluetooth
 Applies to test sets with optional built-in Bluetooth or compatible Bluetooth USB dongle attached.
- Select the test results, test profiles, screen capture files to be exported. For a full backup, tap the check box in the top header row to select all files.
- At the bottom of the screen, tap
 . The test set scans for Bluetooth devices automatically.
 - After pairing the device, tap Send to export the selected files. Original files won’t be deleted from the test set. Each file is saved into it's own folder using the "MyVeEX" tree directory format.
Exporting Results to PDF
- Select the test result files to be exported.
- At the bottom of the screen, tap
 . A "PDF file will be generated to USB disk" message appears.
 - Tap Yes.
Alternatively, when saving results, select the Enable+Report (pdf) or Enabled+V-Scout+Report options. The PDF report will appear in the File Manager list.
Transferring Results to Phone/Tablet via NoApp® QR Code
VeEX's NoApp® (US Patent 12,190,199) uses NFC and QR code technologies to process and consolidate test results data, from small meters to more advanced test sets, efficiently as part of our vision to streamline workflow and reporting.
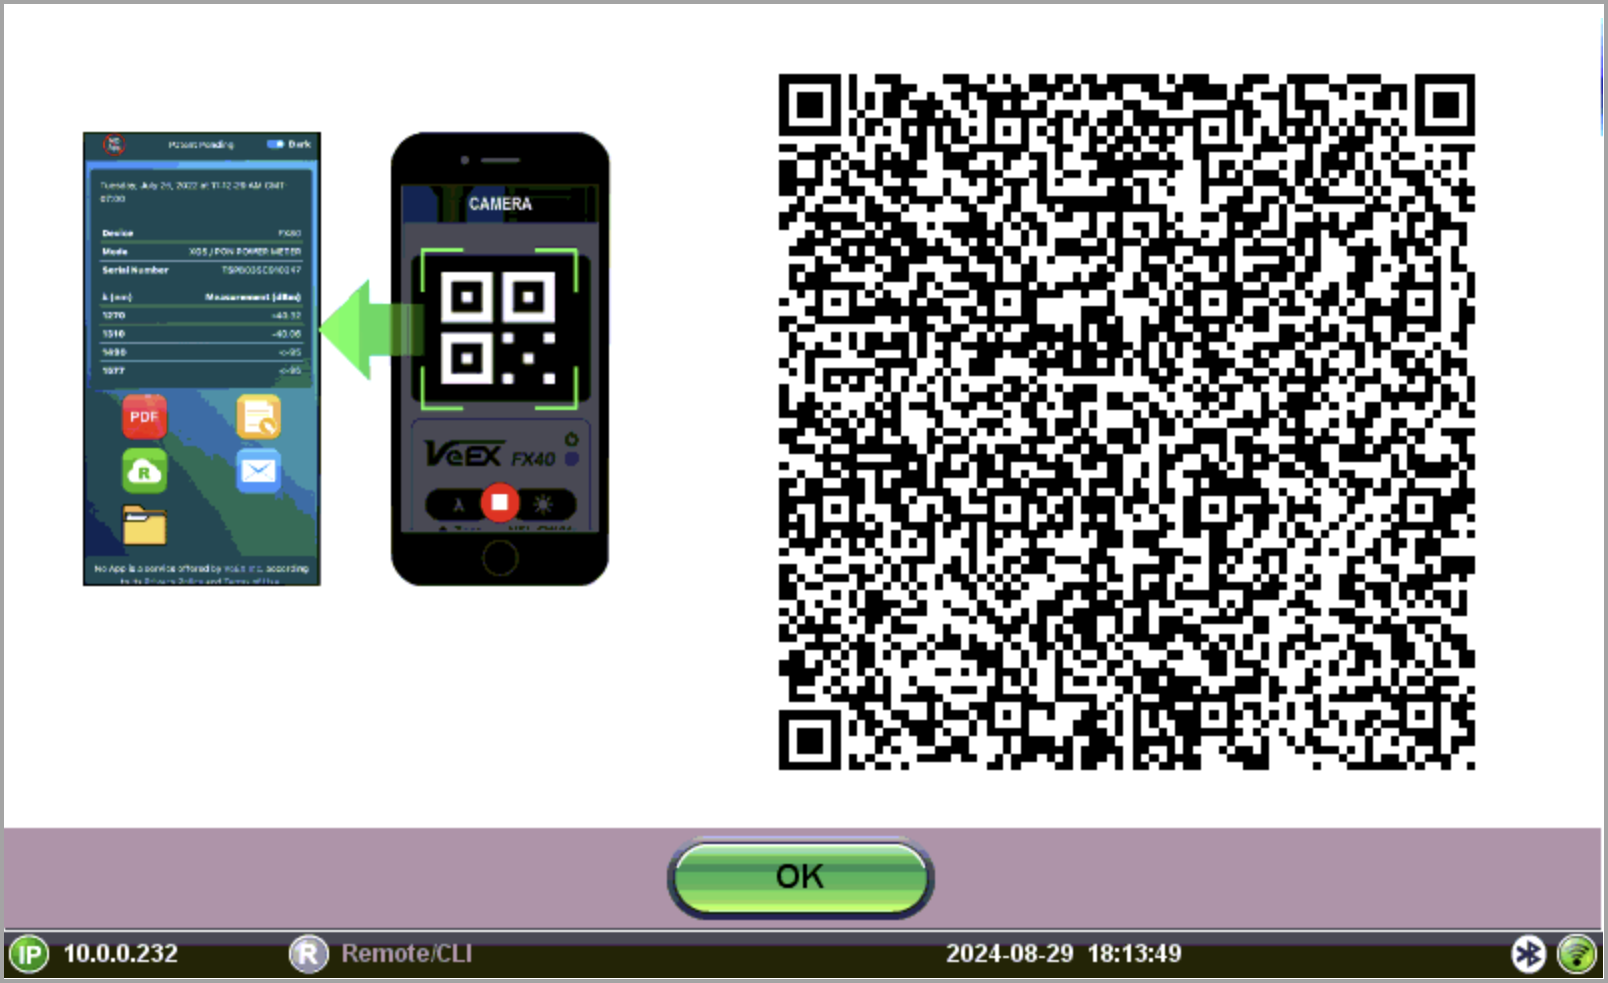
Test Results QR Transfer and Report Generation
Once the test report is displayed, company information, logo, job ID, geolocation, comments, picture, other test results, etc. can be added. The test results can also be uploaded directly to the centralized/cloud server (for R-Server subscribers). PDFs can also be generated and results shared using email or SMS.
Multiple tests reports, from the same or different testers, can be combined into a single report. For example, a PON Internet access activation may require some optical power measurements at the drop, an optical fault locator measurement to verify the length of the drop, a PON signal analysis test, and an Internet speed test to verify the QoE. Since they all belong to the same job, with NoApp, they can be assembled and filed on a single comprehensive report.
 QR Code generation must be enabled on the test set and mobile device, or it can be launched later, from the File Manager by tapping on the QR icon. QR Result generation is only supported by some test applications.
To transfer results to mobile device:
-
On the Results & Files tab, select the test results to view.
-
Tap
. The QR transfer screen displays. Results that do not support QR codes will display a "Result not supported" message. -
Using the mobile device's camera, focus on the QR code and tap it. The results appear in the browser.
Viewing Results on Phone
After transferring results to a mobile device via the QR reader, the browser launches automatically and displays them.
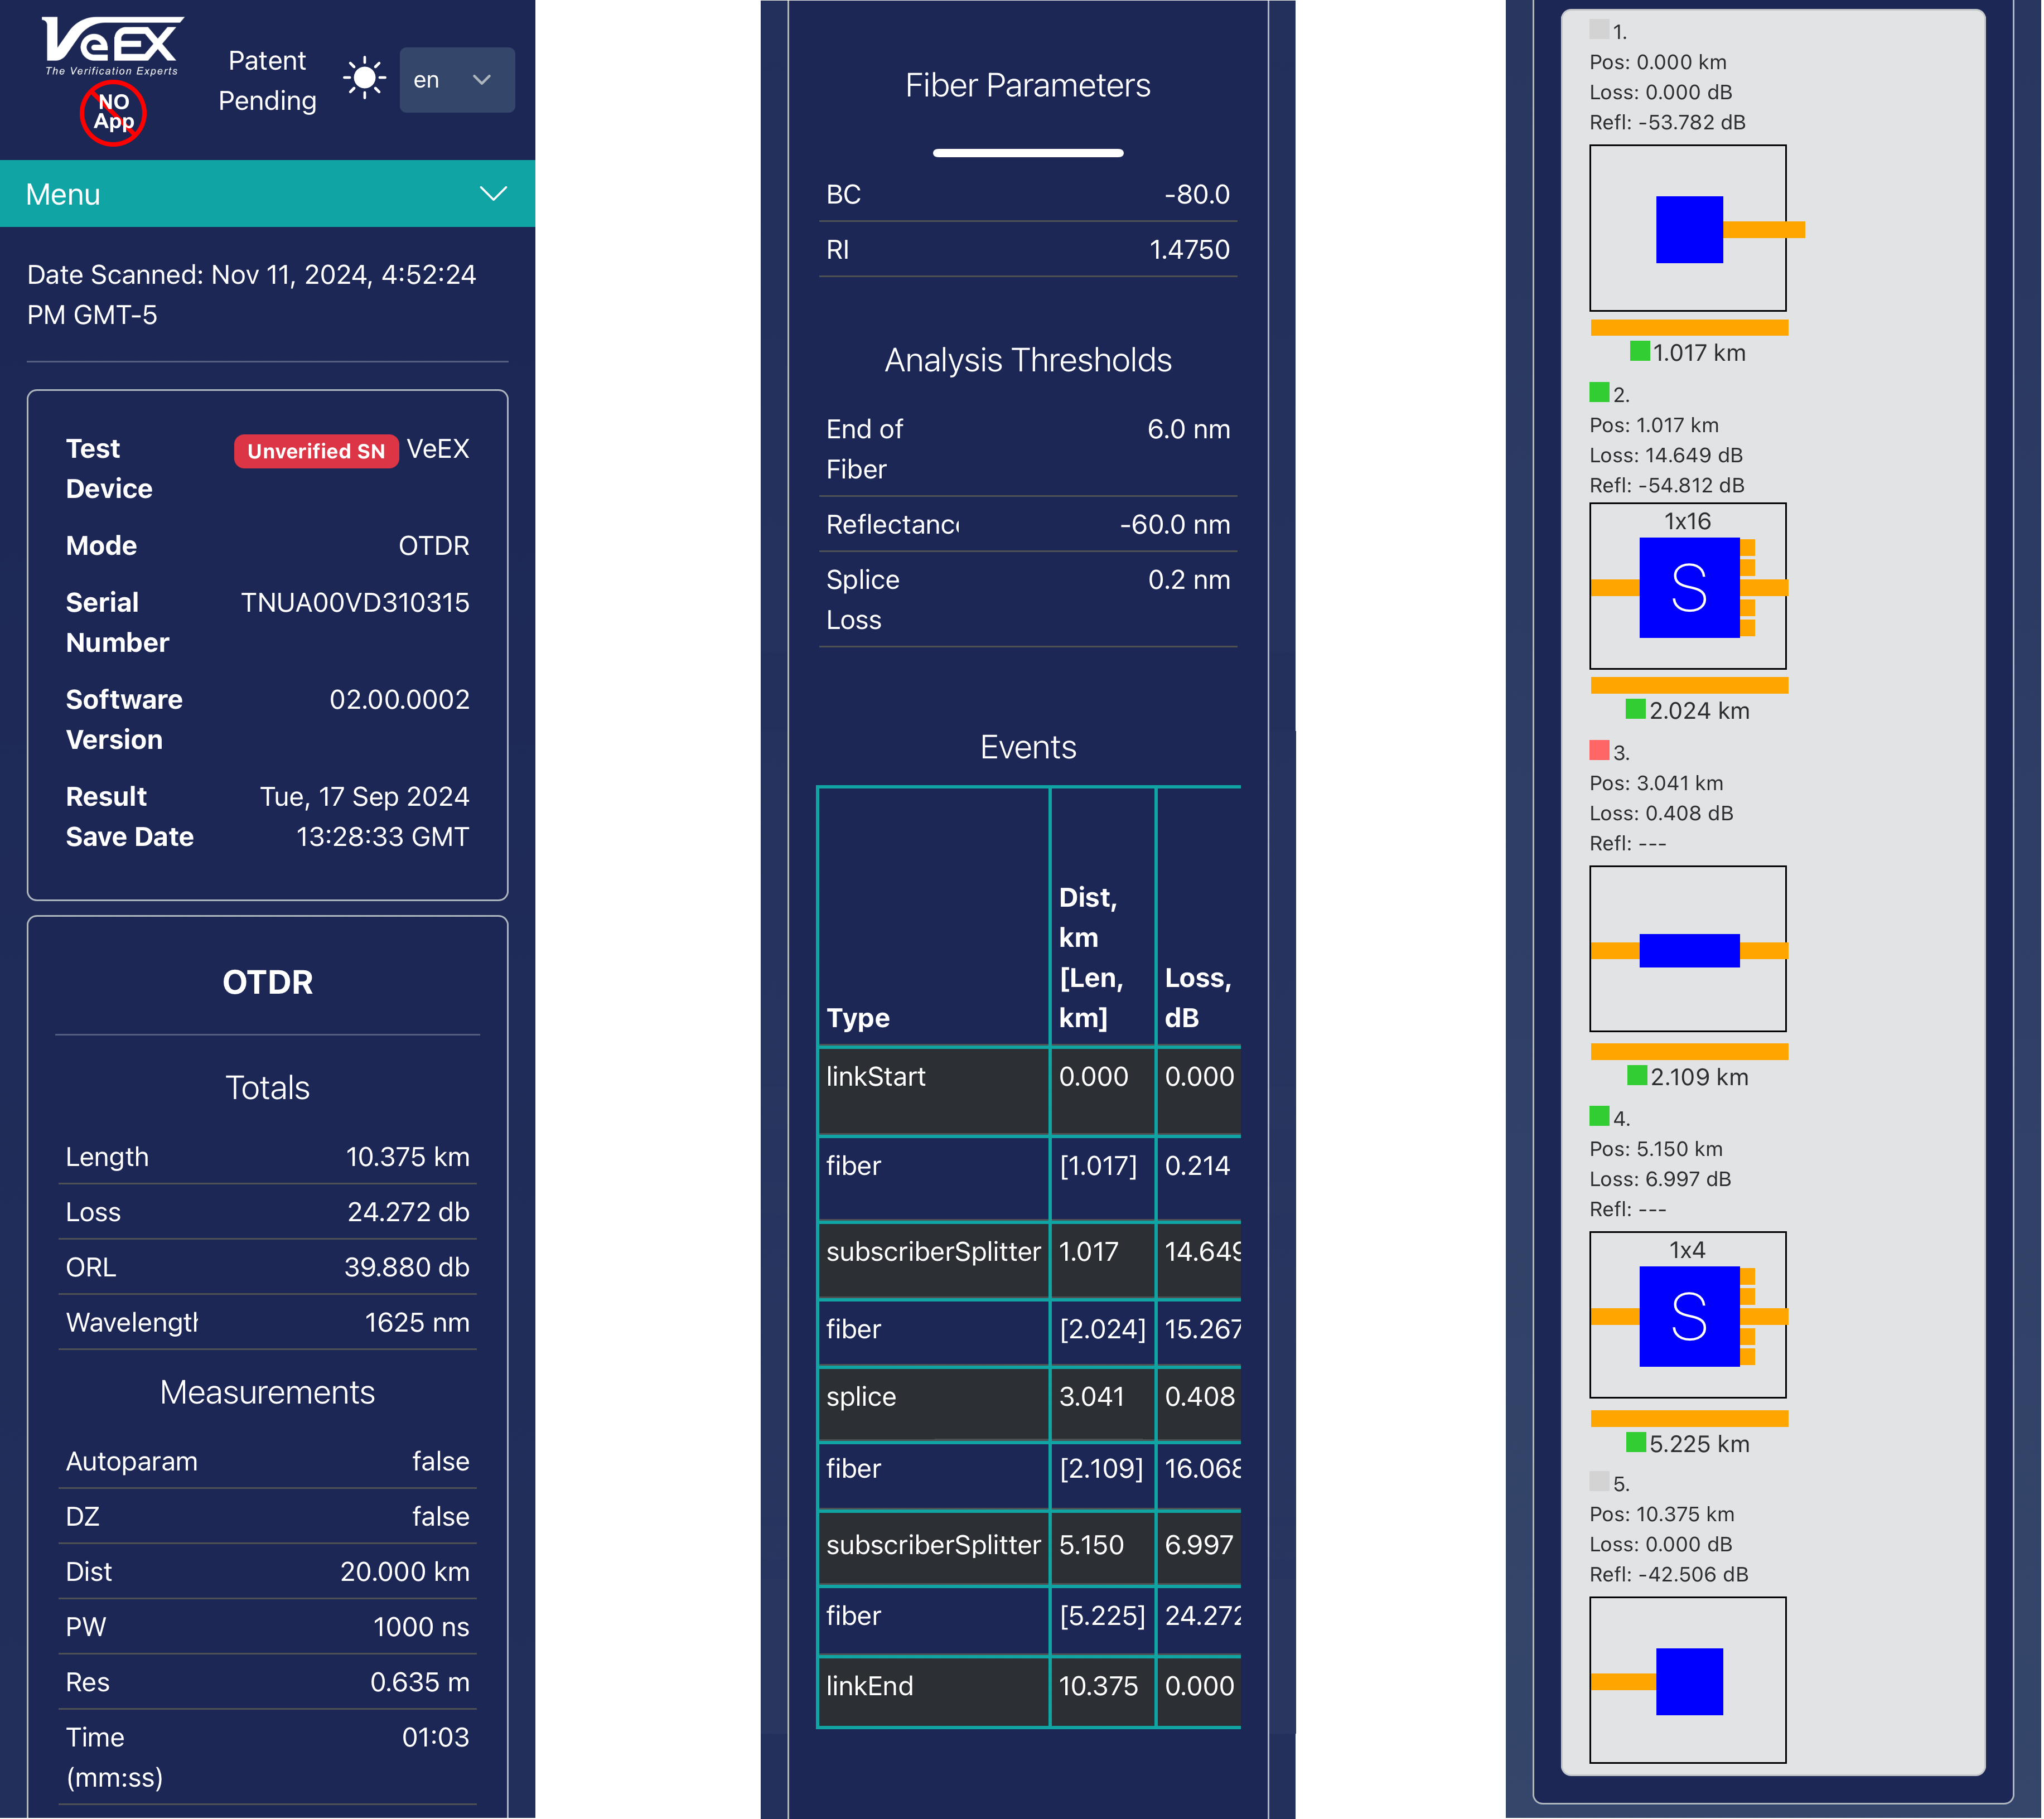
The top of the screen shows the device type, mode, serial number, and software version, and the date results were saved on the device.
Export options appear at the bottom on the screen. Alternatively, tap the Menu drop-down menu to view the options.
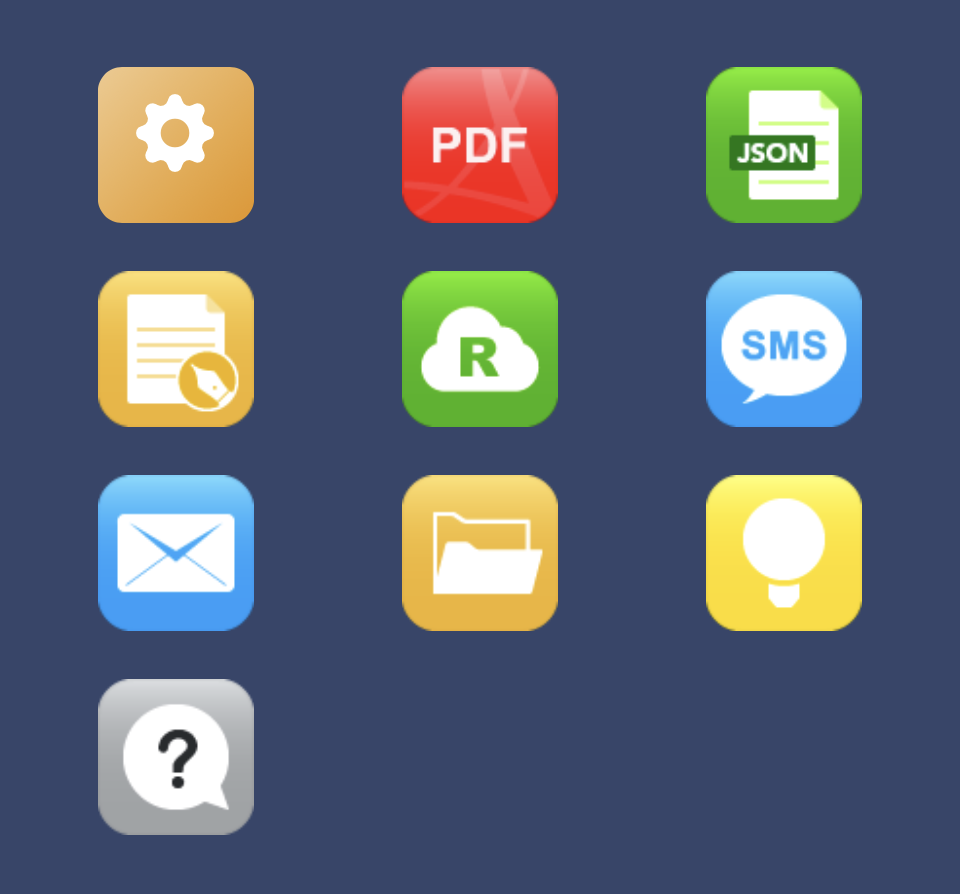
Results - Mobile View Export Options

|
Adds/Removes location (GPS coordinates) from results report; customize report with logo. |

|
Generates complete report in PDF format, which can be shared with the customer (subscriber) or emailed to a supervisor. |

|
Exports to JSON format, for third-party integration or processing. |

|
Adds extra job-related information to the report (e.g., Job ID, tech's information, comments, pictures, etc.). |

|
Uploads results to R-Server (for R-Server users). |

|
Texts results via SMS protocol. |

|
Emails current test report. |

|
Creates a new project for results so multiple test results, from the same or different test sets, can be combined into a single job report. |

|
Opens knowledge base. |

|
Opens documentation resources for test set. |