Fiberizer Cloud
Fiber test results including Fiberscope images can also be uploaded to a registered Fiberizer Cloud account. Registration is free.
Connecting to Fiberizer Cloud
To connect the test set to Fiberizer Cloud, you must be a registered user. For new users, go to the fiberizer.com website from a PC Internet browser to register before proceeding with these directions.
Go to http://fiberizercloud.com to register.
- After registering, tap on Modify > Settings.
- Enter the username and password, then tap Check. If the message Connection has been successfully verified does not display, recheck the username and password.
- Tap Select to choose a project folder to upload files to and tap OK.
- Save or Discard the cloud login details.
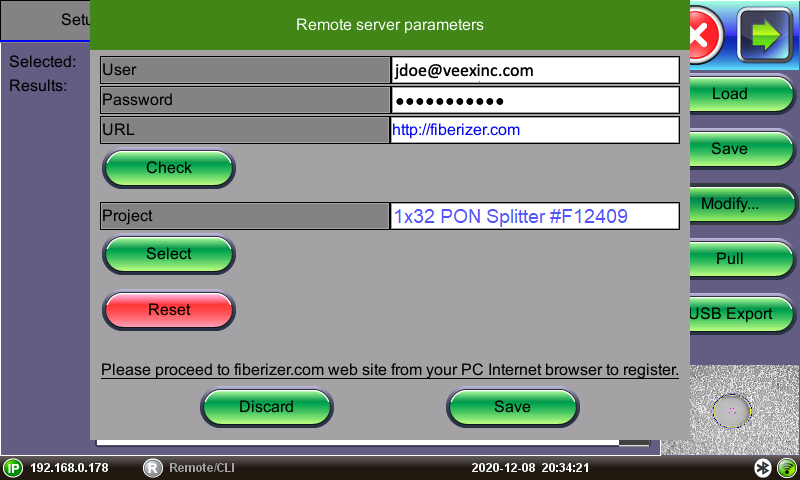
Settings to connect to Fiberizer Cloud
Uploading/Downloading Files with Fiberizer Cloud
Before attempting to upload or download, ensure that the test set is successfully connected to Fiberizer Cloud. Tap Push next to a directory item to upload it into Fiberizer Cloud. Tap Pull to download the directory collection from Fiberizer Cloud.
The Project selection defines the project folder location on the Fiberizer Cloud account to which to save the results. The default setting uploads to the global root folder.
![]() For a project folder to appear in the project list, it must be created in Fiberizer Cloud first. The test set cannot create Fiberizer Cloud project folders.
For a project folder to appear in the project list, it must be created in Fiberizer Cloud first. The test set cannot create Fiberizer Cloud project folders.
After pushing results to the Fiberizer Cloud project, check the Jobs folder to which the saved cable folder was uploaded. Use Fiberizer Cloud to create professional reports or serve as an online storage backup. The example below shows MPO results on Fiberizer Cloud.
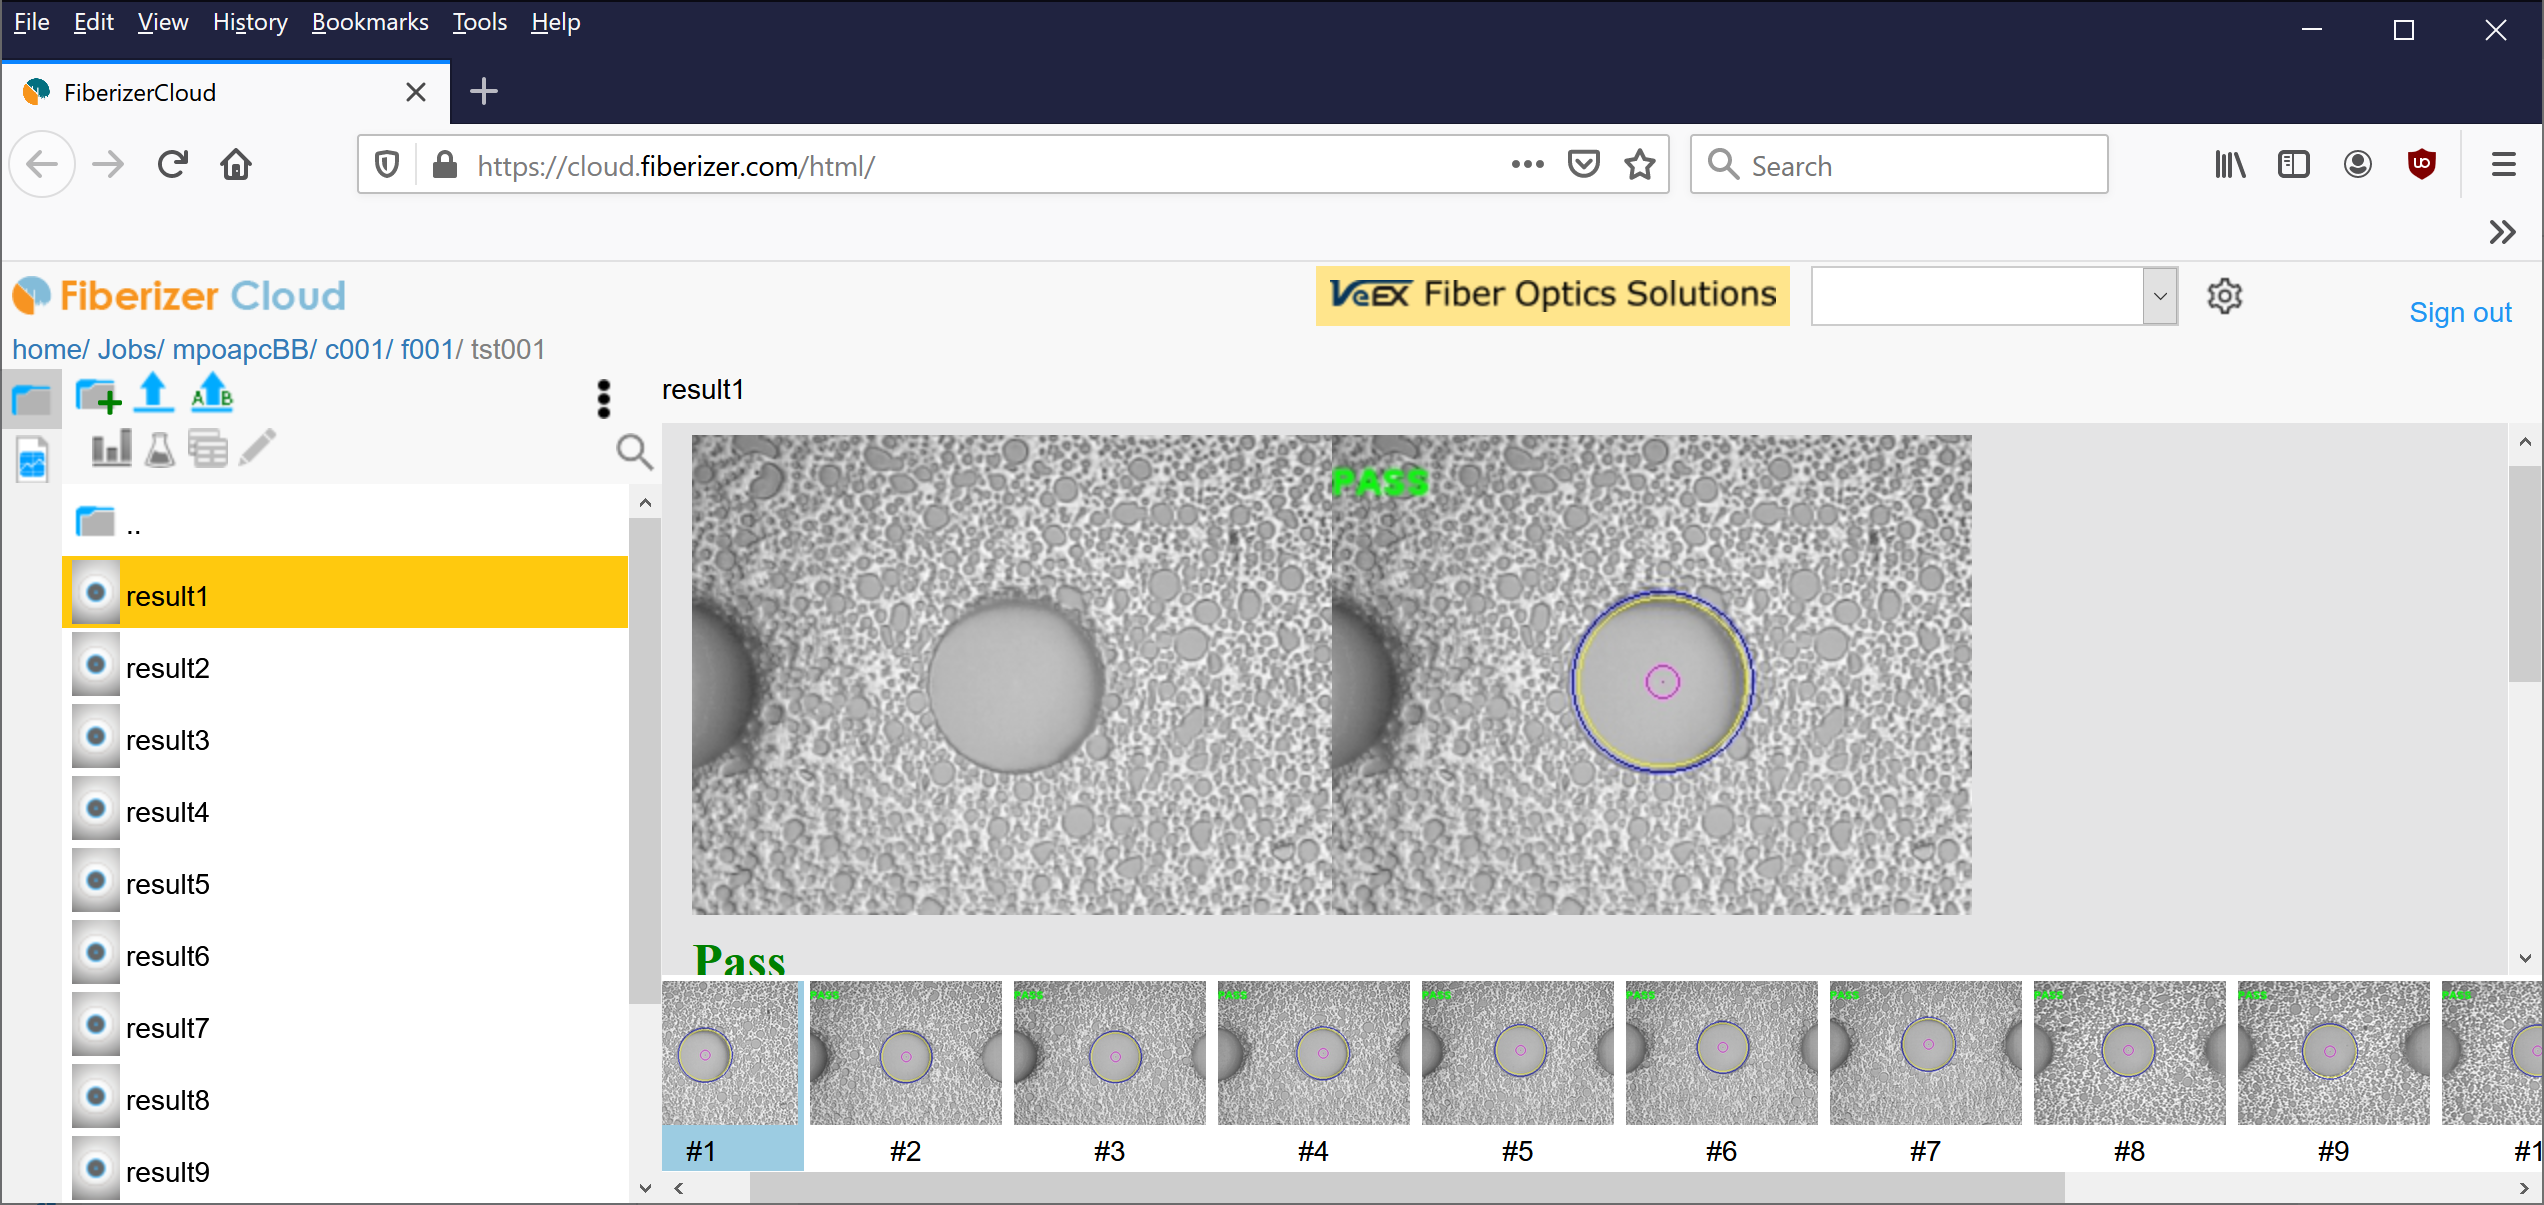
MPO Fiber View on Fiberizer Cloud