iPerf TCP/UDP Speed Test
![]()
The iPerf Internet Performance test (also known as V-PERF in other VeEX products) is an advanced Layer 4+ network performance validation tool, based on the RFC6349 test methodology. It measures the maximum achievable bandwidth between two devices and provides insights into throughput, stability, and potential network issues. The tool supports both TCP (Transmission Control Protocol) and UDP (User Datagram Protocol) protocols.
The TCP test measures the highest achievable bandwidth while ensuring reliable data delivery. , It reports metrics such as bandwidth, latency, and retransmissions. As a stateful protocol, TCP maintains an active connection and manages acknowledgments, retransmissions and congestion control. This makes it ideal for service providers validating customer-facing services such as high-speed internet, where consistent throughput and reliability and essential.
Alternatively, the UDP test measures bandwidth without error correction, making it ideal for real-time applications like video streaming. As a stateless protocol, UDP does not establish or maintain a continuous connection or track individual packets, which allows for faster transmission but with possible packet loss. iPerf provides additional insights into UDP performance through metrics such as bandwidth, packet loss and jitter.
Key Features
-
Operates over wired Ethernet and Wi-Fi links.
-
Supports TCP or UDP Throughput testing.
-
Performs stateful TCP or stateless UDP Tests at the test interface's maximum line rate.
-
Fucntions in both TCP/UDP Client and Server modes.
-
Fully compatible with iPerf3 Clients and Servers.
-
Provides Measurements: TCP or UDP upstream and downstream Throughput rates (current, minimum, maximum, average), TCP retransmissions, UDP packet loss, UDP packet jitter.
The iPerf speedometer icon will remain visible on the main test page, to show the current/active Test Mode.
Swipe-up from the bottom to reveal the Test Application menu.
-
Tap the
 iPerf button to select it as the active Test Mode.
 -
Tap the
 Config button (or the
  icon) to setup the iPerf test parameters.
-
After running a test, tap
 Save Results button to store the current test results. Overwrite the default File Name with a custom name, as well as add extra information such as Job ID, Node ID (Location or Site), subscriber's Account. Tap the OK button to save.
![]() Tap the iPerf button (or the V-Pert button for wired applications) to setup the iPerf test parameters.
Tap the iPerf button (or the V-Pert button for wired applications) to setup the iPerf test parameters.
iPerf Configuration
On the Configuration page, make sure the Test mode is set to iPerf3 speed test mode. On the iPerf Settings section, set the target iPerf Server to test against, by selecting a test Profile. Expand the Details section to edit the test configuration.
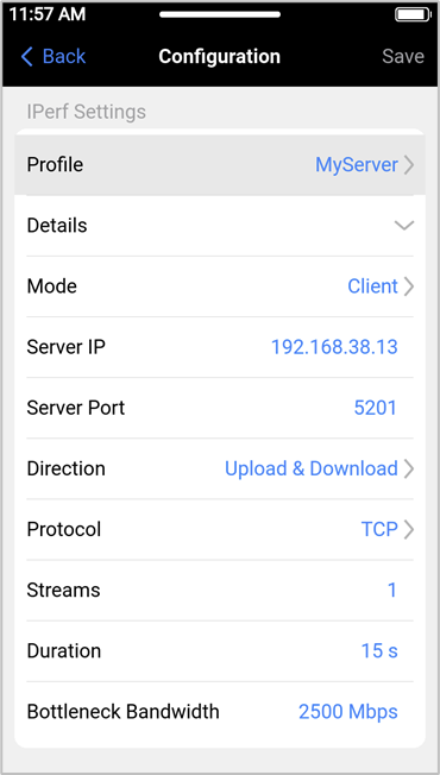
The configuration for different tests and target servers can be saved as Profiles, to recall the same configuration for future use.
-
Mode - The default is Client mode is the most common application for this test set, to test from the customers' premises towards a centralized known/trusted remote iPerf3 server. Server mode is also available for certain isolated test scenarios.
-
Server IP - The address of the iPerf3 server must be reachable from the test site.
-
Server Port - TCP port used for all iPerf3 traffic.
-
Direction - Typically the test is run for both directions Upload & Download, however users can also select to tests in one direction, Client to Server (Upload) and Server to Client (Download).
-
Protocol - Select between TCP (Transmission Control Protocol) and UDP (User Datagram Protocol).
-
Streams - Number of concurrent test streams used for the test (op to 16). The appropriate or optimum number of streams depend on several factors, including the server, service under test and test procedure.
-
Duration - Duration of the test for each direction.
-
Bottleneck Bandwidth - Sets the target bandwidth to N Mbps (Mbit/s) or Gbps (Gbit/s), If there are multiple streams, the bandwidth limit is applied separately to each stream.
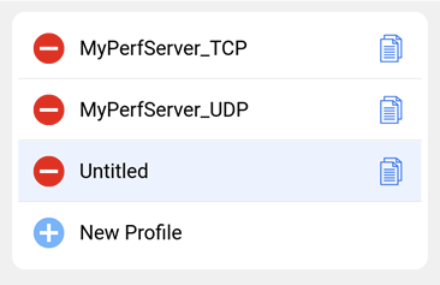
Once modified to fit the application, Save it as a Profile with a unique descriptive name. To create new profiles, on the Profile page, tap Edit and use the ![]() Add function or use the
Add function or use the ![]() Copy function to clone an existing profile and use it as a starting point for the
Copy function to clone an existing profile and use it as a starting point for the ![]() New one. Use the delete function for the profiles no longer needed.
New one. Use the delete function for the profiles no longer needed.
Use the Configure Interface field to set the test interface's IP Address behavior, DHCP (dynamic) or Static.
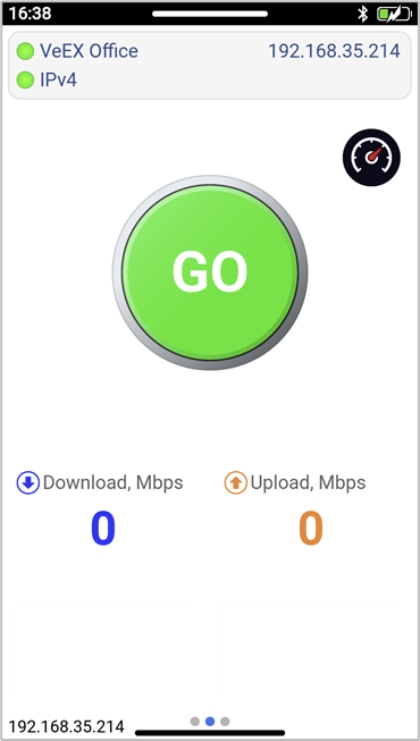
Tap < Back (or swipe right) to go back to the main iPerf3 speed test page. Make sure to stablish the appropriate connections, the Ethernet (LAN) or Wi-Fi (WLAN) link is active and the GO button is green. Press GO to start the test.
iPerf Throughput (Speed Test) Results
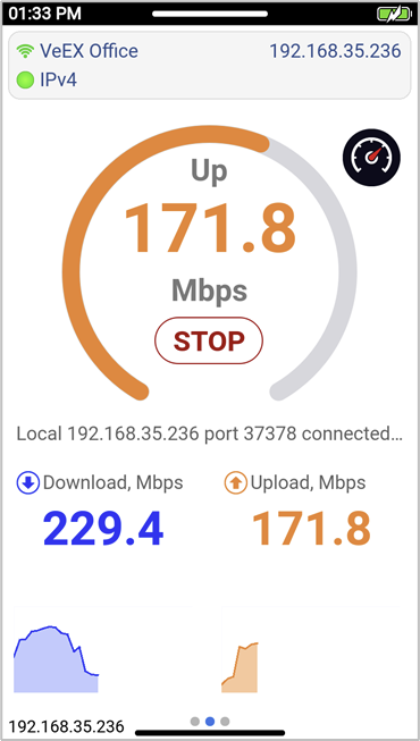
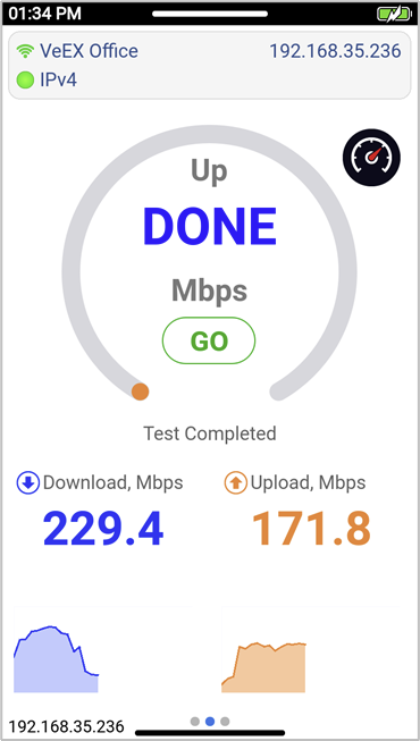
After pressing the GO button, the test set starts by measuring the attainable throughput speeds for the Download (downstream) and then the Upload (upstream).
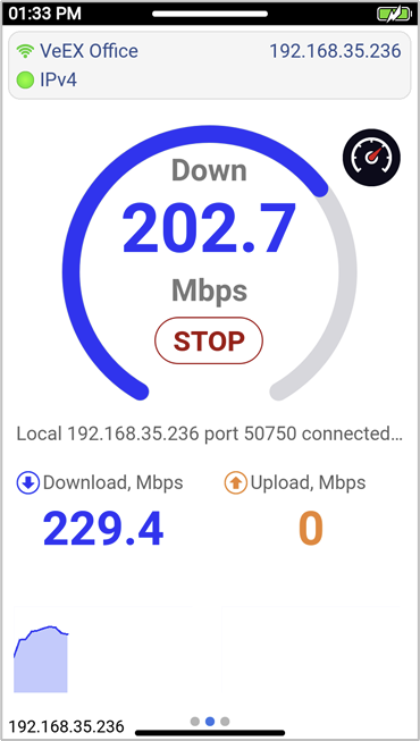
When the test has finished, it displays DONE.
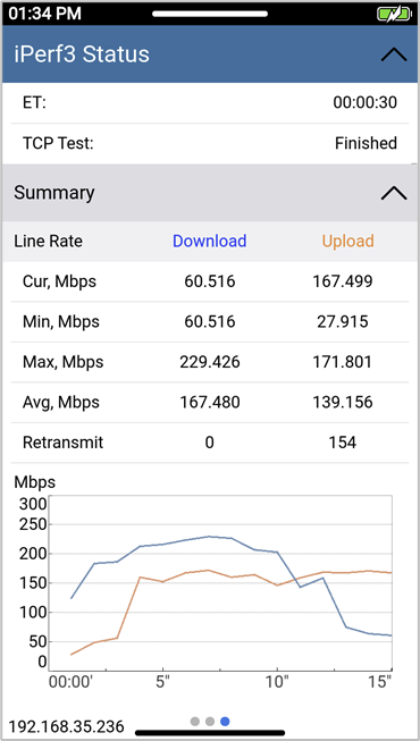
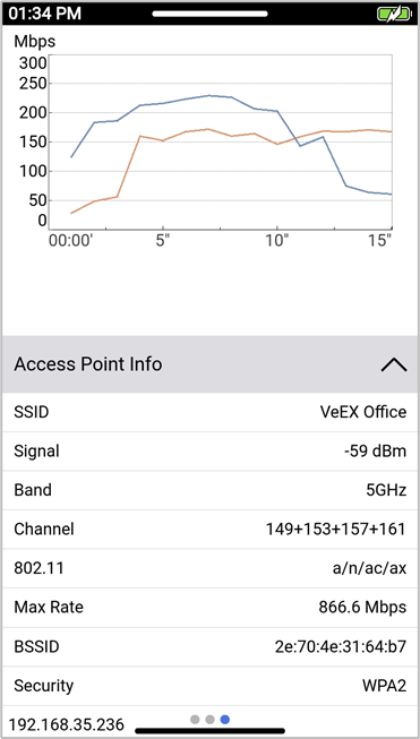
Swipe left to see the detailed Test Report. Scroll up and down to go through all the details. The different sections of the report can be collapsed or expanded, to better focus on the key performance indicators (KPI) and information preferred by the user.
Swipe up and tap the ![]() Save button to store the current test results or swipe right to run a new test.
Save button to store the current test results or swipe right to run a new test.
Refer to the following video for a Quick Guide on how to use the PX90