Ethernet Setup
Test Port Selection
Test mode, test port(s), and network settings are required prior to performing any measurements or applications.
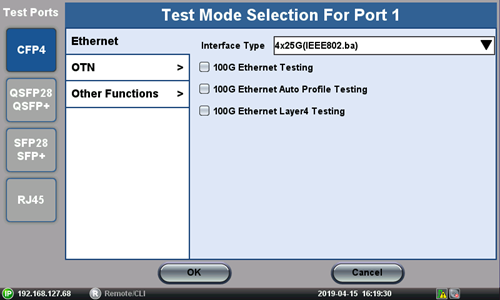
Ethernet test modes are accessed by selecting the Test Application button at the top of the screen ![]() . Tap on a technology group then select a test interface. Depending on interface options purchased, the following selections are possible:
. Tap on a technology group then select a test interface. Depending on interface options purchased, the following selections are possible:
Shared single/dual port combinations between RXT-6200:
-
Single port 100G (CFP2 or CFP4)
-
Single port 100G, 50G (QSFP28/QSFP+)
-
Single port 40G (QSFP+)
-
Single port 25G, 10G, 1G (SFP28/SFP+)
-
Single Copper port 1G (1G Copper)
-
Dual port 100G, 50G (QSFP28/QSFP+)
-
Dual port 40G (QSFP+)
-
Dual port 25G, 10G, 1G (SFP28/SFP+)
-
Dual Copper port 1G (1G Copper)
After selecting the test interface, tap OK or Accept button (depending on your interface) located at the bottom of the pop-up window.
Test Mode Selection
When the dual port interfaces and software options are enabled, the test module can operate a combination of two ports at the same time.
![]() The configuration parameters (header, bandwidth, etc. for each application (on each of the ports) are completely independent from one another. All test feature combinations are allowed and completely independent (Loopback, BERT, Throughput, RFC2544, VSAM) in dual port operation. However, some advanced tools, such as IPTV, VLAN scan, Packet Capture, etc. are available in single port testing mode only. The user interface will provide an error message when a feature is not available in dual port operation.
The configuration parameters (header, bandwidth, etc. for each application (on each of the ports) are completely independent from one another. All test feature combinations are allowed and completely independent (Loopback, BERT, Throughput, RFC2544, VSAM) in dual port operation. However, some advanced tools, such as IPTV, VLAN scan, Packet Capture, etc. are available in single port testing mode only. The user interface will provide an error message when a feature is not available in dual port operation.
When the soft LEDs are steady green, this indicates that the module is ready to perform different tests. This may require turning the LASER On button for optical interfaces or tapping the History tab to clear blinking LED reminders of past Errors and Alarms (test results are not affected).