Construction (Verify Downstream Signals)
A typical PON Construction work flow might be to:
-
Inspect connectors
-
Use a light source + OPM to measure insertion loss.
-
Verify splitter loss.
-
Use a PON meter to measure live downstream wavelengths.
-
Compare readings to ODN design budgets.
The Construction feature is used during network build-out and cabinet commissioning to verify that downstream optical signals are strong enough and correctly routed before ONTs are provisioned. In these scenarios, the FX120 or FX120T (terminated OPM) checks downstream signals by verifying the PON ID/MAC ID and measuring power levels at each port. This process ensures minimal interruptions during installation and confirms that downstream signals are correctly delivered and documented for both construction and service activation phases.
Power measurements ensure:
-
The ODN meets the optical budget for GPON/XGS‑PON.
-
Splitters and splices were installed correctly.
-
No hidden high‑loss events exist before activation.
-
The network will support ONT registration without LOSi/LOAi issues.
Signal levels and ODN loss are automatically evaluated against ITU-T/IEEE standards or custom-defined thresholds, with results shown as Pass/Fail. When saved to a Flow® report, these results can be uploaded to VeEX VeSion R-Server, providing centralized visibility and audit tracking for the entire team.
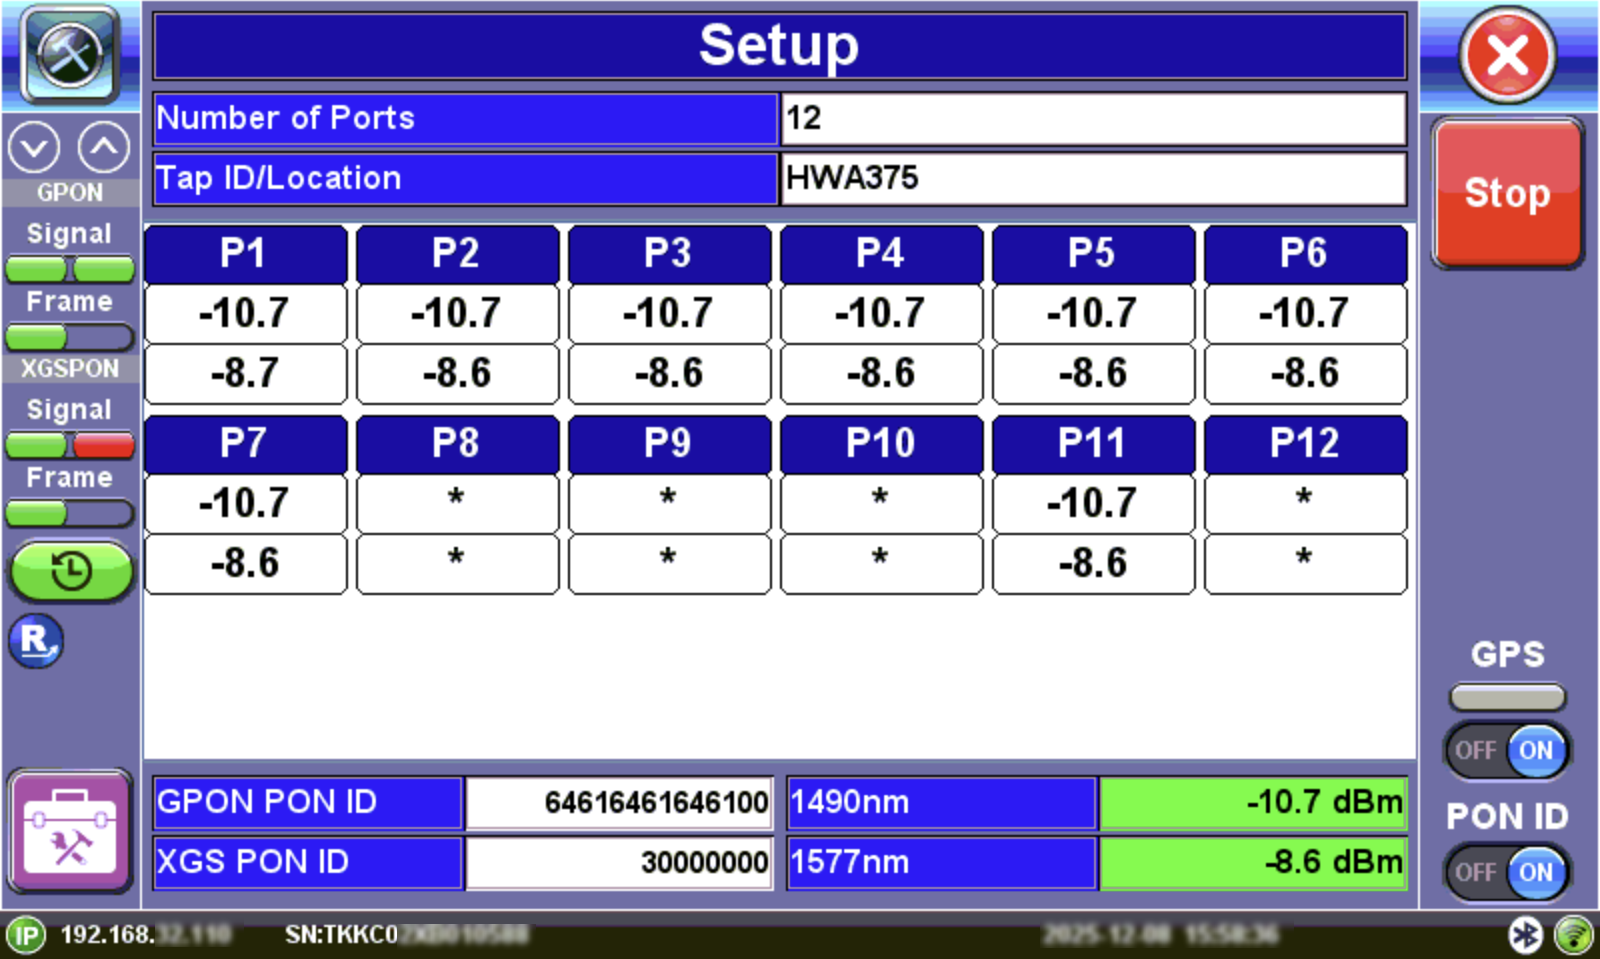
Construction Setup
Using the Construction Feature
-
On the FX120, press Tool > Construction.
-
Use a patchcord from the FX120 OLT port to the splitter port.
-
If connected to VX-Connect on a mobile device, toggle on GPS to record the geographical location of the tap in the results when the test is saved. Toggle on PON ID/MAC ID to see them next to the power levels. Refer to Capturing GPS Coordinates and PON ID/MAC ID.
-
Run the port analysis on the FX120 by pressing Start.
-
Tap the port to populate the field with the power level detected. The power level is displayed for both 1G and 10G for each port, depending on the network configuration.
-
When finished press Stop. Press the save button to save to test set. To save your results to a Flow® report, press
 Flow (only available when Construction Flow is enabled). Refer to Flow® Tests for details on creating a Flow® report and uploading to R-Server. Refer to Upload Profiles and Results to R-Server for details about R-Server.
Capturing GPS Coordinates and PON ID/MAC ID
The VeEX VX-Connect mobile application assists in connecting VeEX test sets to a network using a mobile device's hotspot feature to effectively manage jobs and upload test results.
When connected the mobile VX-Connect app, GPS coordinates are saved to test results and uploaded to R-Server. This ensures results are shown for the correct location.
-
Download the VX-Connect app onto a mobile device.
-
On the FX120, press Tool > Construction.
-
If needed, choose to save or not save previous results to clear screen.
-
Connect/Pair the VX-Connect app to the PON analyzer. The GPS LED appears green when connected.
-
After connecting to the PON analyzer, the GPS/PON ID/MAC ID switches should toggle ON automatically. If they do not, manually toggle ON GPS and/or PON ID/MAC ID.
-
Press first port to be measured. If the switches are toggled ON, then the GPS coordinates and PON ID/MAC ID are captured and will be shown on test results.
-
When finished press Stop. Press the save button to save to test set. To save your results to a Flow® report, press
Flow (only available when Construction Flow is enabled). Refer to Flow® Tests for details on creating a Flow® report and uploading to R-Server. Refer to Upload Profiles and Results to R-Server for details about R-Server.
|
|
 If the connection to VxConnect is lost while capturing downstream measurements, any GPS coordinates that were previously captured will still be saved with test results. However, if the GPS and PON ID/MAC ID switches are toggled OFF before saving results, they will not appear.