Traces Tab
After running a test, select the Traces tab to view the active or measured OTDR traces. The color-coded blocks represent the corresponding trace viewed in the OTDR display. The OTDR can display up to ten traces simultaneously (i.e., an active trace and nine additional traces).
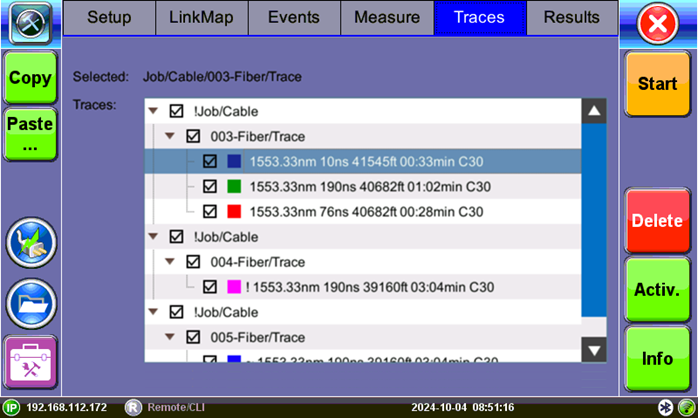
Traces tab
Traces are displayed along with the name, pulse width, distance range (LMax), and acquisition time used for the test. To view any trace, select the file(s) using the check box. All selected traces will be overlaid and can be viewed using the Results/Traces tabs.
Trace Properties
The traces in the memory are saved in BELLCORE, version 2.0 format. The OTDR trace files have the extension .SOR which means Standard OTDR Record.
If the measurement was performed at several wavelengths simultaneously, the traces are saved as a group i.e. they will share the same common name but with wavelength added (e.g. 01_meas_1310, 01_meas_1550).
To edit information for an already measured trace, tap the Information button on the right sidebar to open the Trace Information window, containing the following information relating to the saved file:
- Device: OTDR supplier name, Mainframe ID and serial #, and optical module serial # (if applicable)
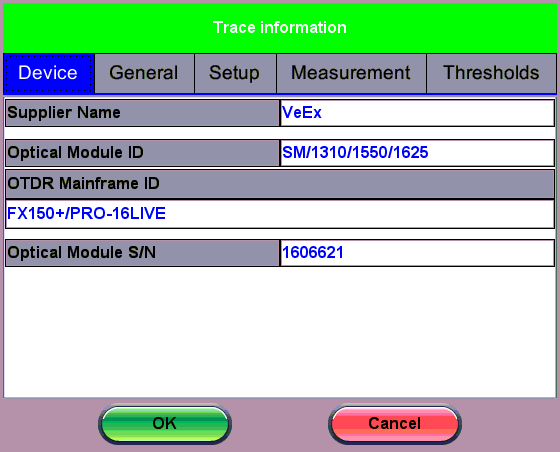
Trace Information - Devices
- General: Date/Time, Job ID, Cable ID, Fiber ID, Group ID, Fiber Type, Originating/Terminating locations, and Comments
- Setup: Profile, Measurement Mode, Network Type used to make the measurement.
- Measurement: Test parameters used to make the measurement.
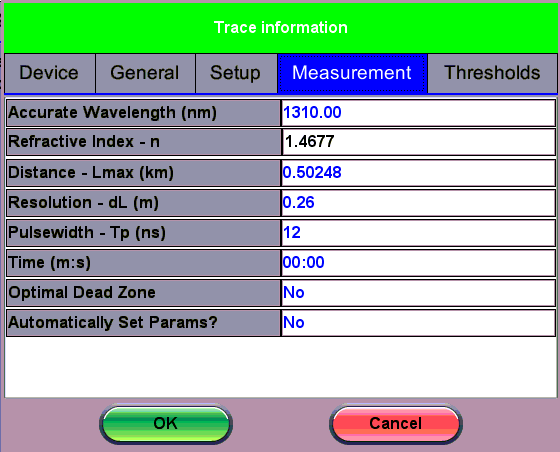
Trace Information - Measurement
- Thresholds: Analysis thresholds used to analyze the trace, as well as PON identification for link map.

Trace Information - Thresholds
 For more information on Span settings and Launch/Receive cable offset, see Span Settings.
To edit the Refractive Index (RI) and Backscattering Co-efficient (BC) for an already measured trace:
- Select the trace you want to edit, then tap the Information button.
- On the Measurement tab, change the RI as needed.
- In the Thresholds tab, change the BC as needed.
- Tap OK to apply changes. All changes will be applied immediately.
- After carefully noting the JobID/CableID/FiberID/TraceID fields, save the trace. The Job/Cable/Fiber/Trace determine the location to which the trace is saved. For multi-wavelengths/multi-pulsewidths, edit trace separately.