Software Update Process
![]() Back up all the test results and test profiles before performing software upgrades. Refer to Working with Saved Results, Profiles, Images.
Back up all the test results and test profiles before performing software upgrades. Refer to Working with Saved Results, Profiles, Images.
Step 1: Download Software
Download the software from www.veexinc.com any of the following ways:
-
Go to the >Support > Software Updates (https://www.veexinc.com/support/software) and enter the first four characters of the product's serial number, to obtain the software installer package specific to the product.
-
Enter the full product name in the Search box, click on the Software section to expand it, and download the appropriate software installer package.
-
Go to >Products, then click on >Product Finder or >Product List, to access the product's page. The links for the software installer package and release notes are under >RESOURCES.
Step 2: Unzip File
Unzip the downloaded file(s) to the file. The resulting install file should end in .tar.
![]() Do NOT uncompress them any further.
Do NOT uncompress them any further.
Step 3: Prepare Test Set
Power down test set, connect it to the AC/DC power charger, and plug in the power cord. The unit must remain connected to the AC/DC charger during the entire update process.
Step 4: Install Update
Install the update in one of the following ways:
A) Install update from USB memory stick.
-
Copy unzipped .tar file to the root directory of a FAT32 USB memory stick.
-
On the powered down test set, plug the USB memory stick into a USB-A to micro-B USB OTG adapter and connect the adapter to the test set's micro-B USB port.
-
For a clean install (clears data and settings), press and hold the
 and
and  buttons.
  and buttons.
A clean software update will erase all user settings, test profiles and saved results. Use the USB Memory Browser in the >File Manager to back up all data prior to performing a clean software update.
-
Wait until the test unit beeps, then release the buttons to begin the update.
-
After the update process finishes, the test set reboots automatically.
B) Install update via Web Remote.
![]() PCs and reliable wired connections are recommended for this task. In DHCP environments, the remote test set may get a different IP address after a reboot (static or reserved IPs are recommended).
PCs and reliable wired connections are recommended for this task. In DHCP environments, the remote test set may get a different IP address after a reboot (static or reserved IPs are recommended).
-
Make sure the test set is ON and connected to a LAN, WLAN (WiFi), or configured as a WiFi access point (AP Mode). Refer to WiFi Wiz.
-
Open a web browser and enter the test set’s IP address into the address/search field (e.g., 192.168.0.113). The test set’s current IP address is usually displayed on the bottom- right corner of the screen. Refer to Remote Access for more information about connecting via Remote Access.
-
Once the test set’s Web Remote Access page loads, select Upgrade on the left side of the browser window.
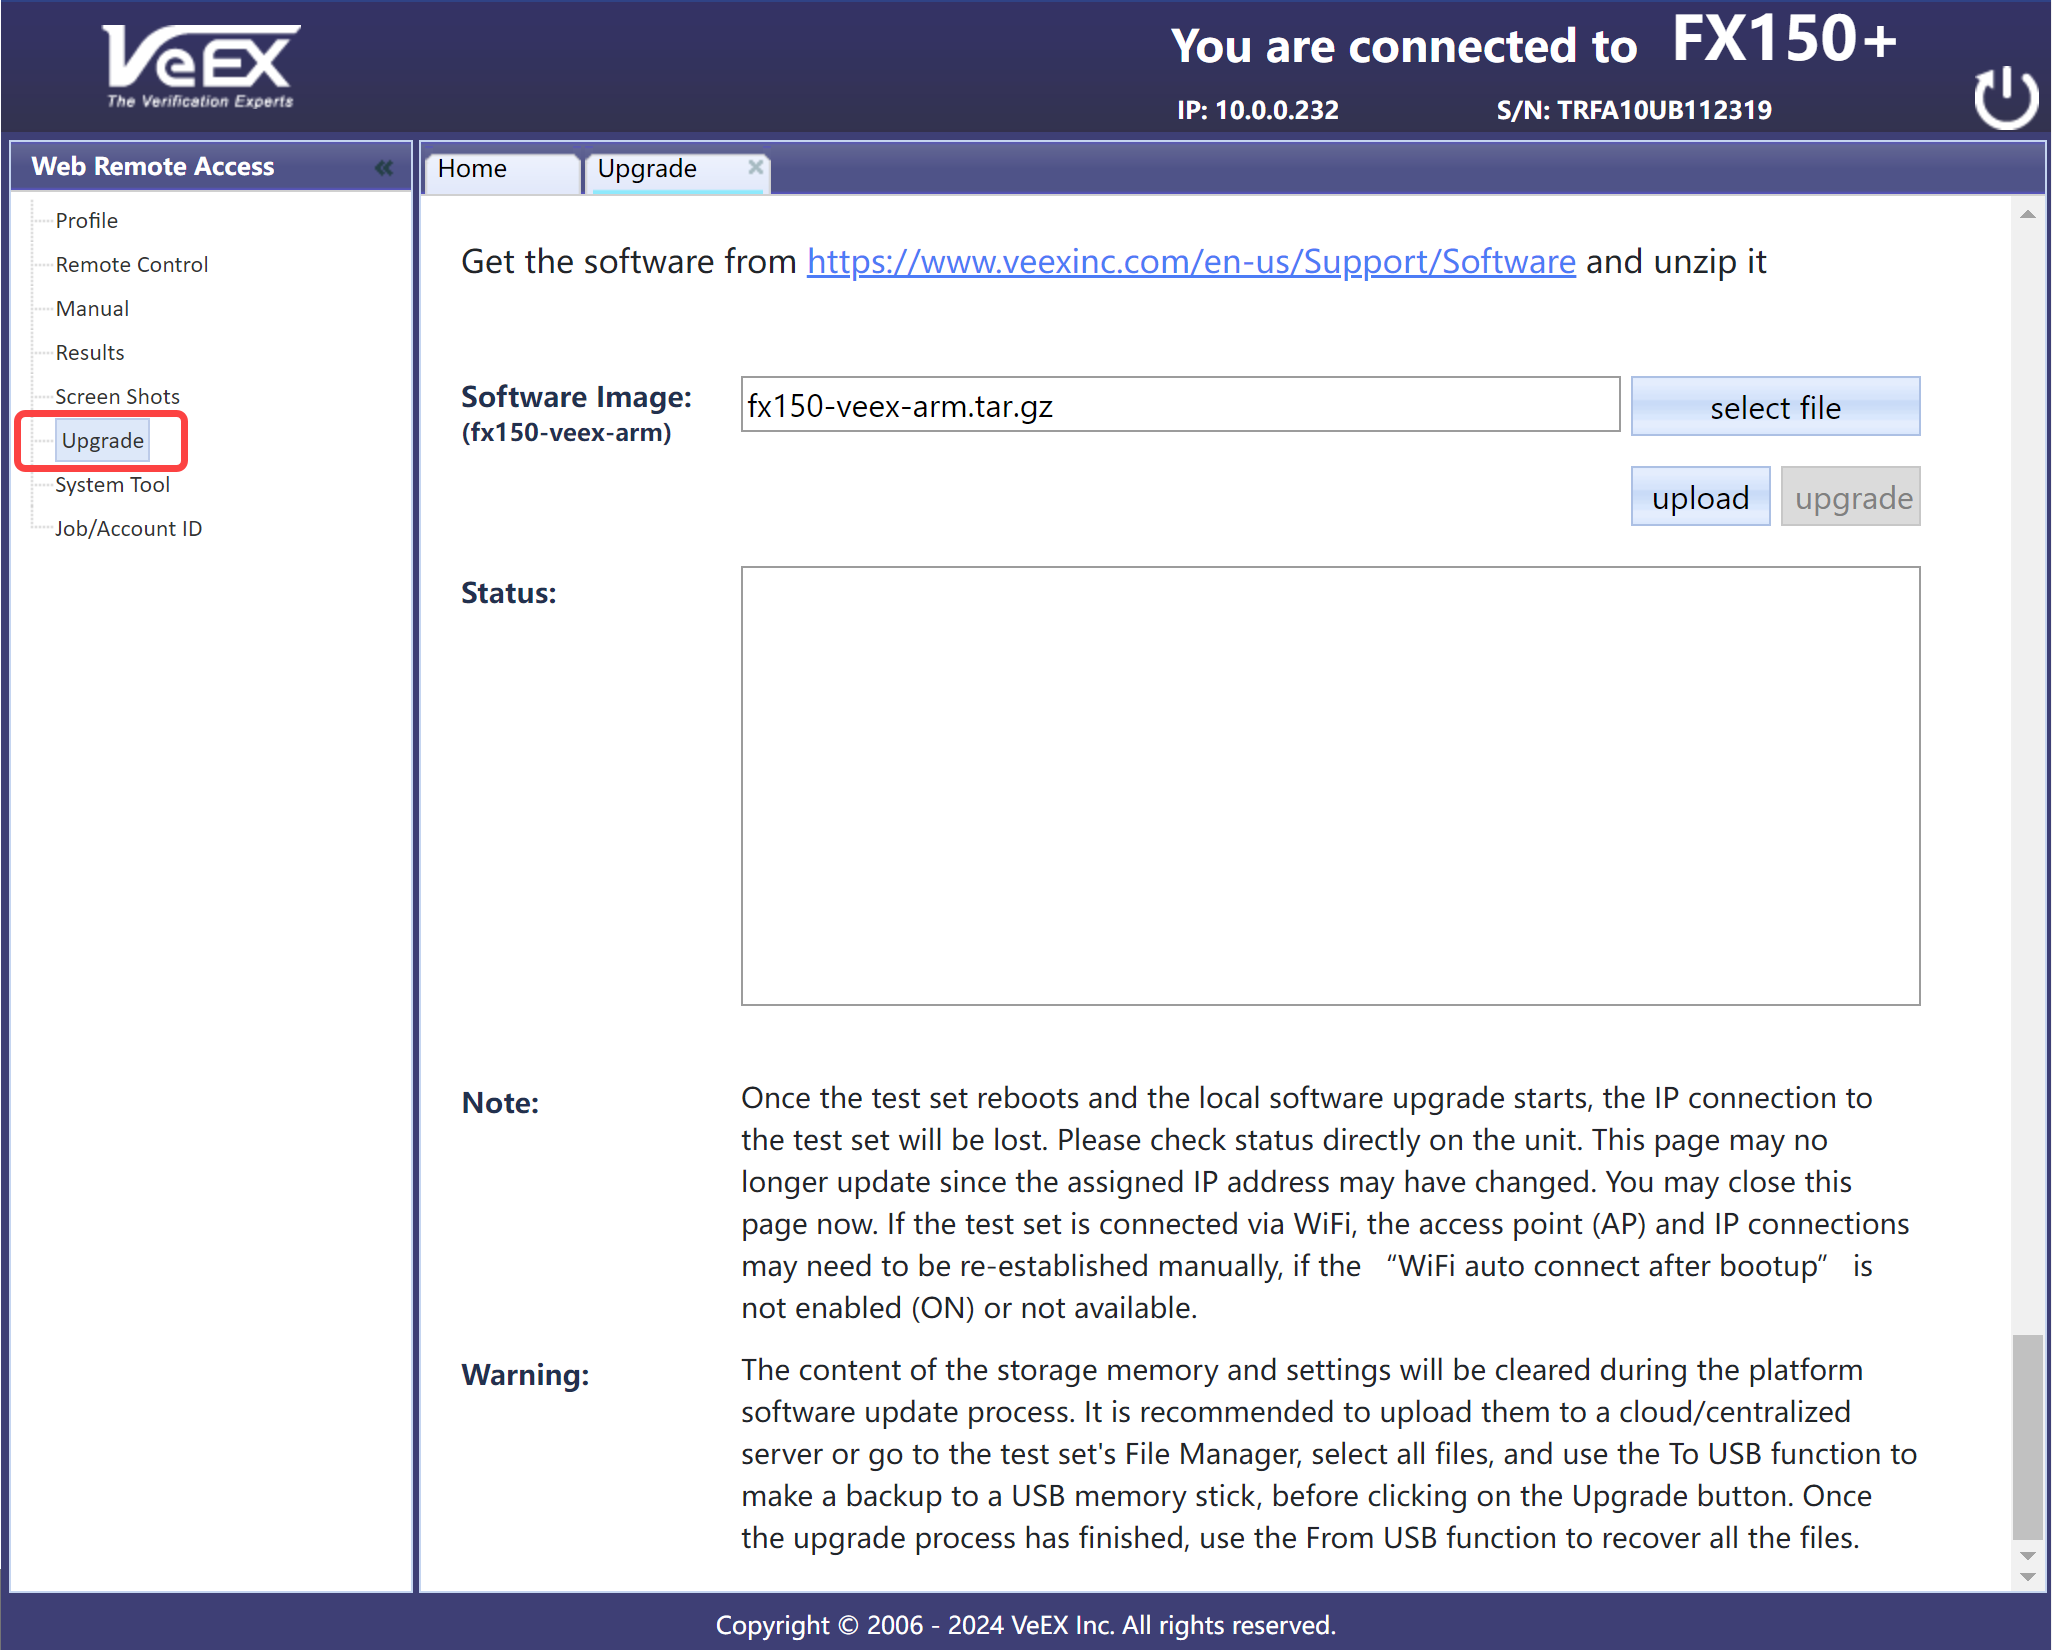
Web Remote - Upgrade option -
Click Select File and use the file browser to point it to the appropriate .tar file previously unzipped in Step 2.
-
Click Upload to transfer the .tar file to the test set. Depending on the file size and connection speed, this may take a few minutes.
-
After the file upload is complete, click Upgrade. If a reboot warning message is shown, click OK. Let the test set go through the process, uninterrupted. This will take a few minutes. If the file verification fails, due to link or transmission errors, try uploading it again.
-
Additional ROOTFS and/or low-level CPLD upgrade notifications may be presented, on the test set screen, after the reboot. Tap OK to proceed with these updates.
-
Reboot the test set, if required.
Step 5: Confirm Software Version
After the software upgrade is completed, go to the Utilities >Settings >About menu to confirm the software version.
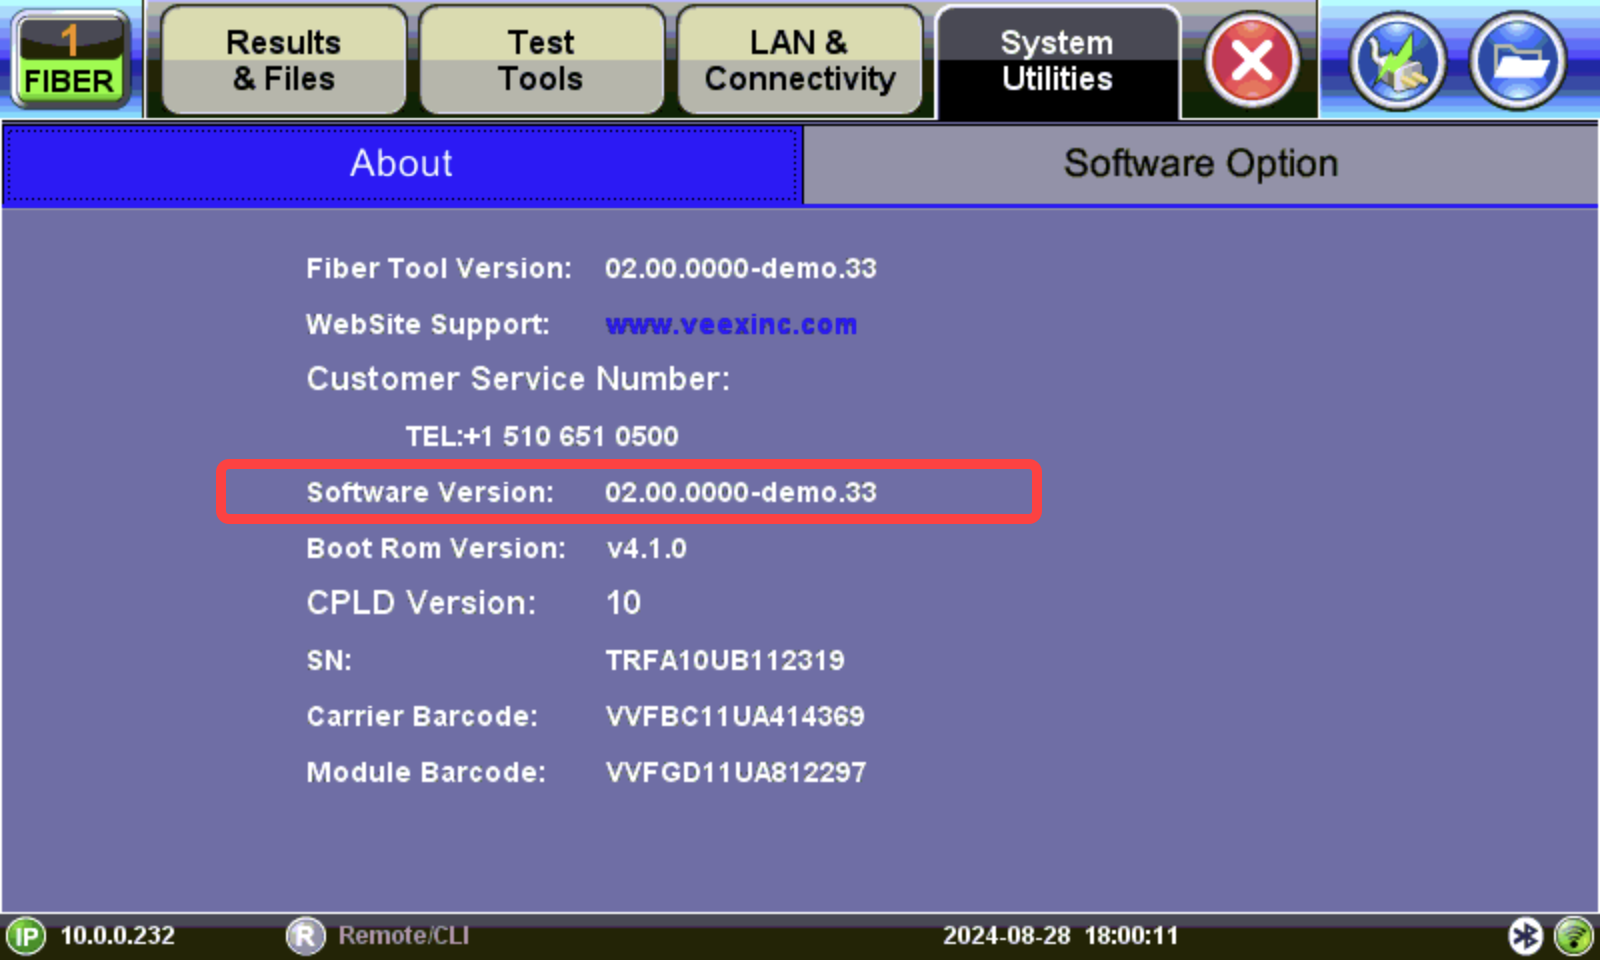
Software Version is displayed in the About section.