PFP Splitter Power
The PFP Splitter Power analysis provides a way to measure insertion loss for every fiber strand in sequence and readings saved and loaded later, if needed. The process is secured with a graphical display, limiting the risk of errors.
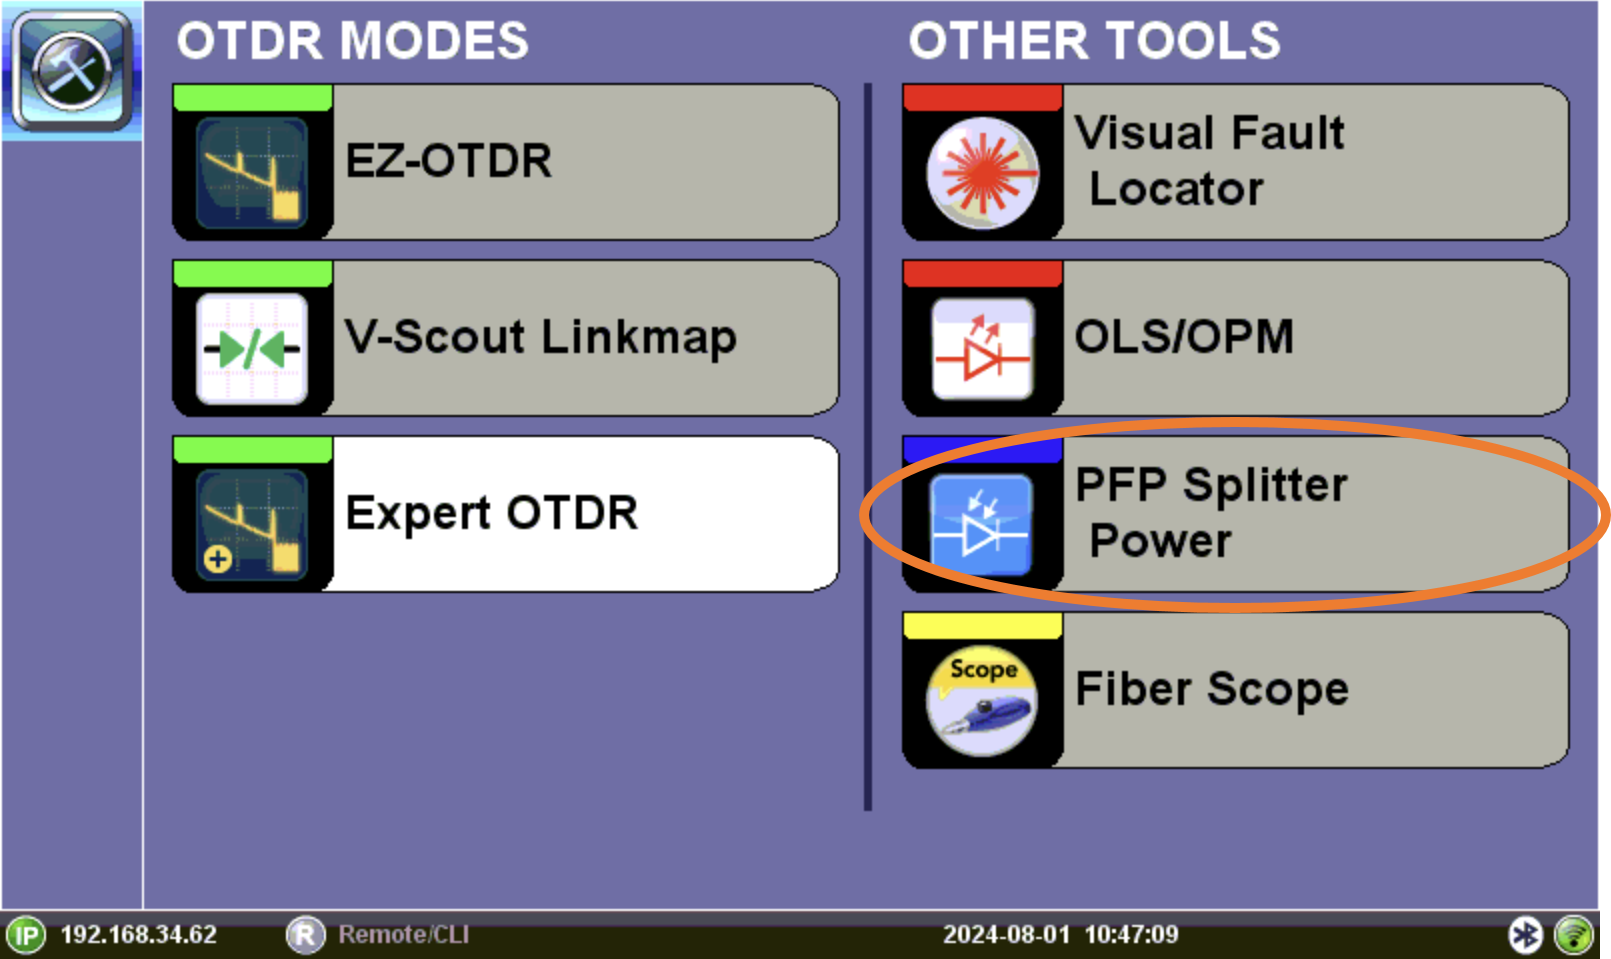
PFP Splitter Power analysis option
Process
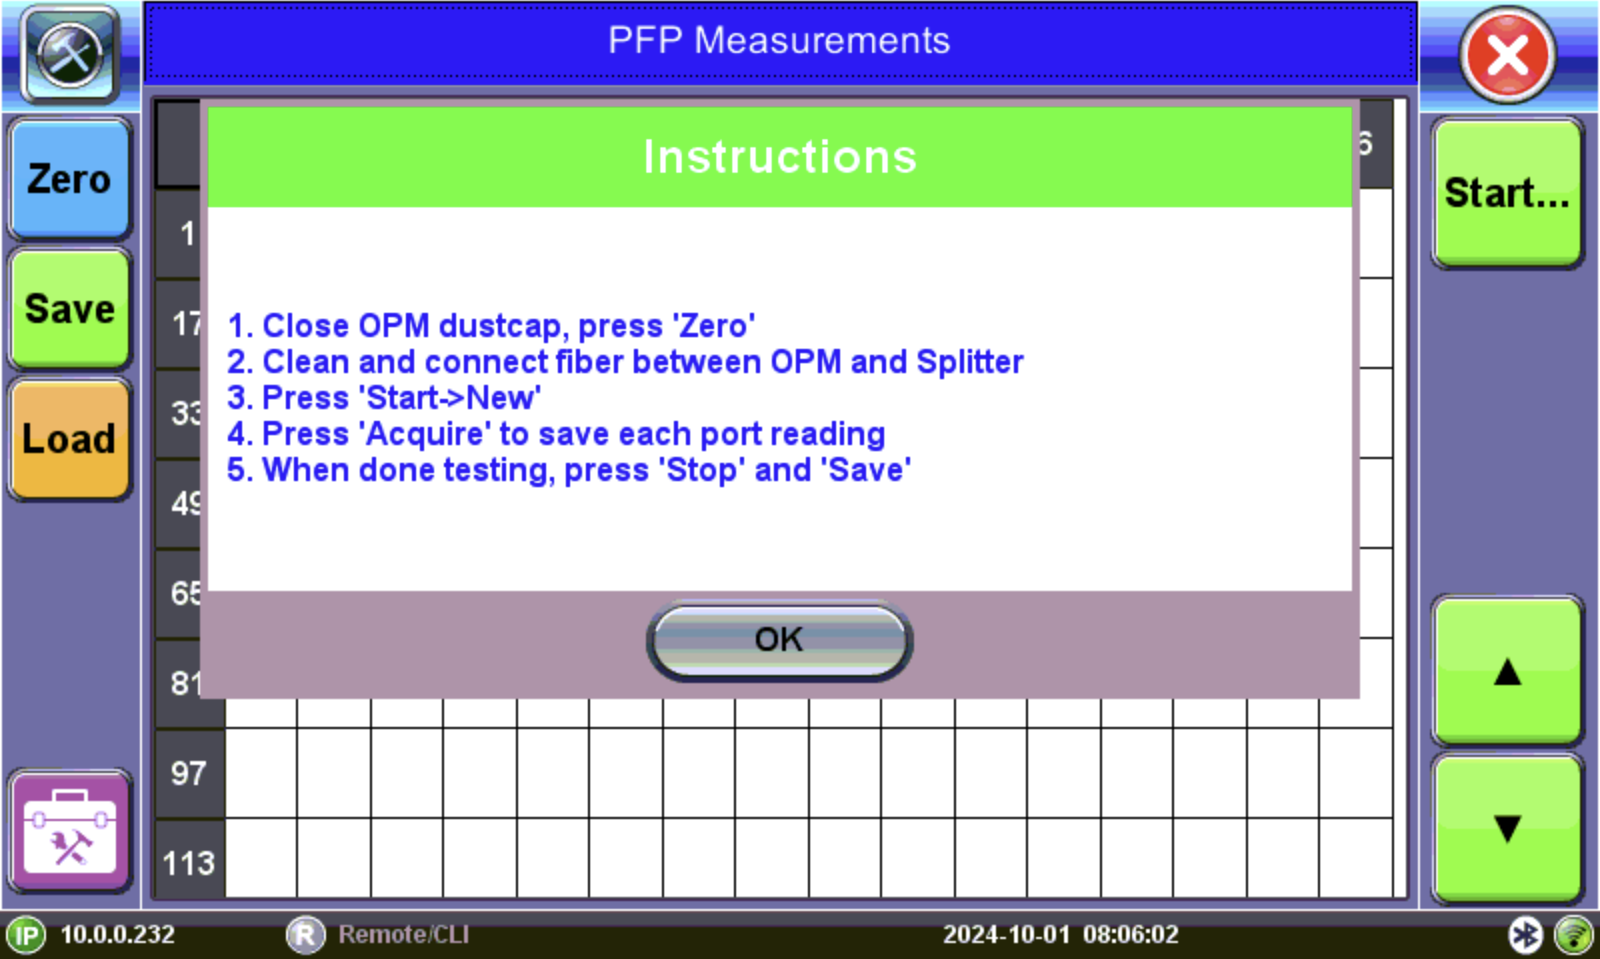
PFP Splitter Power Introduction Screen
To use the PFP Splitter Power Analysis feature:
-
Close the dust cover tightly to the OPM port.
-
On the test set, press PFP Splitter Power and then on the Introduction box tap OK.
-
Press Zero. This recalibrates the OPM to treat current conditions as zero and is used before making measurements or when conditions change significantly e.g, when there are sudden temperature changes.
-
Thoroughly clean the pathcord connector. For instructions, see "CLIC" - Clean to Maintain Optical Connector Quality.

Dirty connector end-faces are often the number one cause of poor performance, link failures and even connector damage. CLean and Inspect your Connectors (CLIC) as it is important to keep the end face clean and un-blemished to prevent excessive loss and return loss.
-
On the test set, press Start and then press New.
-
Test splitter output port, tap corresponding panel port # and then press Acquire to log the power measurement.
-
After completing the power measurement for the last strand, press the Stop button and then press Save to end the test and save the results or Stop to stop the test without saving the results. Pressing Save will generate a POPM file containing the information collected for the splitter/cabinet. Refer to Working with Saved Results, Profiles, Images for details on exporting the POPM file.
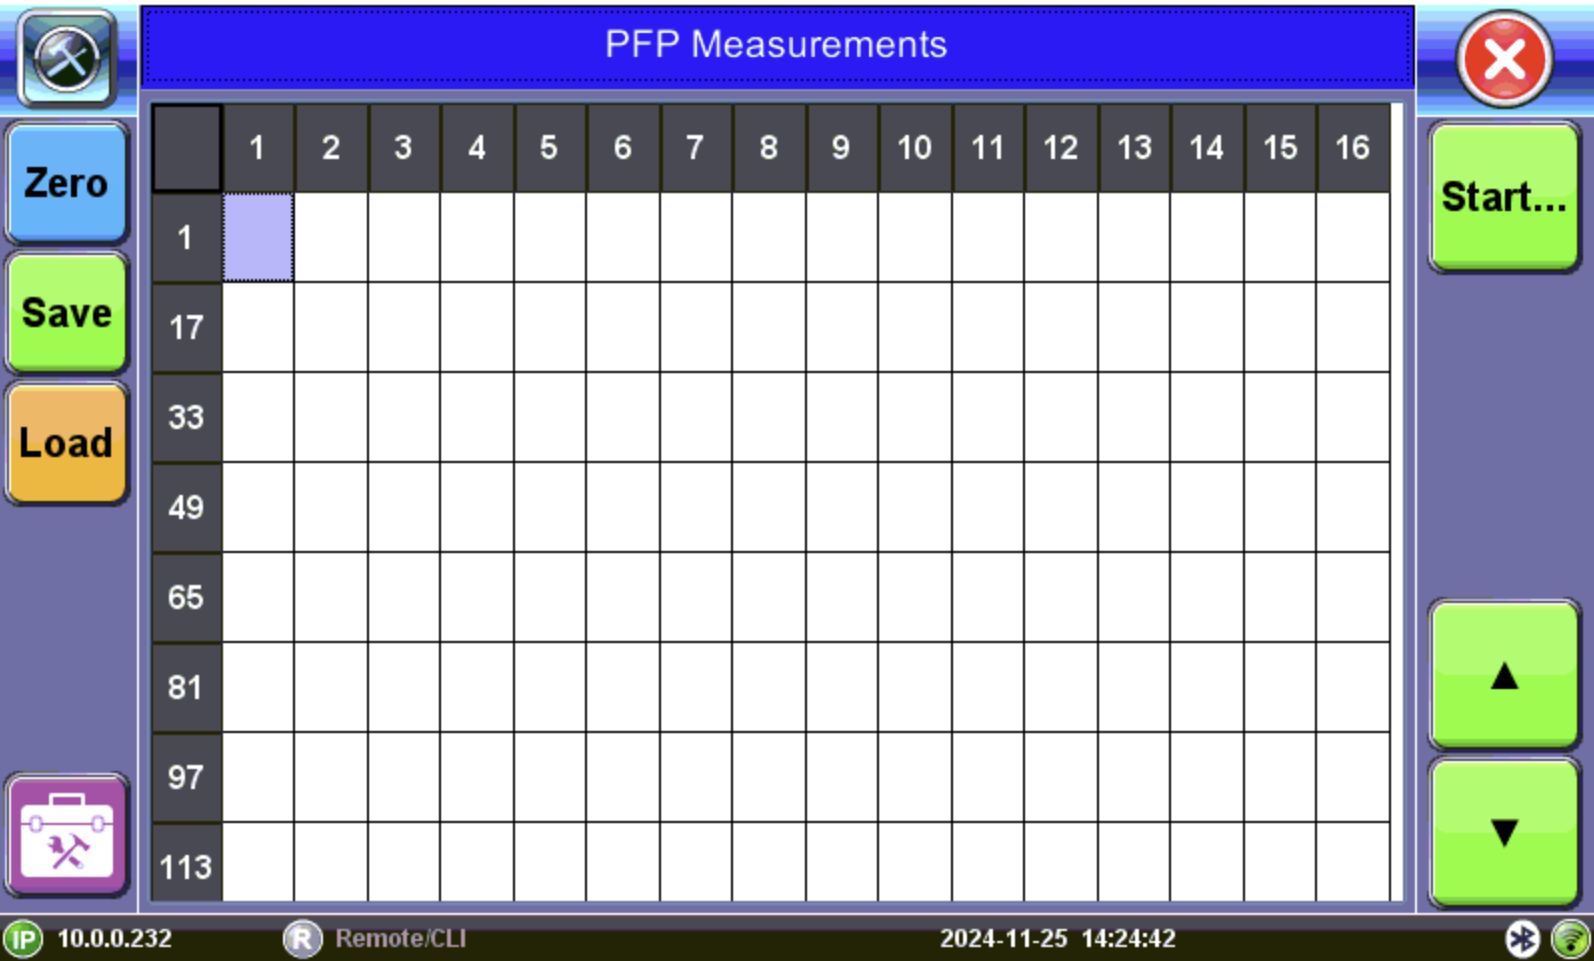
PFP Measurements
PFP Measurements
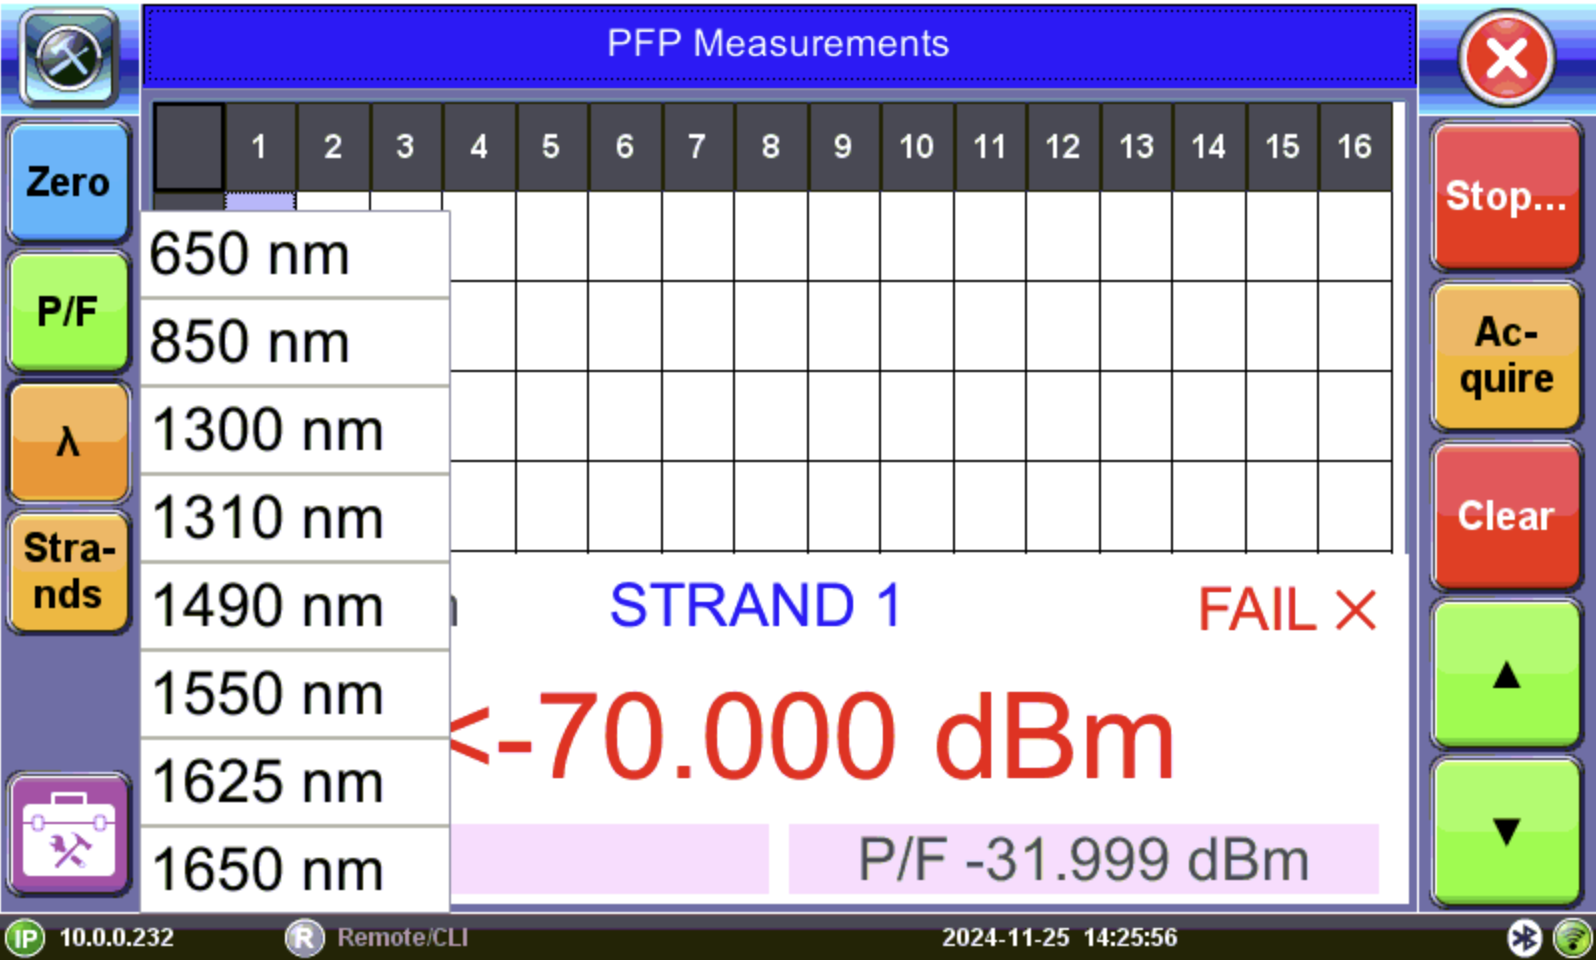
Wavelength Selection

Put the cover over the OPM test port BEFORE recalibrating.
-
Save: Saves all acquired test results to a file.
-
Load: Loads previously saved test results.
-
Start: Begins a new test or resumes and earlier test.
-
Up/Down: Selects an active cell.
-
P/F: Sets the threshold for pass/fail indicator.
- Wavelength: Matches the calibrated wavelength to the signal being measured.
-
Strands: Sets the first and last strand # to test.
-
Stop | Save/Stop: Save creates a test file to save all cell results. Stop ends the test without saving cell results to a file. The next time the application is opened, previous cell results will be reloaded into cells.
- Acquire: Loads current measured value into the Table cells. The Table cells indicate pass/fail and how many new records have been temporarily saved into memory. The Acquire button must be used to capture each individual reading.
-
Clear: Clears content from a cell.
Results
Results can be saved to the test set POPM file and exported to USB. Refer to Working with Saved Results, Profiles, Images.