Results Tab
The Results tab is used to view previously saved OTDR test results. OTDR traces can also be manually saved using the Results tab.
The traces are saved in the following folder directory hierarchy:
- Job ID
- Cable ID
- Fiber ID
- Results – Traces
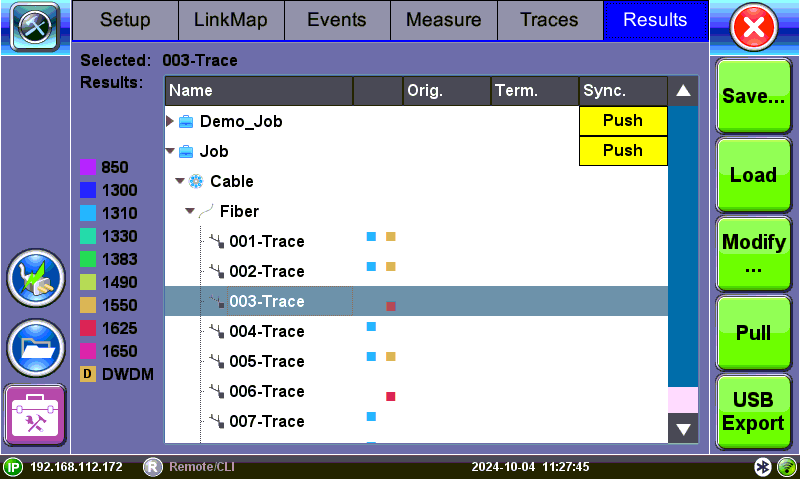
Results tab
To expand the selection or folder directory, tap on the arrow. An arrow pointing to the right indicates the branch is collapsed whereas an arrow pointing downwards indicates the branch is expanded.
To push test results to your Fiberizer Cloud account, select the Push command for the folder that you wish to upload to the Cloud. Refer to Fiberizer Cloud.
- Save: Manually enter details when saving results or save using details entered in the autosave settings menu.
- Load: Displays selected trace for active viewing.
- Modify: Renames or removes selected file.
- Pull: When connected, pulls file from Fiberizer Cloud onto test set.
- USB Export: Exports selected test results to USB stick using the "MyVeEX" tree directory format or a flat file when all files should be saved in a single folder. The files can be found on the USB stick in the OTDR Export folder.
![]() Alternatively, access and export files to a USB memory device by tapping Utilities>Files>Saved, then To USB. Each trace will be saved in a separate file folder.
Alternatively, access and export files to a USB memory device by tapping Utilities>Files>Saved, then To USB. Each trace will be saved in a separate file folder.
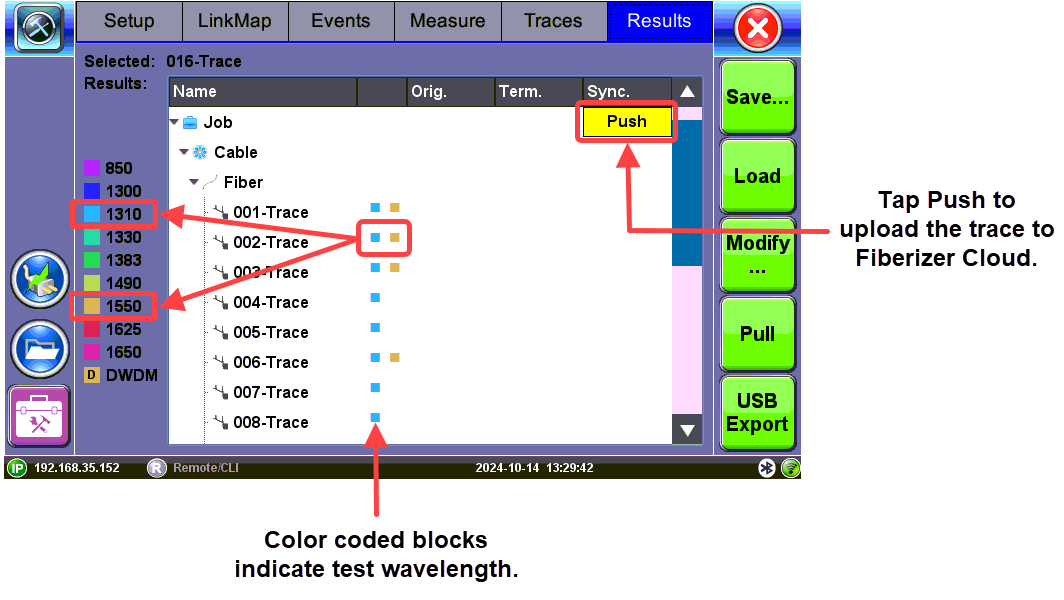
Results tab: Wavelength/Trace
Saving OTDR Traces
Configure Autosave in the Setup screen or save OTDR traces manually from the Results screen. The Autosave options can also be configured from the Results screen. (See Autosave Parameters.)
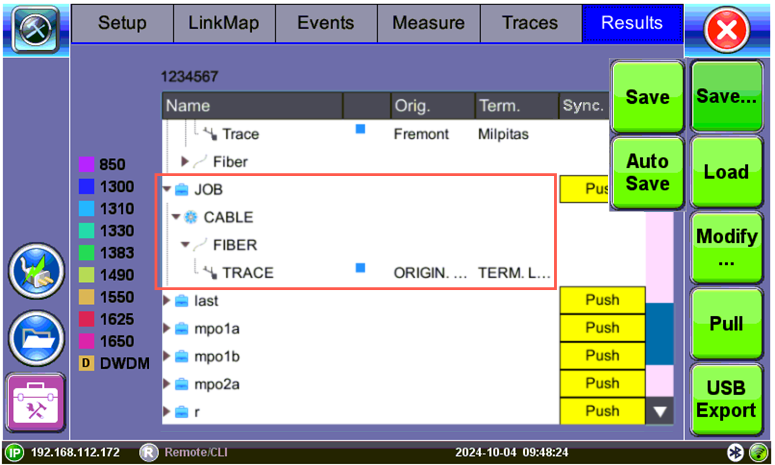
Results tab: Save options
The traces are saved in the following folder directory hierarchy:
- Job ID
- Cable ID
- Fiber ID
- Results – Traces
|
|
To save Traces:
- On the Results tab, select the trace you want to save.
- Click Save, then click Save. The Result Saving window appears.
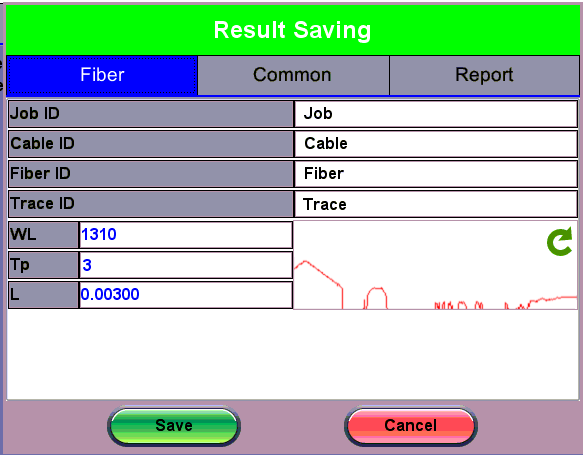
OTDR Traces: Result Saving Window
- If needed, change the default information on the tabs and enter a filename in the Traces ID field. Then, click Save.
To view or print reports, use the File Management feature or one of the Fiberizer software applications.
Third Party Viewers
When third party viewing is checked, the OTDR saved results include a filter so that third party software will display OTDR traces identical to how VeEX test sets display them.
|
|
To save a trace for third party viewing:
- In the Results tab, tap Save. The Result Saving window appears.
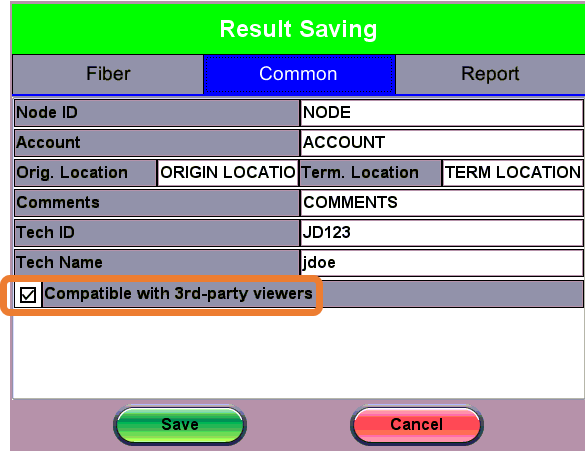
OTDR Trace: Saving file for Third Party Viewer
- Select the Common tab, and then check the Compatible with 3rd-party viewers checkbox.
- After making any other changes, as needed, click Save.
To view and print test reports, refer to OTDR Test Reports.