Software Update Process
 Back up all the test results and test profiles before performing software upgrades.
Download the installer package provided by VeEX and unzip (uncompress) the
 The computer may identify it with a compressed folder icon; however, there is no need to further uncompress it.
Using a Web Browser
-
Verify that the test set's battery has >50% charge, it is connected to its charger, and charging. The unit must remain connected to the AC/DC charger during the entire update process.
-
Establish a LAN or WLAN (Wi-Fi) connection using a USB Wi-Fi dongle, and note the test set's IP address.
-
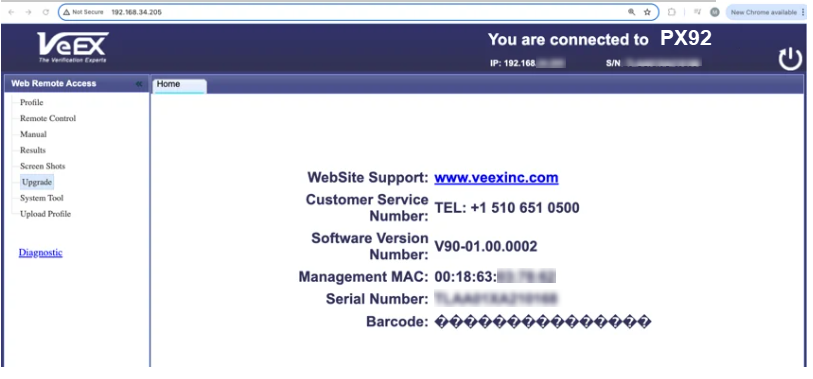
On a computer, connected to the same network, open a web browser and point it to the test set's IP address, to open its Web Remote Access page.
In DHCP environments, the remote test set may get a different IP address after a reboot (static or reserved IPs are recommended).
-
Select Upgrade from the left menu.
-
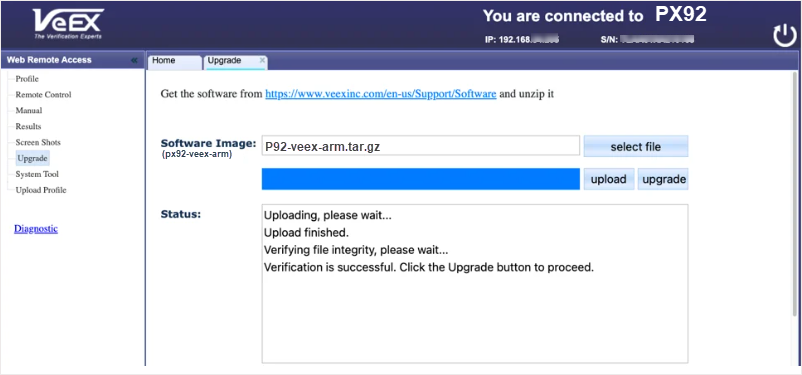
Tap the Select File button and use the file browser to select the uncompressed installer package, then select Upload to transfer it to the test set. Depending on the file size and connection speed, this may take a few minutes.
-
Once the file upload has finished and has been verified, click the Upgrade button, then select OK to start the software update process in the test set. Let the test set go through the process, uninterrupted. This will take a few minutes. If the file verification fails, due to link or transmission errors, try uploading it again.
-
The test set may reboot multiple times during the process.
 DO NOT turn the test set OFF until the software update process has finished.
-
After the software upgrade is completed, confirm the software version on the About screen.
Using USB Memory Sticks
-
Verify that the test set's battery has >50% charge, it is connected to its charger, and charging. The unit must remain connected to the AC/DC charger during the entire update process.
-
Copy the
-
Insert the USB-C memory stick into the test set. (If using a USB-A memory stick, use the USB-A to USB-C adapter.)
-
Go to System Settings and locate the Upgrade icon. Once the unit detects the image, the Upgrade icon becomes active. Tap the icon, and the system will automatically identify the newer version. Tap Upgrade to initiate a software upgrade. The test set may reboot multiple times during the process.
DO NOT turn the test set OFF until the software update process has finished.
-
After the software upgrade is completed, confirm the software version on the About screen.
Using R-Server
-
Verify that the test set's battery has >50% charge, it is connected to its charger, and charging. The unit must remain connected to the AC/DC charger during the entire update process.
-
Select Cloud Services and register the test set, if needed.
-
In Cloud Services/R-Server, swipe left until the Software screen is displayed. If new software is available, NEW will be shown next to the software version.
-
Select the update file, then at the bottom select
 Upgrade. Depending on the file size and connection speed, this may take a few minutes. The new version of the software will download to the test set from R-Server and begin the update process. Let the test set go through the process, uninterrupted. This will take a few minutes. After the update process finishes, the test set reboots automatically.
 -
The test set may reboot multiple times during the process.
DO NOT turn the test set OFF until the software update process has finished.
-
After the software upgrade is completed, confirm the software version on the About screen.