Switch Control
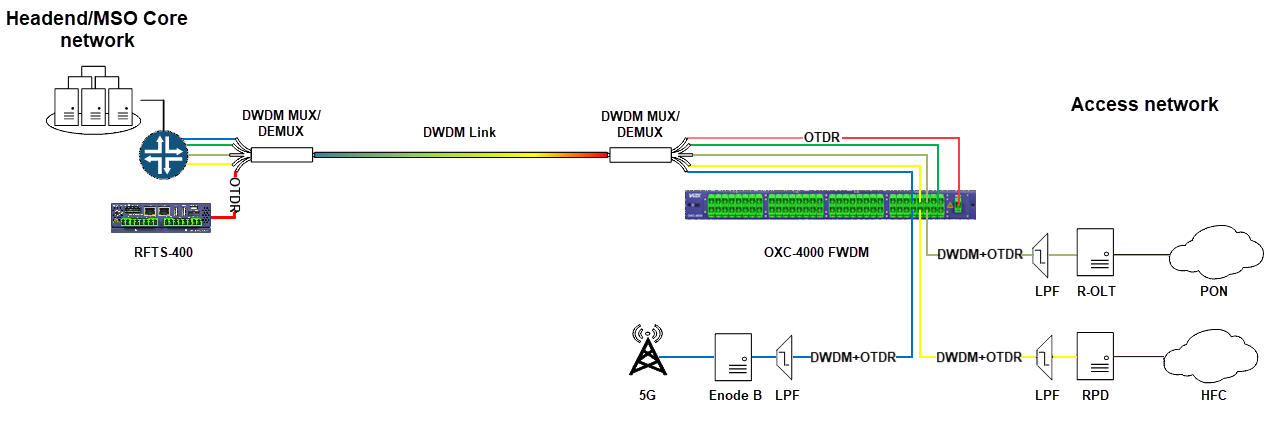
One OCM control module can control up to 4,608 ports. The system creates a cascade between the test port on the OTDR module and the input on the first layer switch.
There are two switch types compatible with the RFTS-400:
-
RFTS-400 OSM: The OSM switch provides a space effective and high port density RFTS solution. The can be up to 108 LC ports in 1U.
-
OXC-4000: These series switches can be placed in a different location from the RFTS-400 OCM. This is important for greenfield networks and network construction monitoring.
For information on installing OSM switch hardware, see Adding OSMs (Optical Switch Modules).
Add a Switch
OSM Switch
-
Select the OCM port that will be connected to the MON port of the OSM and click Add OTAU. The identification number for the OSM is determined by the port number of the OCM.
-
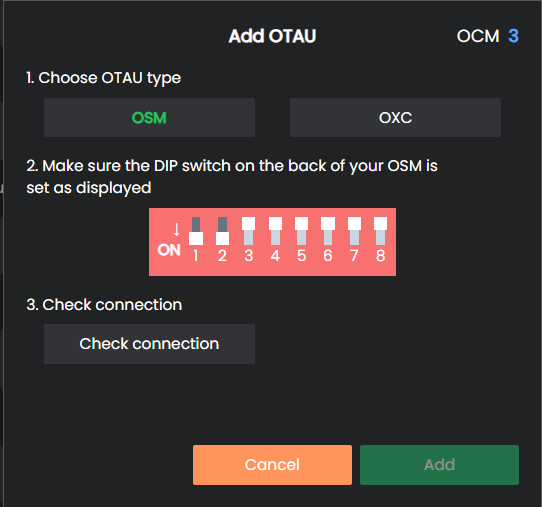
On the Add OTAU screen, choose the OSM switch type and click Add.
-
Ensure that the Optical Switch Module (OSM) has the matching switch ID as displayed in the User Interface (UI).
-
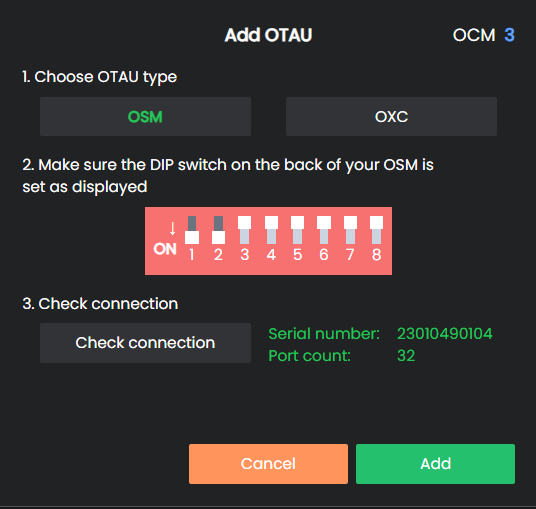
Click Check connection to confirm the communication status between the Optical Switch Module (OSM) and the Optical Control Module (OCM). Ensure that the system reads the OSM port count and the serial number by verifying that both values match the newly added OSM module.
-
Select the Add button to create and store the new optical switch cascade configuration.
![]() The OSM module ID is a logical address used by the OCM for signaling exchanges between the OCM and any particular OSM. This ID is independent of the physical OSM position or control wiring sequence (daisy-chain order).
The OSM module ID is a logical address used by the OCM for signaling exchanges between the OCM and any particular OSM. This ID is independent of the physical OSM position or control wiring sequence (daisy-chain order).
OXC-4000 Switch
-
On the Add OTAU screen, choose the OXC switch type.
-
Enter the IP address for the switch and select Check connection to confirm the communication status.
-
Once confirmed, select Add.
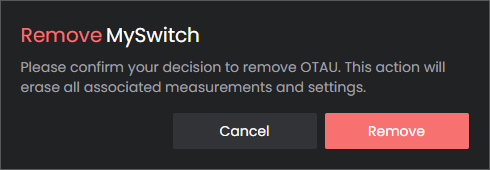
Remove a Switch
To remove the switch from the cascade, select Remove OTAU and click Remove.
![]() When there is more than one switch connected to the same OTDR, it might be difficult to find the correct one if needed. Click the side bulb icon to make it blink so the switch is more noticable.
When there is more than one switch connected to the same OTDR, it might be difficult to find the correct one if needed. Click the side bulb icon to make it blink so the switch is more noticable.