Cloud Services

|
Swipe down from the top of the screen to reveal the System, Settings & Tools menu, then tap the |

Part of VeEX’s VeSion centralized monitoring and management solutions, the VeSion R-Server™ Workflow and Asset Management system provides crucial tools to manage fleets of technicians, test equipment, standardized test profiles, thresholds, centralized test results collection, reporting, jobs/ticketing, and software update delivery to create coordinated and efficient disciplined workforce and test procedures. R-Server enhances the workflow to achieve the level of quality and repeatability required by telecommunications service providers, MSOs and their contractors. The flexible R-Server can be deployed in cloud, hosted, and corporate networks, on physical or virtualized servers.
Supervisors can preset and upload test parameters which are provided to the test sets as profiles. Technicians can download profiles, run tests, and upload results to a centralized system that stores and secures the data.
Registration Requirements
A test set must be registered to an R-Server before it can upload results. If it is not registered, a reminder message will appear when attempting to upload.
When the Server Address/URL field contains a valid R-Server address, the test set automatically checks its registration status when opening the
If the status is unknown or needs to be refreshed, press  Check on the R-Server screen.
If the unit is not registered, complete the registration steps below.
Registering the Test Set
-
Open
- Contact the R-Server administrator and/or supervisor for the IP address/URL of the R-Server and required information.
-
Enter the following fields:
-
Server Address/URL: R-Server IP address or URL
-
Tech ID: Registered technician ID
-
Tech Name: Registered technician name
-
Company: Company name
-
Supervisor ID: Supervisor ID (ties the test set to the correct organizational group/Org Chart)
-
-
Press
 Register to submit the registration request. A confirmation message appears when the request is successfully submitted.
 -
The R-Server manager must authorize the registration before access is granted.
-
After approval, an authorization message appears the next time
Unregistering the Test Set
-
Press
 UnRegister. The first press moves the test set into Inventory Management.
 -
Press
UnRegister again to remove the test set from the R‑Server account completely.
Uploading Results to R-Server (from Cloud Services App)
-
Open
-
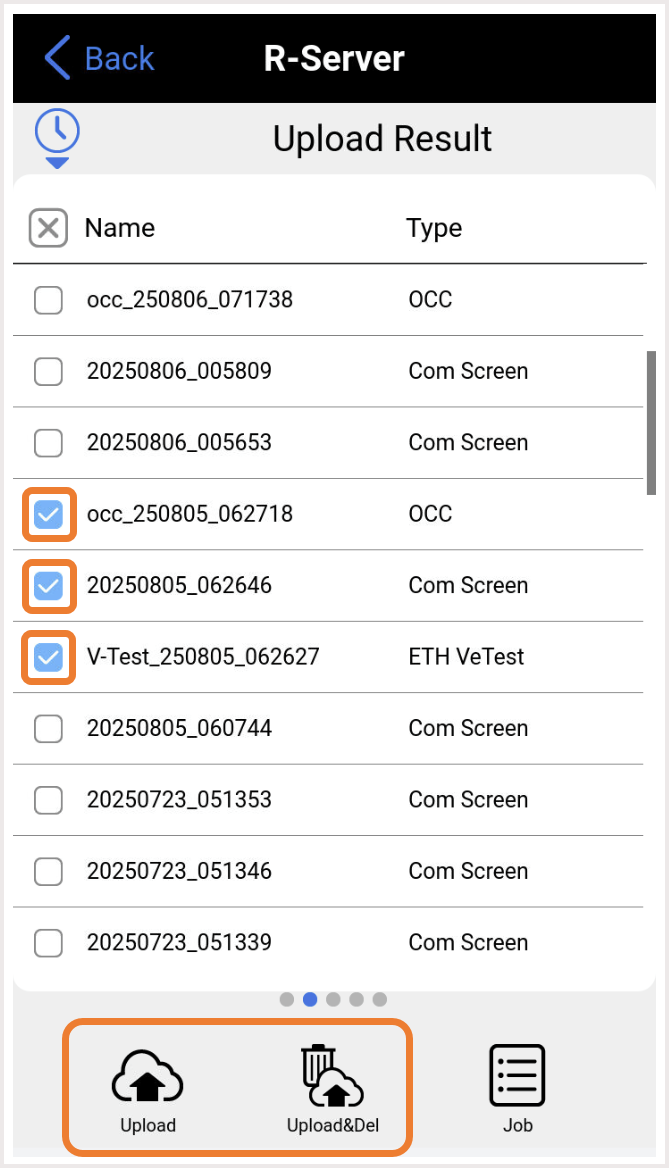
Swipe left to the Upload Result screen, then select the files to upload.
-
Choose one of the following:
-
 Upload: Transfers the selected result file(s) and keeps them on the test set.
 -
 Upload&Del: Transfers the file(s) and deletes them from the test set after upload.
-
Uploading Results to R-Server (from Files App)
-
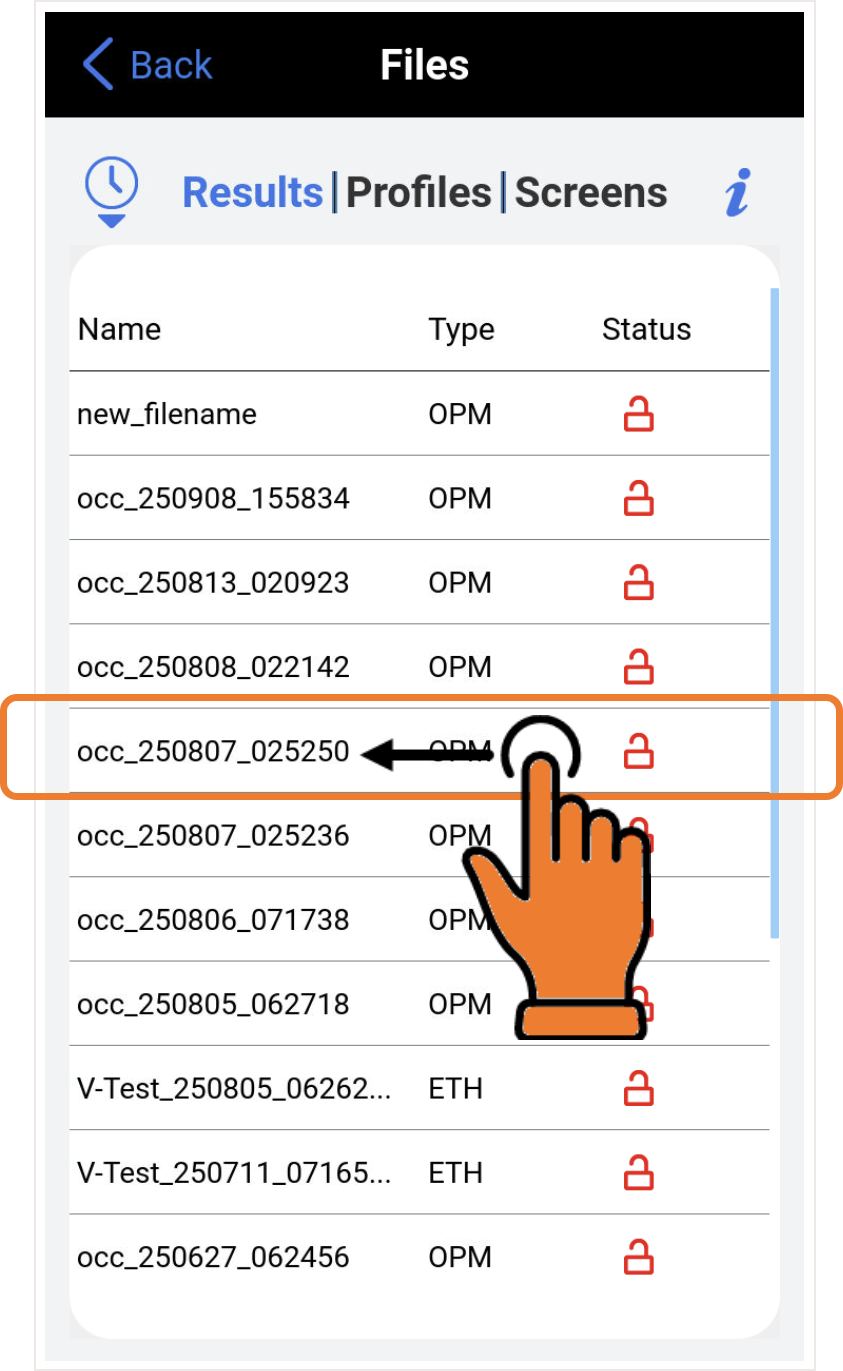
Open
 File Manager.
 -
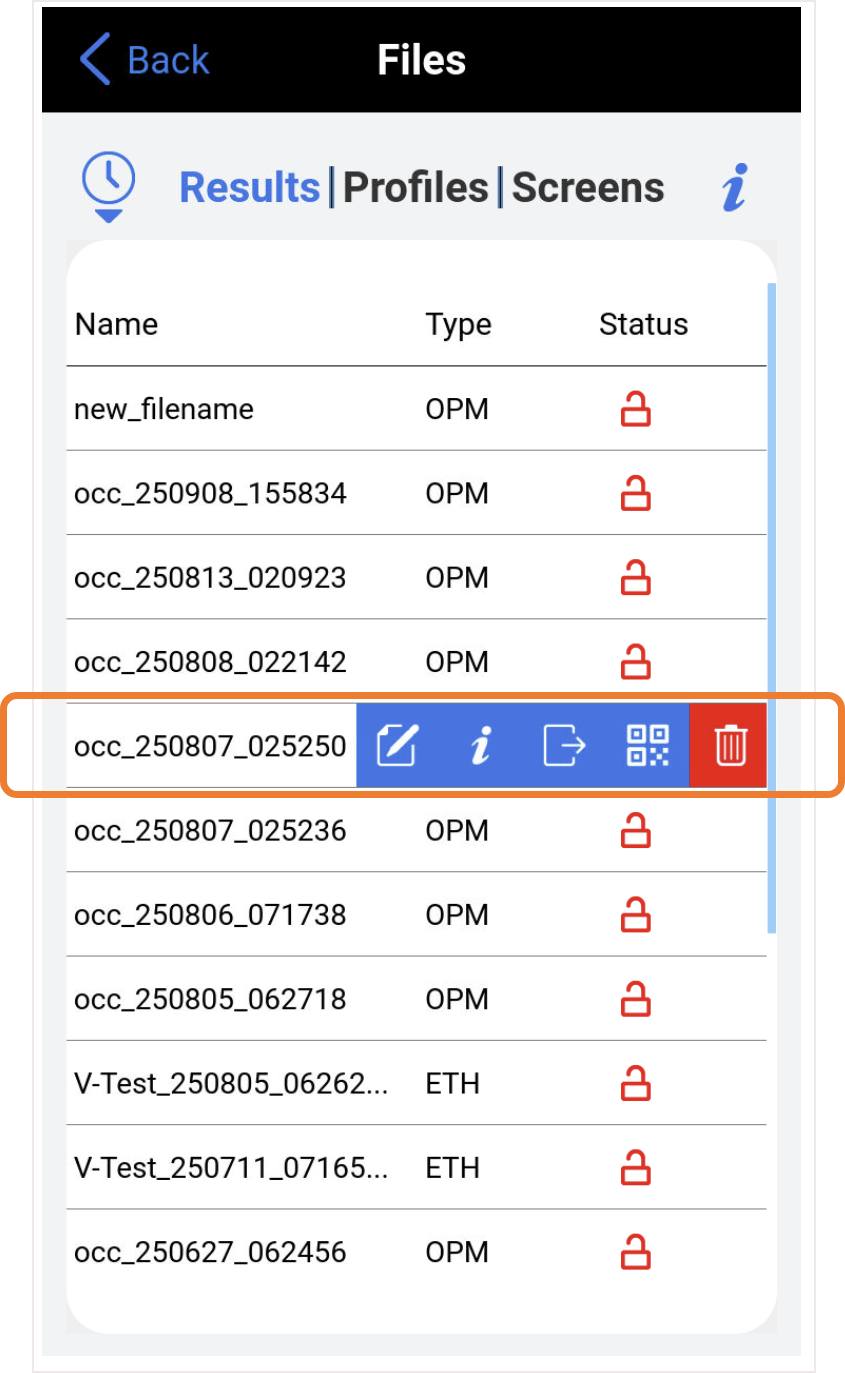
Swipe left on the desired result.
-
Tap the
 Transfer Files icon.
 -
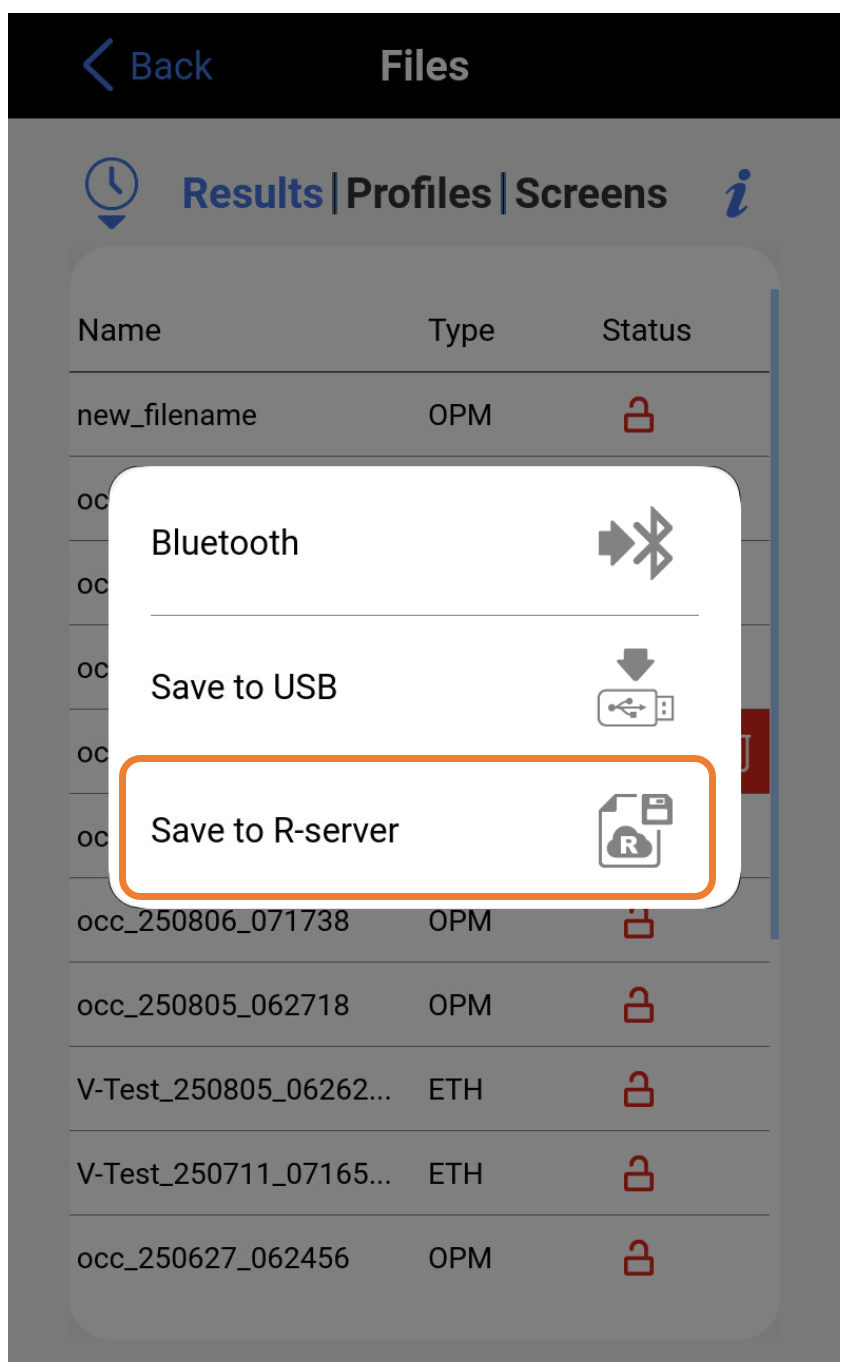
Select Save to R-Server
 . A confirmation message appears when the upload is complete.
Downloading Profiles from R-Server
-
Open
- Swipe left to the Download screen. If new files are available, NEW appears next to the file name.
- Select Download to retrieve the required files. When the download completes, a confirmation message appears.
-
Downloading and Installing Software from R-Server
-
Verify that the test set's battery has >50% charge, it is connected to its charger, and charging. The unit must remain connected to the AC/DC charger during the entire update process.
-
Establish a LAN or WLAN (Wi-Fi) connection , then select
-
In
-
Select the update file, then at the bottom select
 Upgrade. Depending on the file size and connection speed, this may take a few minutes. The new version of the software will download to the test set from R-Server and begin the update process. Let the test set go through the process, uninterrupted. This will take a few minutes. After the update process finishes, the test set reboots automatically.
 -
The test set may reboot multiple times during the process.
 DO NOT turn the test set OFF until the software update process has finished.
-
After the software upgrade is completed, confirm the software version on the About screen.
 Due to potential Internet bandwidth limitations, the software versions distributed through R-Server may be in the form of smaller incremental update packages, with previous version prerequisites.
For alternate methods of updating test set software, refer to Software Update Process.