GIS Management
The GIS Management features is available to users assigned as Administrators only.
To map GIS coordinates for fiber breaks, first import a .KML or .KMZ geographical location information files for the line routes being monitored. The system will assemble the route and adjust any locations and slack loop position inaccuracies. Any disconnected route segments and/or locations and slack loops will be highlighted, so the .KMZ file can be adjusted with a third party tool, then re-imported. Contact VeEX Customer Care to learn more to learn more about all supported KMZ/KML properties supported by the RFTS-400 Serverless System.
After uploading the GIS files, assign them to a port in the Port Dashboard screen. When an alarm is triggered on a port with a correctly configured GIS file assigned, the alarm may be viewed on the map.
![]() RFTS-400 reads the KML/KMZ file as is. Any markers for slack loops, manholes, and other locations, must be indicated in the file before it is imported.
RFTS-400 reads the KML/KMZ file as is. Any markers for slack loops, manholes, and other locations, must be indicated in the file before it is imported.


GIS management: Upload .KML/.KMZ file
Import GIS file
Access GIS files from the RFTS setup screen by selecting the RFTS-400 Platform ![]() gear icon, then selecting GIS mgmt. at the top.
gear icon, then selecting GIS mgmt. at the top.
![]() GIS mode is reserved for a future release.
GIS mode is reserved for a future release.
Select Import KML/KMZ Browse to upload to upload a GIS file. The Import screen will include details from the file, including but not limited to routes, point locations (e.g. route markers, splices, manholes, handholes, cameras, towns), and slacks.
![]() The details imported are dependent on what is contained in the GIS file before import.
The details imported are dependent on what is contained in the GIS file before import.
To review GIS inventory parts and locations:
-
Select the opposite arrows icon
 to reverse the route direction.
 -
Select the eye icon
 for the item to appear on the map.
 -
Select the closed eye icon
 for the item to be hidden and not appear on the map.
 -
Select the location pin
 to see the item on the map.
 -
Select the trashcan icon
 to remove an item from the file before importing.
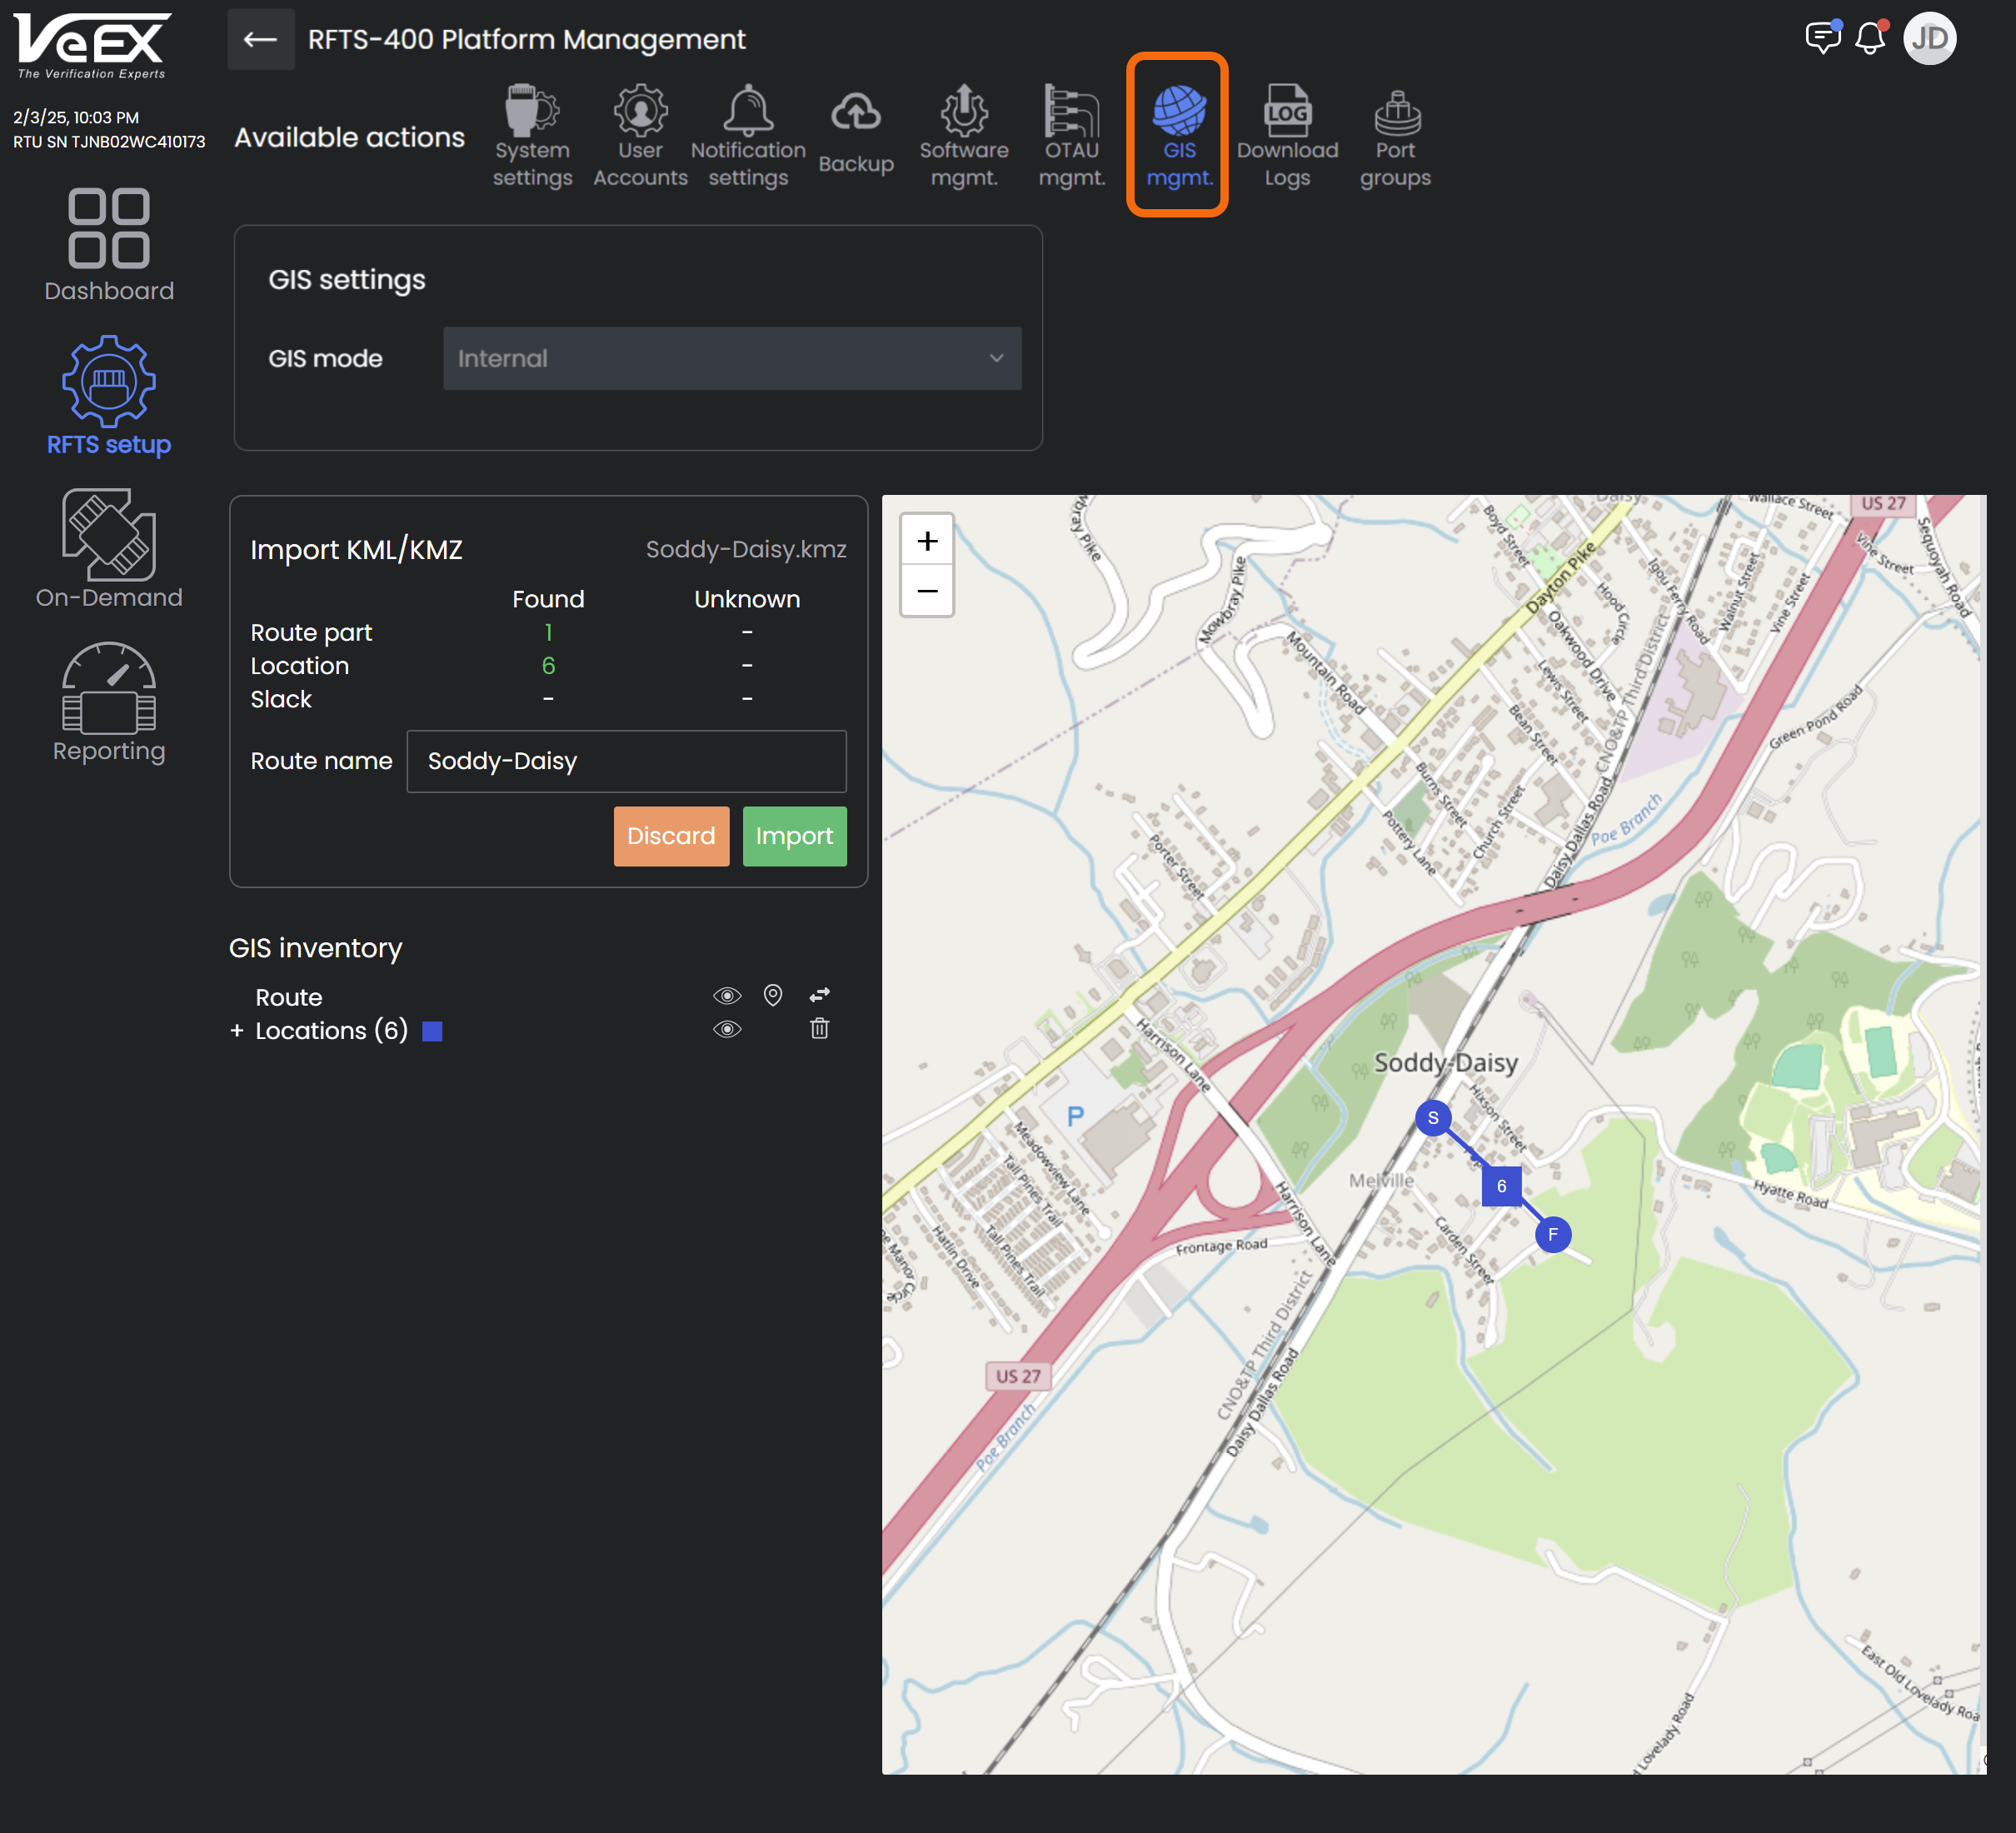
GIS Management: Preview GIS file before importing
After reviewing and verifying items in the GIS file, select Import to import the GIS file with items shown or select Discard to discontinue the import process.
Assign GIS file to Port
On the Port Dashboard for the port, select the GIS file from the dropdown. The system reads the imported GIS file and shows the map of the fiber route and an inventory of items. The file can be unassigned by selecting none from the dropdown.
-
Select
to view the event on the map. -
Select
to drop a pin of the location on the map.
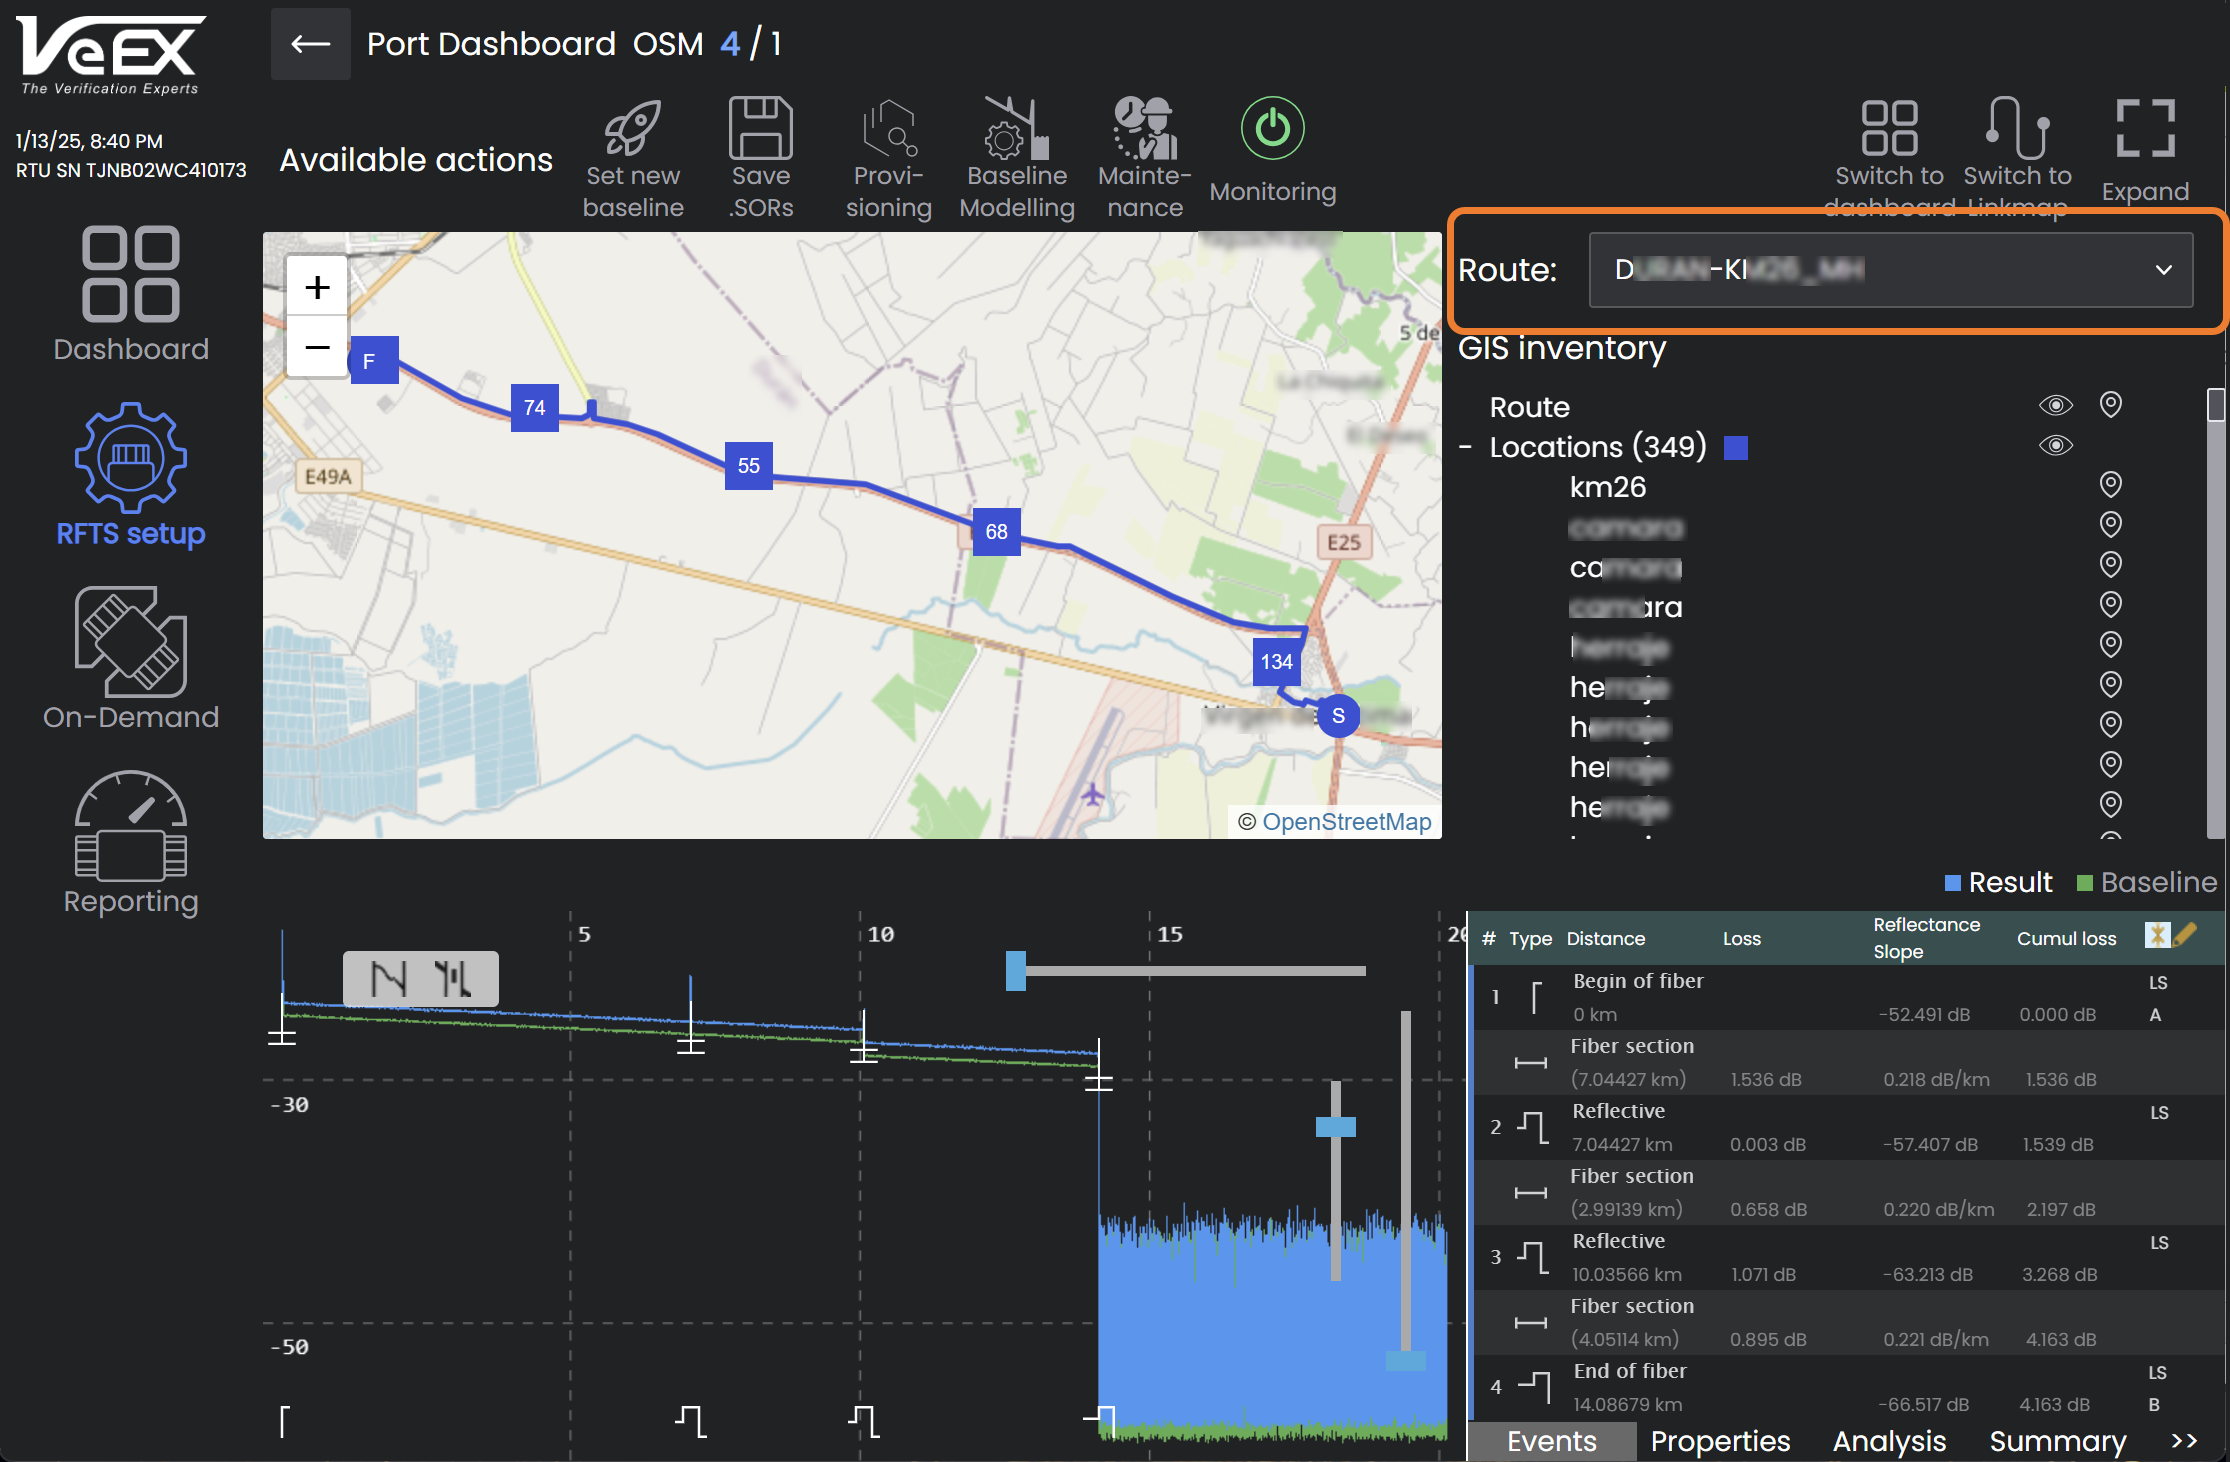
Assign route to port on the Port Dashboard