Internet Access Speed Test

This commonly used Internet speed test evaluates the TCP protocol performance of the access network by testing against ubiquitous Ookla’s Speedtest® servers. This Layer 4+ test stresses the link and service up to the test interface’s maximum line rate, providing key performance indicators (KPI) such as connection time to the server, data transfer time, and line rate throughput rates, all reported during the test.
Perform Internet Access Speed Test
-
Connect to Wi-Fi or 10/100/1000BASE-T test interface. Refer to Wi-Fi Test Application and Ethernet Settings/Connection.
-
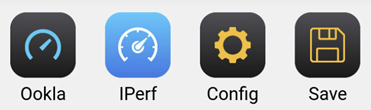
Swipe-up from the bottom to reveal the Test Application menu.
-
Tap the
 Config button (or the Speedtest Powered™ icon) to setup the
 -
Press GO to initiate testing. The download test starts next, followed by the upload test. If Ping mode is enabled, the test set first performs a Ping test. Ping Response results will appear in the detailed results.
-
After running a test, tap the
 Save Results button to store the current test results. Users can overwrite the default File Name with a custom name, as well as add extra information such as Job ID, Node ID (Location or Site), subscriber's Account. Tap OK to save. Refer to File Manager - Results, Profiles & Screenshots.
In Speedtest Powered™ mode, the test follows Ookla’s methodology and tests to the Speedtest Server Network™. In this mode, the test is compatible with Ookla’s protocol/methodology; it scans nearby servers in the local market and tests against the server with the fastest (lowest latency) response.
-
Works with wired Ethernet and Wi-Fi links.
-
Compatible with public Ookla® Netgauge servers.
The Speedtest Powered™ icon will remain visible on the main test page, to remind users of the current/active Test Mode.
The main speed test screen page shows the Link Status and assigned IP Address on the top of the screen. A  or
or  Link Status icon indicates that the active test interface is Wi-Fi. The Speed Test GO (start) button may be shown in gray (not ready) or green (ready).
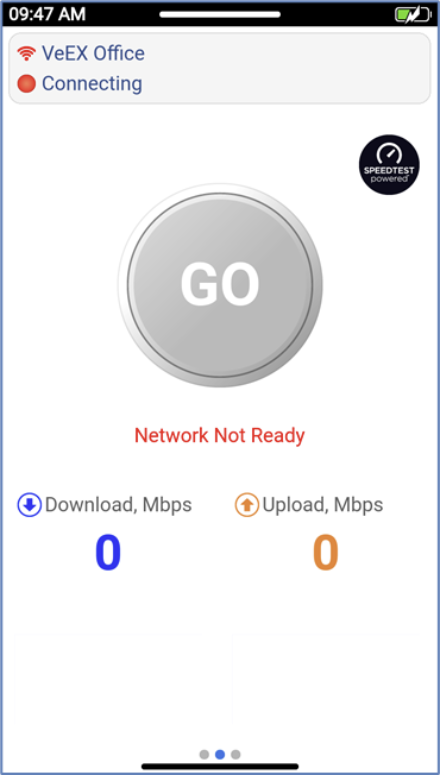
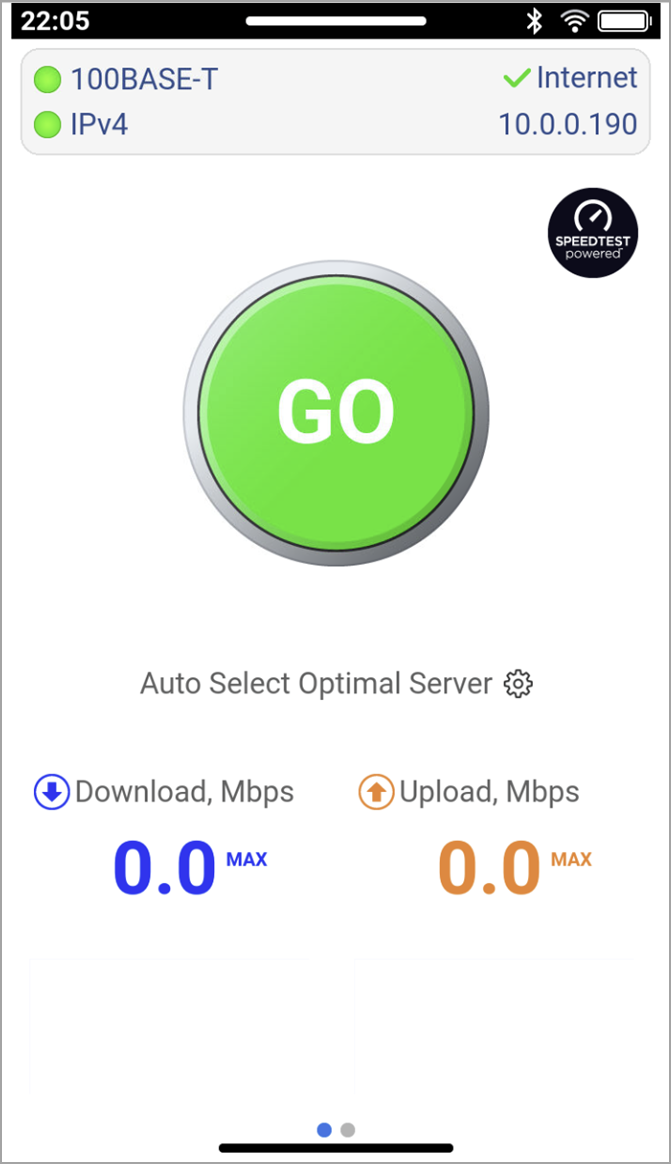
Tap the Connection Status summary box, on the top, to see more detailed information about the current Access Point being used.

Connection status summary box
 If going back and forth between Ethernet and Wi-Fi testing, these two test interfaces will have different IP addresses..
Speed Test Configuration
On the Configuration page, make sure the Test mode is set to Ookla® Speedtest® mode. The Server Selection is set to Auto by default, using Ookla's closest server selection algorithm, or can be set to Manual to select a specific target Host (server) to test against.
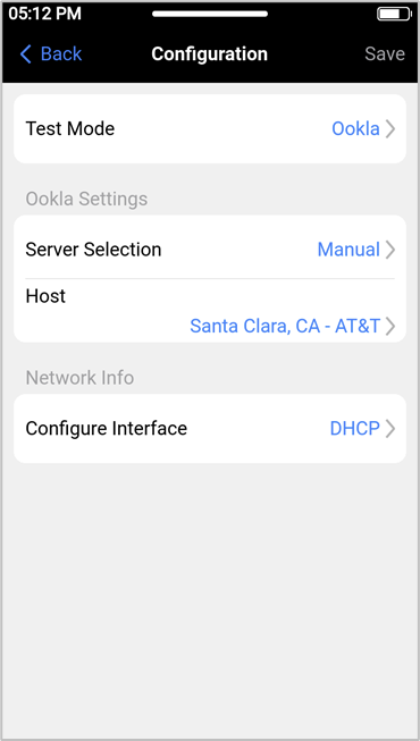
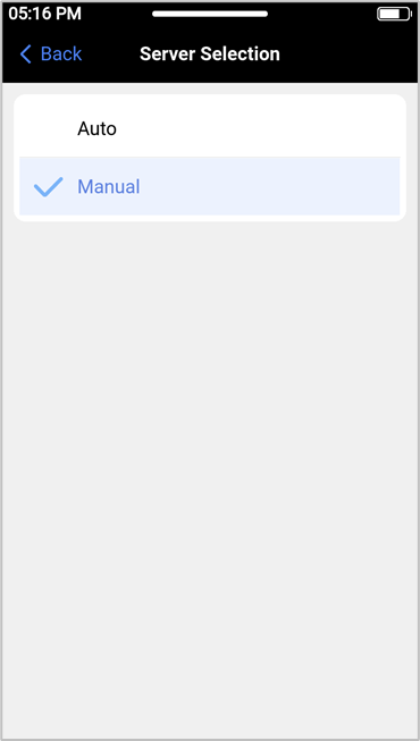
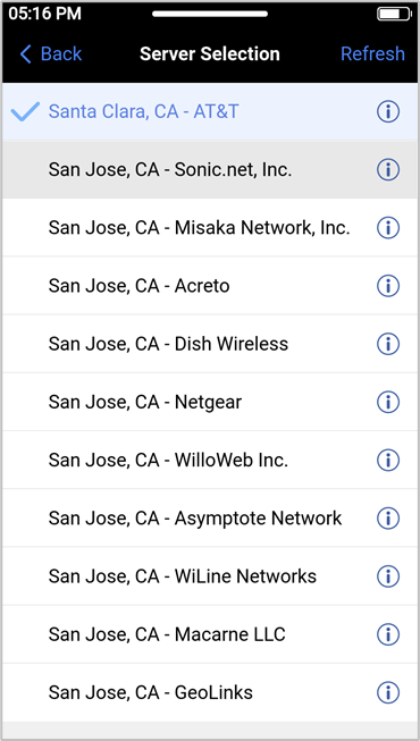
Use the Configure IP Mode field to set the test interface's IP Address behavior, DHCP (dynamic) or Static.
Tap < Back (or swipe right) to go back to the main Speed Test page. Make sure to establish the appropriate connections, the Ethernet (LAN) or Wi-Fi (WLAN) link is active and the GO button is green. Press GO to start the test.
Speed Test Results
After pressing the GO button, the test set starts by measuring the attainable throughput speeds for the Download (downstream) and then the Upload (upstream). Each of the tests (upload and download) may take up to 15 seconds. The test duration is determined automatically and may vary depending on the server location, bandwidth, latency, etc.
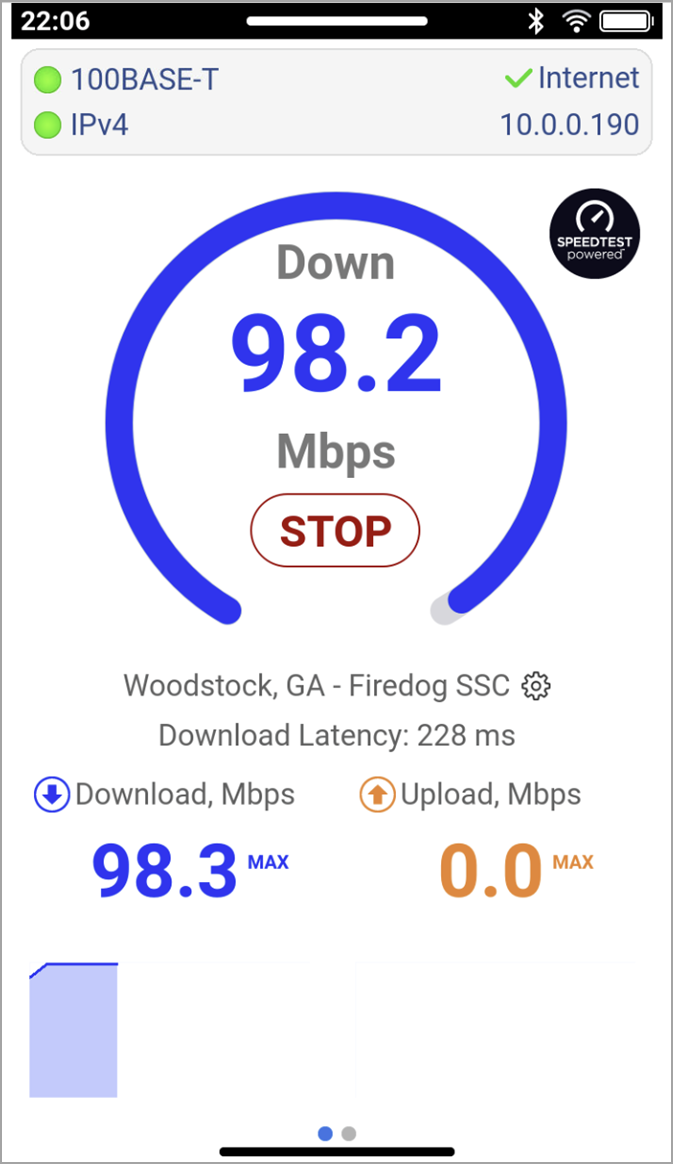
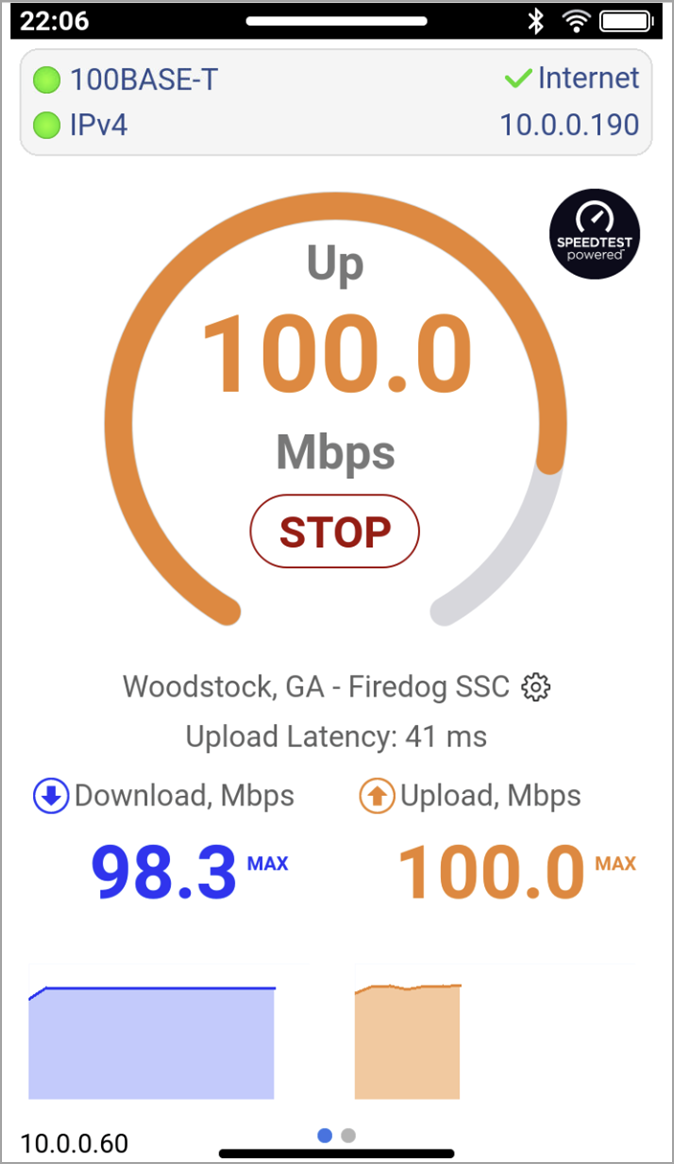
When the test has finished, it displays DONE.
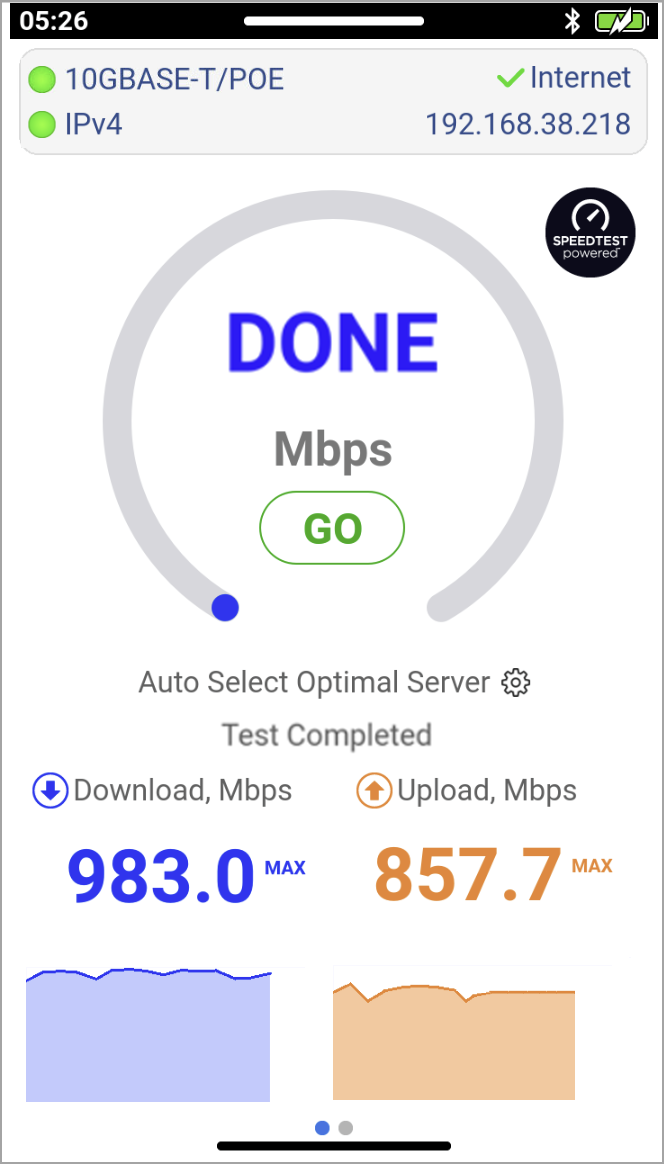
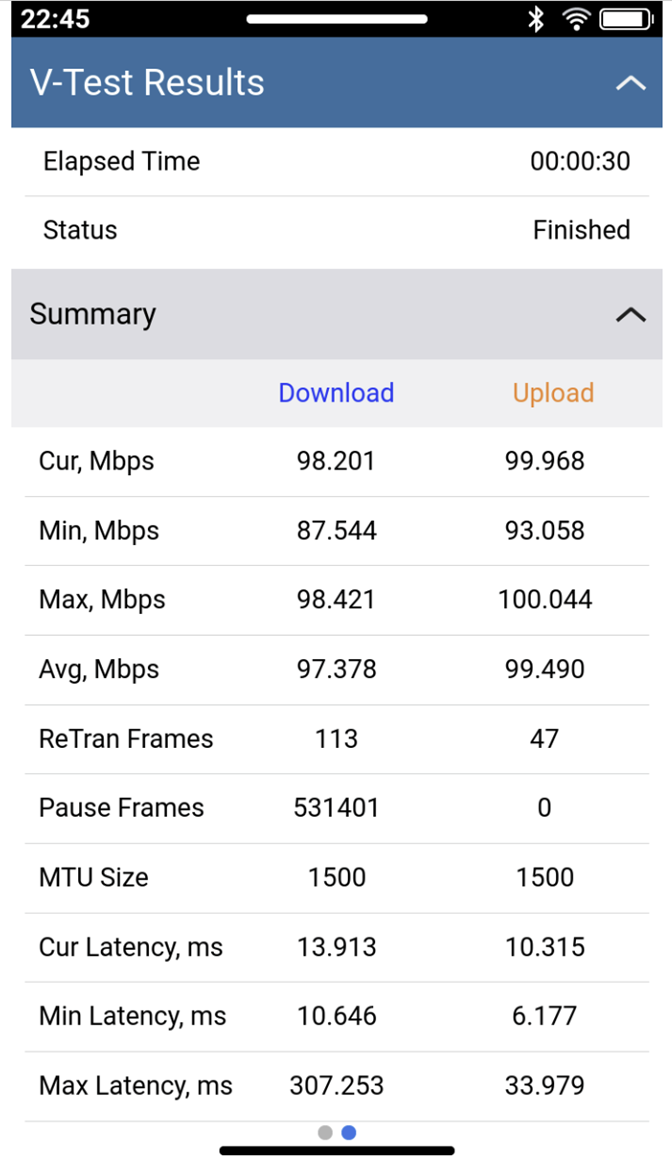
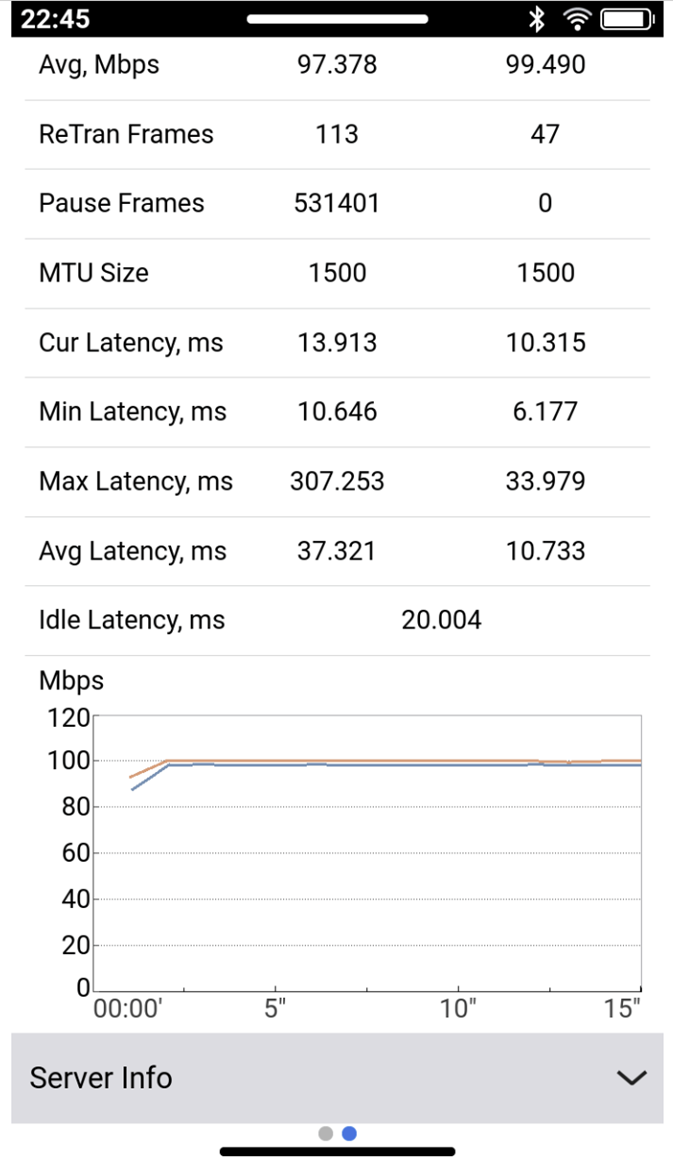
Swipe left to see the detailed Test Report. Scroll up and down to go through all the details. The different sections of the report can be collapsed or expanded, to better focus on the key performance indicators (KPI) and information preferred by the user.
Swipe up and tap the Save button to store the current test results or swipe right to run a new test.
More Information
Refer to the following video for a Quick Guide on how to use the PX90/PX92/MTX90/WX90 to test Internet access speeds with Ookla® Speedtest® servers.