MPO Fiber Testing
Increasing bandwidth requirements for enterprise data centers have resulted in Multi-Fiber Push-On (MPO) cabling because they are pre-terminated and compact. These cables can handle up to 100 Gbps.
Testing the performance of MPO fiber can be time consuming and error prone. The OX-MPO-12 optical switch is designed to make MPO testing easier, faster, and more accurate.
OX-MPO-12 Optical Switch Overview
The OX-MPO-12 optical switch is an ultra-compact, 12 fiber optical switch designed to operate with VeEX OTDRs via USB interface. It is optimized for high-density fiber test applications where MPO/MTP or ribbon cables need to be tested using an OTDR equipped with a single fiber output. It is powered by the test unit's serial interface.
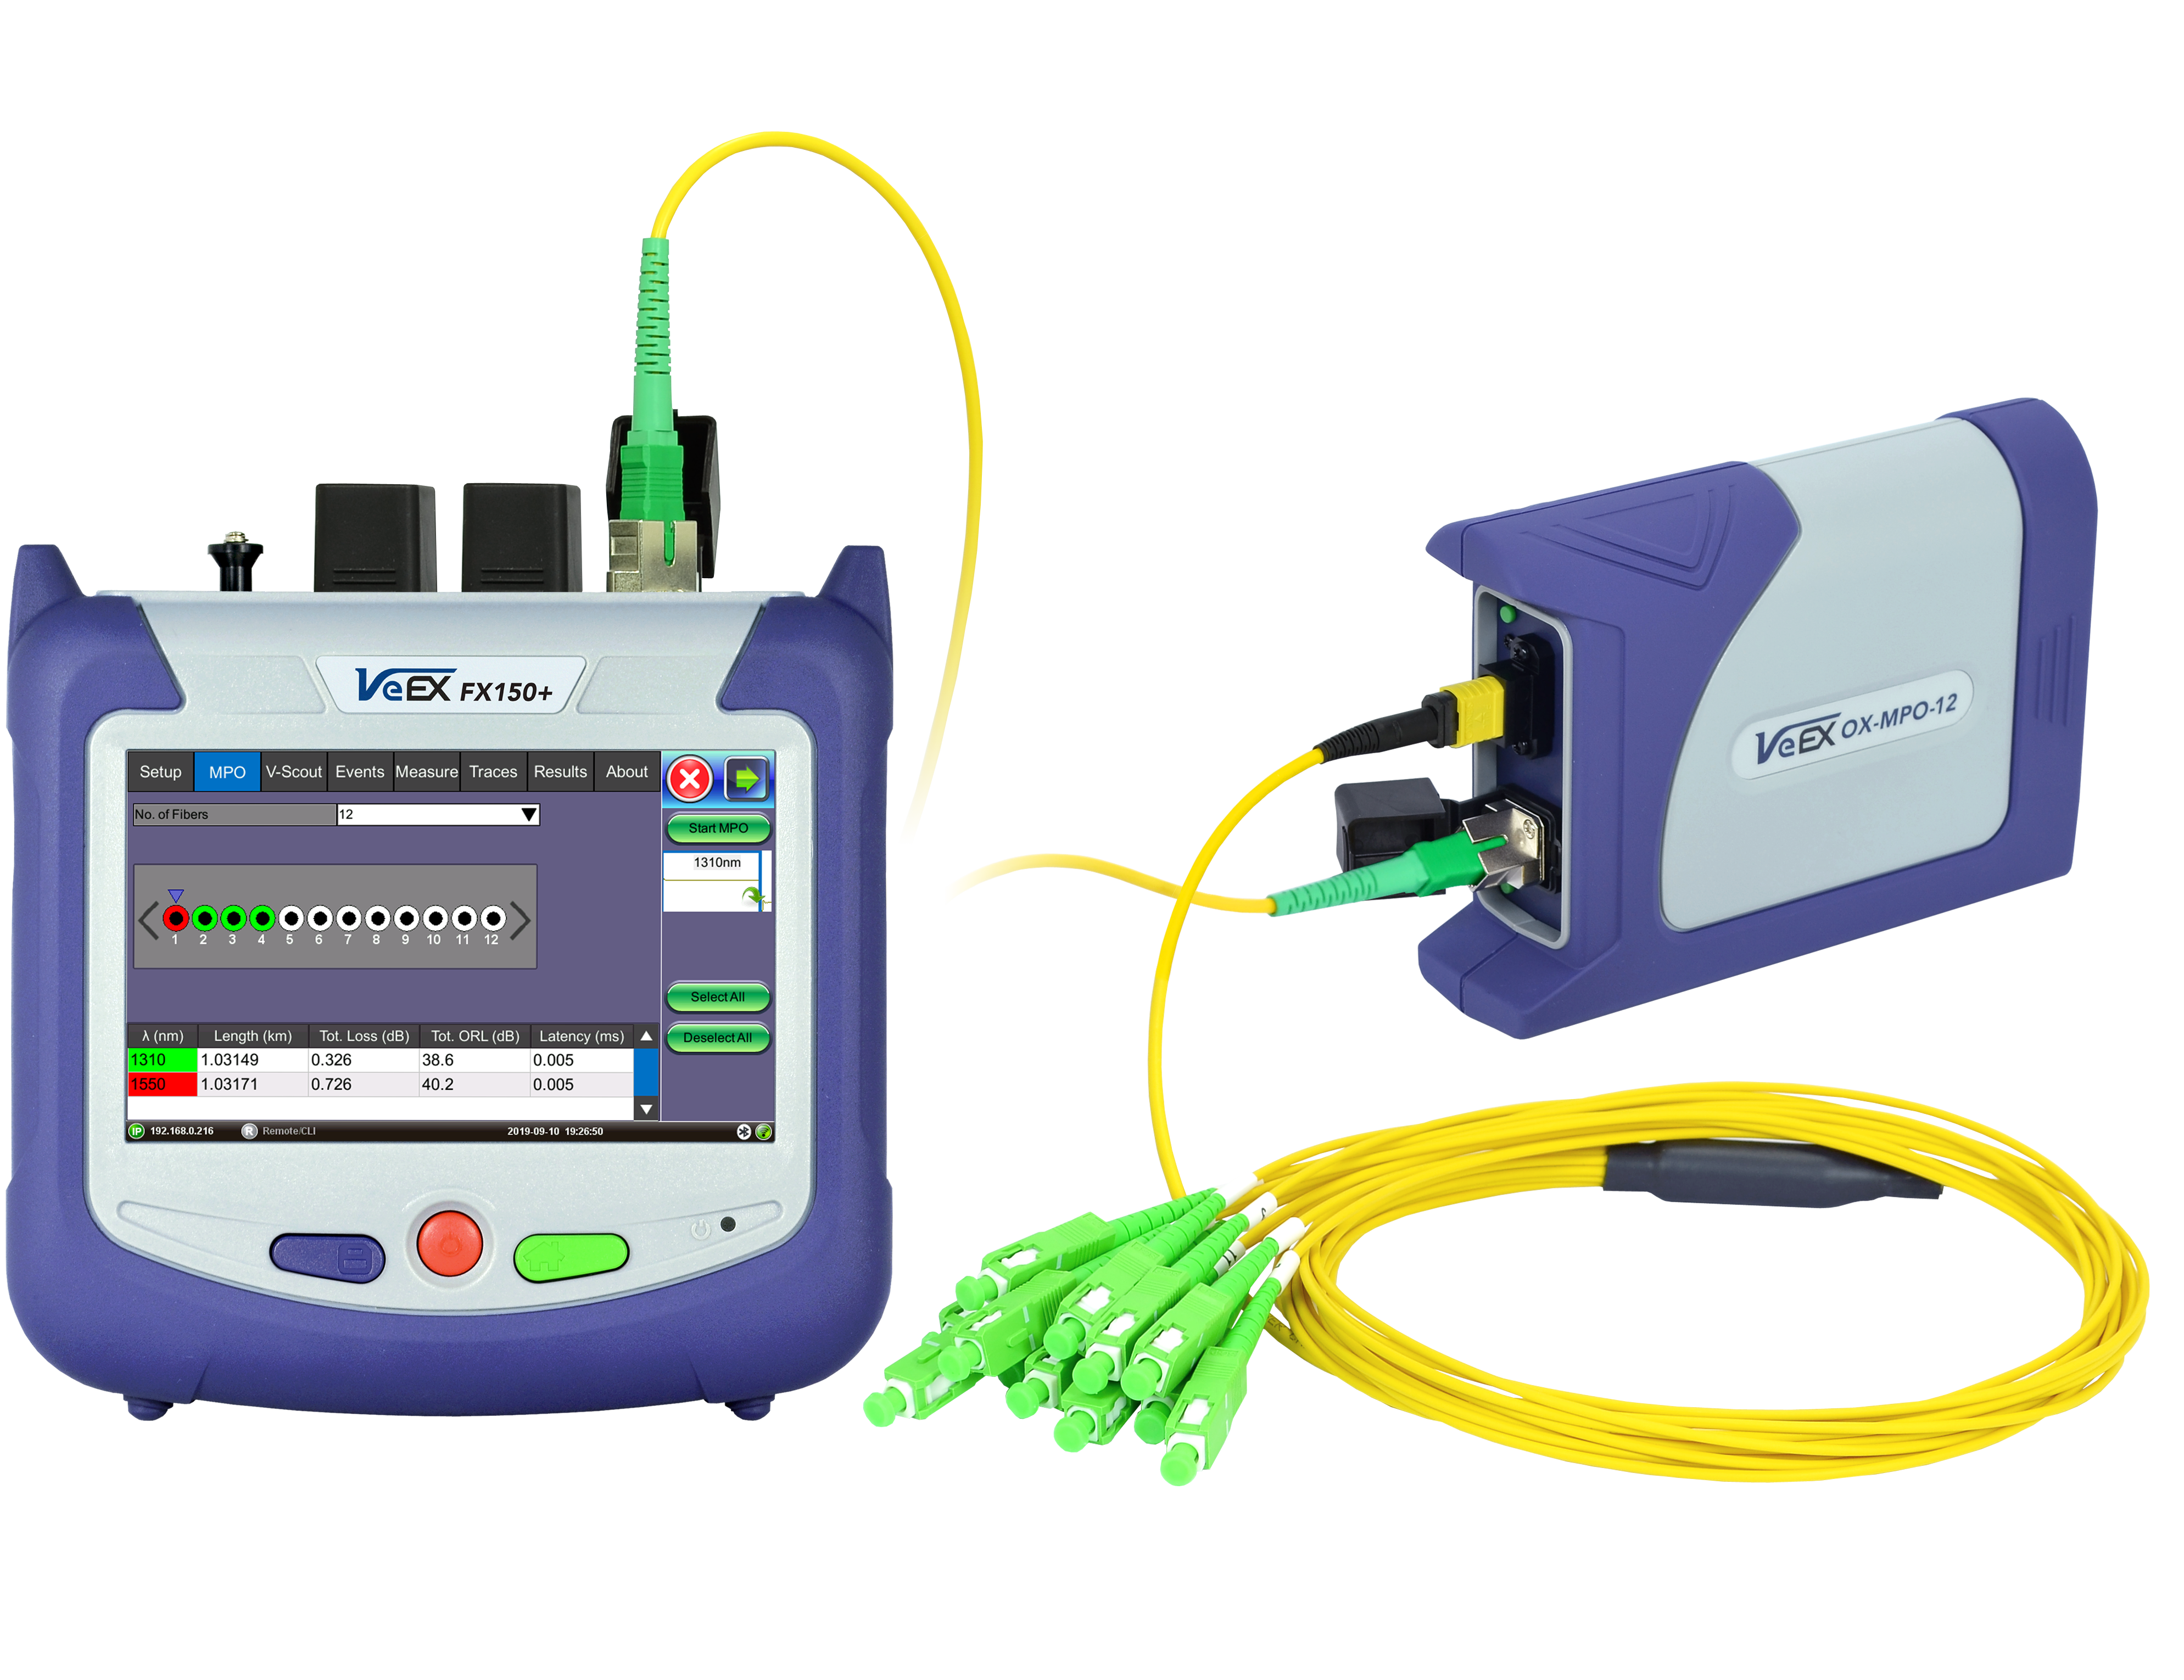
OX-MO-12 connected to FX150 test unit
OX-MPO-12 Connections/Ports
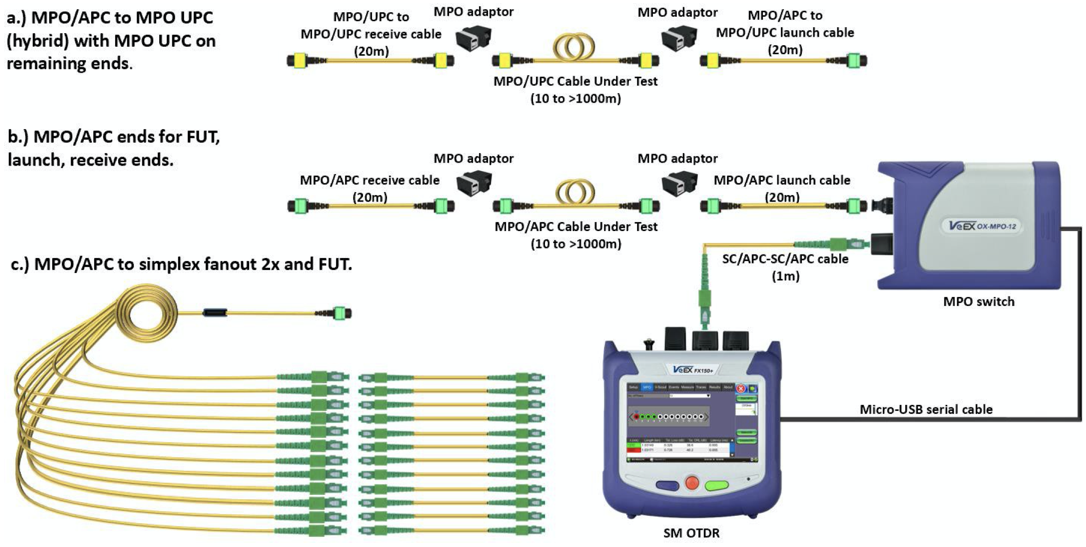
OX-MPO-12: Example of Connections
![]() The MPO switch is detected automatically when powered on. However, the switch can be connected at any time; close and re-open the OTDR application and begin MPO testing.
The MPO switch is detected automatically when powered on. However, the switch can be connected at any time; close and re-open the OTDR application and begin MPO testing.
To connect OTDR to Optical Switch:
- Use the Micro-USB (B) to Micro-USB (B) cable to connect the switch interface to the OTDR port.
- Close and reopen the OTDR application to detect the switch.
- Attach one end of the 1 m SC-APC to SC-APC simplex patch cord from the OTDR port to the SC-APC port of the switch.
- Attach Launch and Receive patchcord cables to the output port of the OX-MPO-12 switch.
 Test Kit Cases to use with the MPO switch are available for purchase from VeEX Inc..
- MPO/APC to MPO/UPC hybrid cable to test MPO/UPC FUT (Fiber under test) and receive cable.
- MPO/APC on both ends (MPO/APC FUT).
- MPO/APC to simplex cable fanout 2x (SC-APC, SC-UPC, FC-APC, FC-UPC, LC-APC, LC-UPC…) to test simplex FUT cable.
Contact VeEX Customer Care for more information.
Using the MPO Switch
Select the Expert OTDR option to test one or all fibers in the ribbon cable in sequential order (minimum 1 up to 12/16 fibers depending on the strand count in the ribbon).
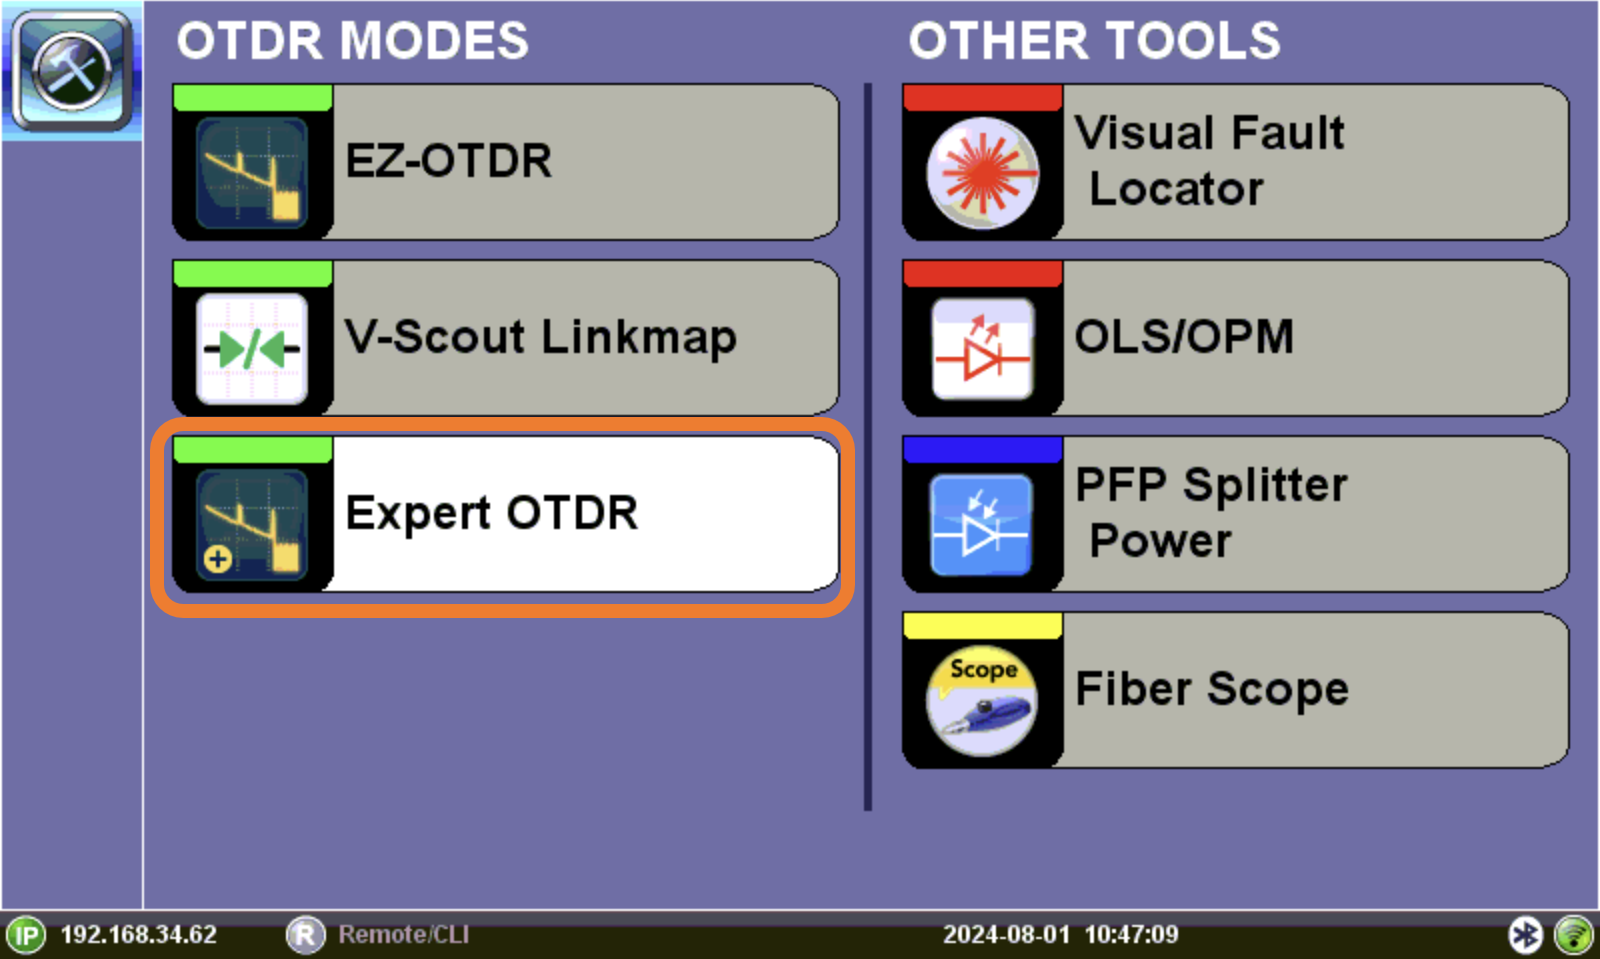
Expert OTDR option
The Results tab allows you to save results and compile reports.
Testing all MPO Fibers
![]() The MPO tab appears ONLY if the MPO switch is connected to the OTDR's microUSB port and recognized as being connected.
The MPO tab appears ONLY if the MPO switch is connected to the OTDR's microUSB port and recognized as being connected.
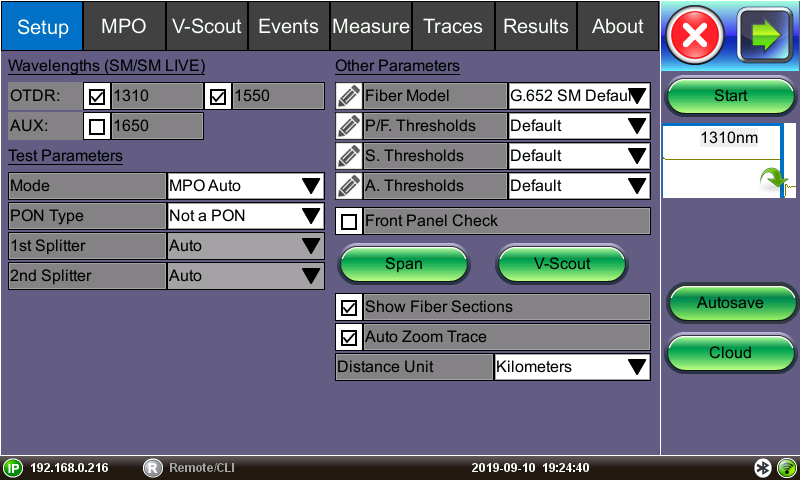
In the Setup menu, select MPO Auto from the Mode drop-down list. Then, tap Start and the Measure tab screen appears. The measurement will begin according to the test parameters entered in the Setup menu. Refer to Setup Screen and Measurements.
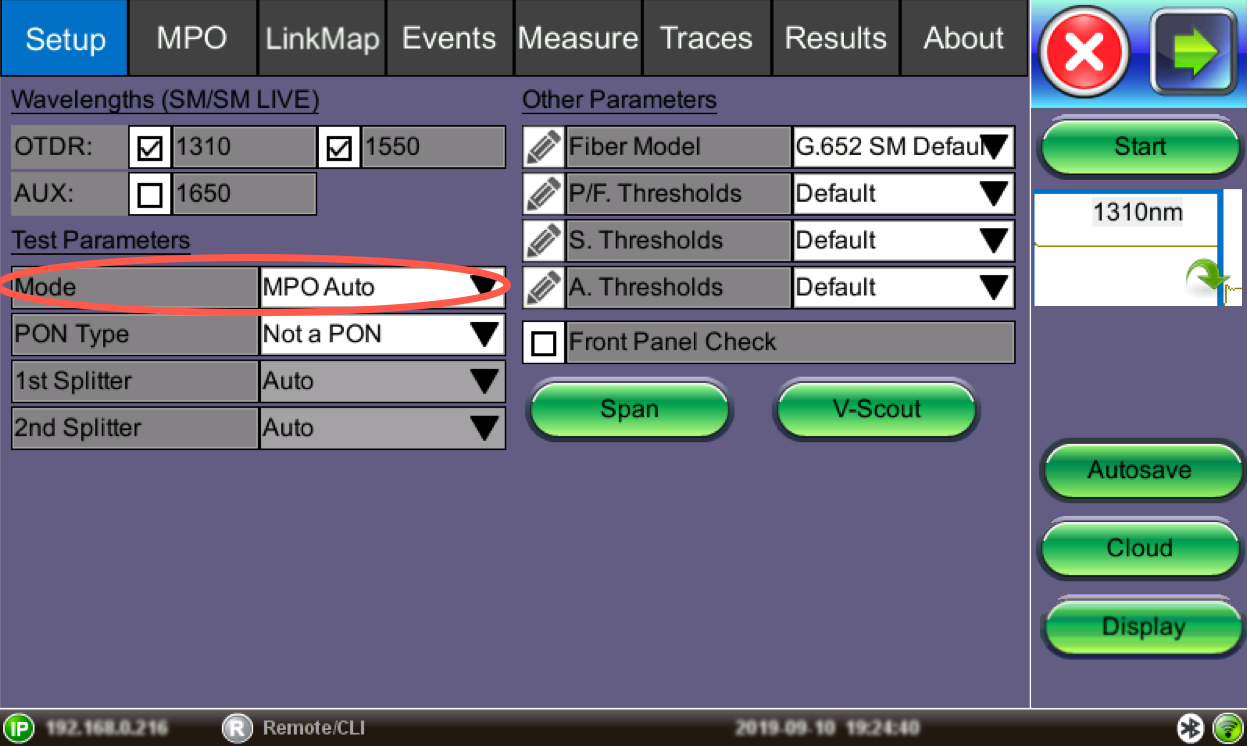
MPO Auto Setup
After the ports are selected and a new MPO test is initiated, each strand will be tested sequentially and displayed one at a time in the Measure tab. Refer to Measure Tab.
At the conclusion of the MPO test or at any time during testing, go to the Traces tab and select each strand to overlay all tests simultaneously. However, each test will clear the display and only show the current test. Refer to Traces Tab.
Testing Individual MPO Fibers
To test individual MPO fibers:
- On the Fiber Main Menu, select Expert OTDR.
- Select the wavelengths to test (1310 and/or 1550 nm).
MPO Setup
It is recommended that you indicate the MPO fiber under test in the Autosave options (e.g., the Cable ID). 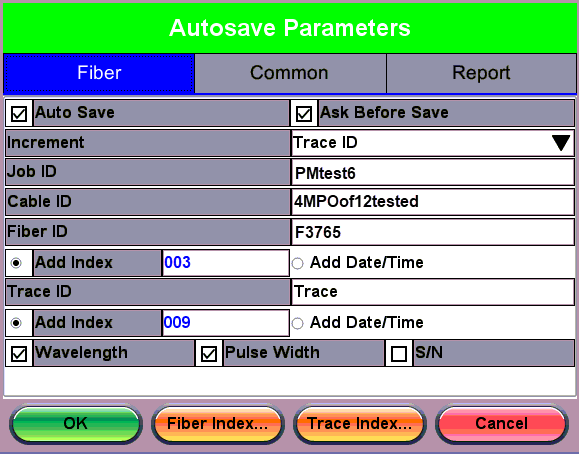
MPO Autosave Parameters
- In the MPO tab, tap the No. of Fibers drop-down arrow and select the MPO connector fiber count, 8 or 12. Each fiber strand is represented by a circle. A black inner circle indicates an active fiber strand and a gray inner circle means inactive.
- Move the blue arrow above the circles left or right and tap to enable testing for this MPO group.
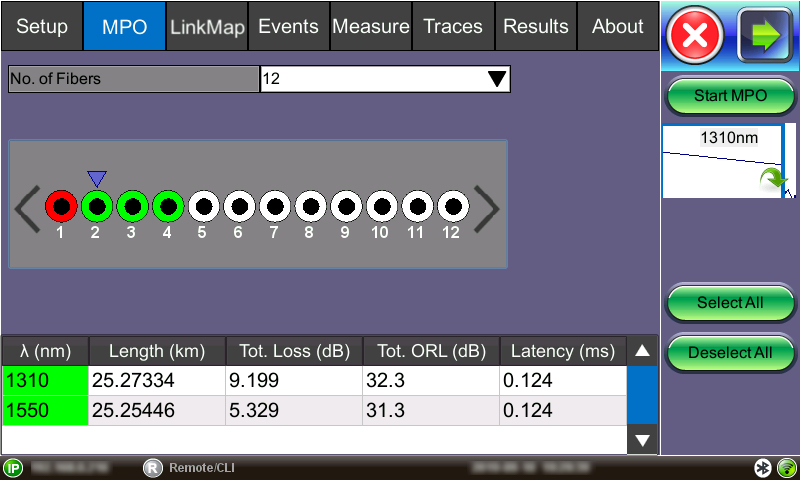
MPO tab
- Tap Start MPO to begin the test. An error message will appear if NO fiber was selected. When the strand test finishes, the outer circle changes to green (PASS) or red (FAIL), depending on the Pass/Fail thresholds previously set, and moves to the next strand until all selected strands are tested.
- To view all MPO strands, select the Traces tab and then select all fibers under the MPO group to overlay results for the ribbon. For more information about the Traces tab, see.