Measurements
When a new measurement is started, only those traces will be displayed on the screen in the Measure tab (refer to Measure Tab). Any previous traces can be accessed via the Traces tab until the unit is switched off. Refer to Traces Tab.
Upon completion, the view will initially default to the selected test mode viewing screen (V-Scout, Event (Auto), or Measure (Manual).
Use the ![]() Exit icon to return to the Fiber Main Menu.
Exit icon to return to the Fiber Main Menu.
Run a Trace
-
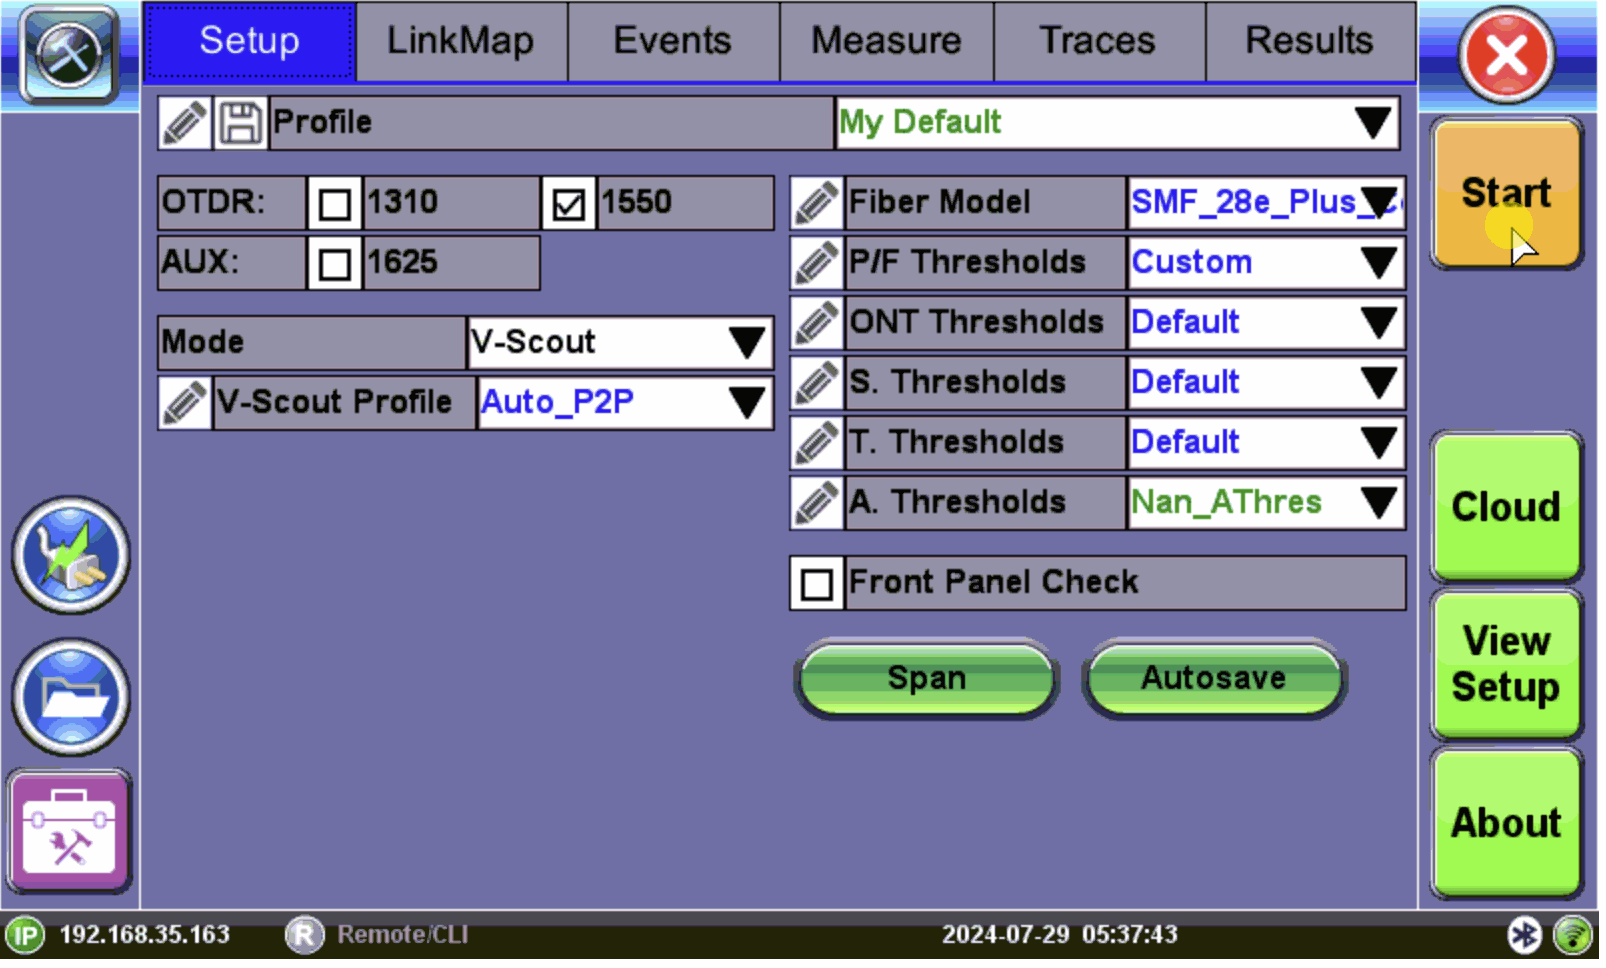
Select the Autosave parameters in the Setup tab. Refer to Autosave Parameters for details.
-
Tap the Start button
 and the Measure tab screen appears. The measurement will begin according to the test parameters entered in the Setup menu. (See Setup Screen.) Elapsed time is indicated below the Stop button
  . For V-Scout measurements, the acquisition wavelength is also displayed. Refer to V-Scout.
 If multiple wavelengths are selected in the Setup menu, the measurement will be performed using all selected wavelengths one after another without stopping and will be overlaid on the screen for comparison and review. V-Scout multi-pulse traces are also overlaid and displayed automatically.
 -
When the test is complete, the Stop button will revert back to a Start button. If needed, tap Stop to terminate the measurement manually.
-
If Autosave is enabled with Ask Before Save checked in the Autosave Parameters screen, a Result AutoSaving window appears asking if the results should be saved. If Ask Before Save was not checked, results will be saved automatically using the filename parameters previously set for AutoSave.
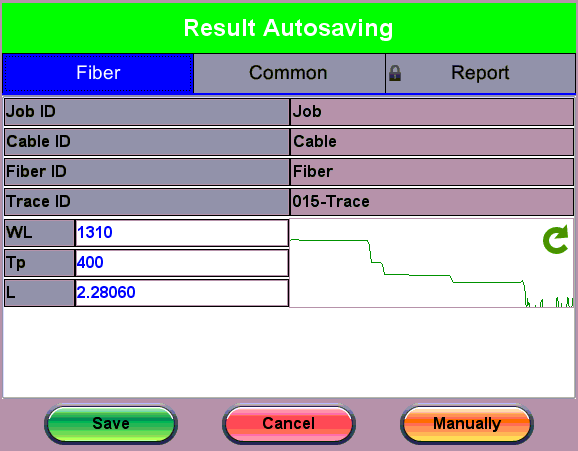
Autosave Results screen
-
Tap OK to autosave with the default settings. Tap Abort to exit the screen.
-
When the test plan is complete and OTDR traces performed, view the link map on the Link map tab.